Admin Configurations
Beginning the guide with the admin settings - Admins can set up a host of items with the ability to turn Fortify on or off, editing zone sizes, distances between forts, amount of forts clans can own and much much more - We can also include schedulers for those all important events eg - Raid weekends, Raid evenings or even end of wipe raids!
Please Note: If your gameserver undergoes a Map/Full wipe then all current Forts will be wiped from the gameserver at the same time. This is a mechanism designed to avoid old Forts being placed on a new map.
In addition any Fortify settings that are changed will only take full effect once the zone has gone through a cycle, eg: Been Enabled or Been Disabled. This can be forced immediately by toggling the setting mode to: OFF, allow 60 seconds for all Forts to switch off and then toggle back to your original setting.
Fortify Settings
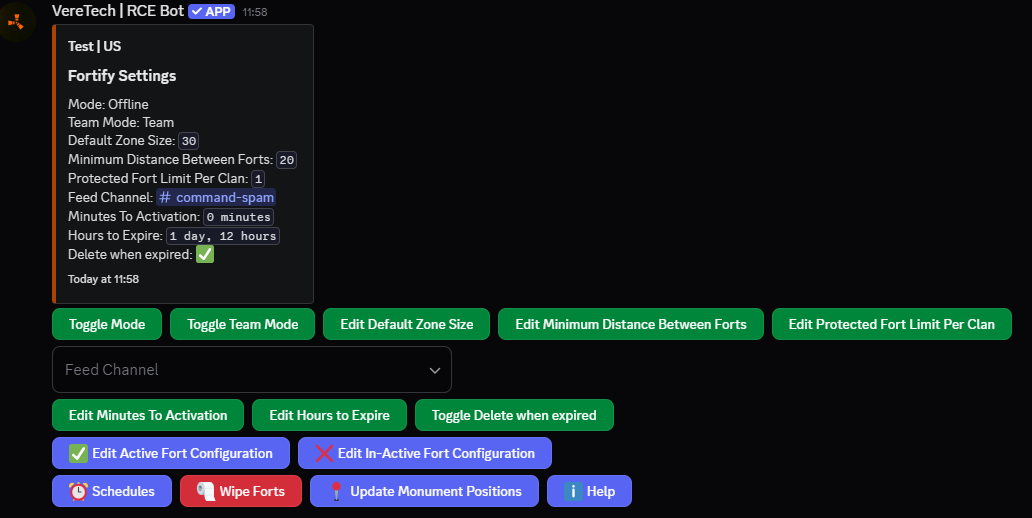
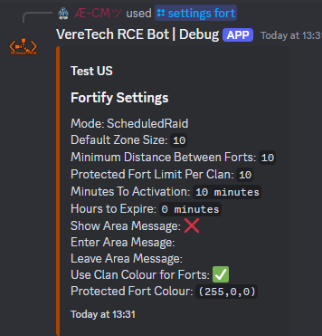
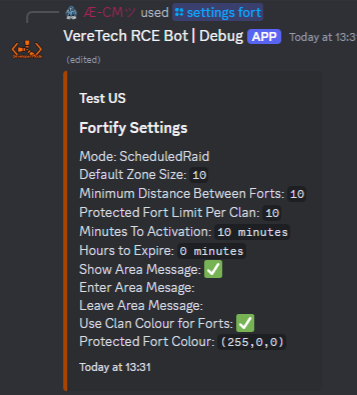
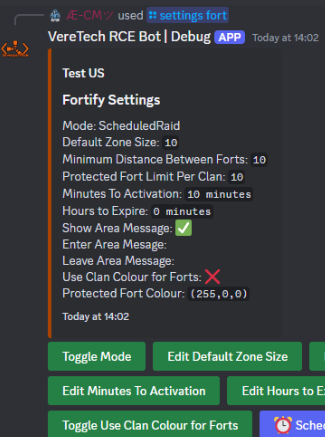
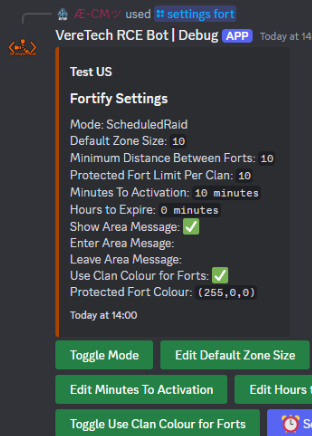
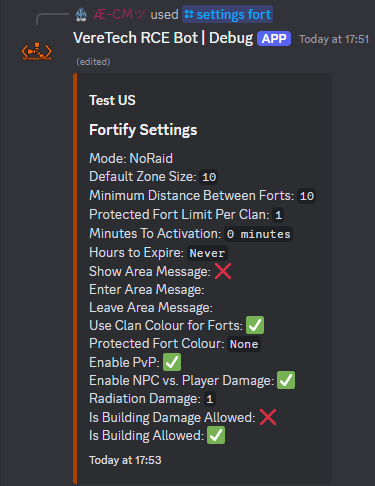
To enter the fortify settings menu we need to use the command /settings fort. Then by selecting your gameserver and hitting send, you will be greeted with the following menu;
This message is fully interactive and has a time-out of 60s, meaning that from your last interaction with this message, you will have 60s to then interact again or the message will then time out.
Toggle Mode
Toggle mode is a button interaction where we have 4 options to choose from, upon clicking the interactive button you will see the message update to your new mode, lets break down the modes individually
Off - Raid protection is completely disabled for the entire server, if your users attempt to set a Fort then they will receive an error message stating that Forts are disabled on this gameserver. If your already have users who have offline raid protection set up and you decide to switch off Fortify for a period of time then all current configured Forts will be stored until they are switched on again, meaning no data will be lost.
Offline - The offline mode is for Fortify to be switched on, allowing users to setup their own Forts within game to avoid that nasty offline raid. Players can then have full use of the Fort commands. This will mean that the full rules of Fortify will apply.
No Raid - No Raid is a permanent protection method - Allowing all Forts to be enabled 24/7 regardless of players online/offline status.
ScheduledRaid - Forts will then be bound to the rule of scheduling, meaning the standard Fortify protection will be enabled up to the point where you introduce a schedule which will override all Fort settings disabling/enabling them at your own will, this could be useful for events such as "Raid Weekends"
Toggle Team Mode
Toggle team mode is a button interaction that has two options to choose from, when clicking the button it will change from clans to team.
- Clans Mode (Default)
In Clans Mode, Fortify integrates directly with your server’s Discord-based clan system.
-
✅ Forts are linked to registered clans created through your Discord.
-
✅ All clan members share raid protection.
-
🔐 Only players who are actively in a registered clan will benefit from Fortify.
Use Case: Best for servers that want strong community engagement and centralized control via Discord.
- Teams Mode
In Teams Mode, Fortify protection is based on in-game Rust teams.
-
🎮 Players must be part of an in-game team.
-
👑 Only the team leader can create a fort using an emote while in game.
-
🛡️ All team members will share offline protection as long as they remain in the same in-game team.
Use Case: Ideal for servers that prefer lightweight, in-game-only functionality without requiring Discord clan setup.
Feed Channel
To set the fortify feed channel click on the button and a list of channels will show up. Select the channel you wish to display the feed in from here the bot will work the magic.
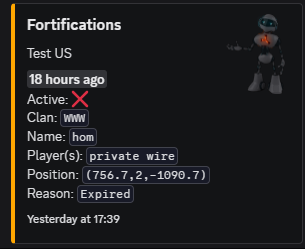
You will then receive feeds in the channel like this one below for anything from
- Forts being removed due to player online
- Fort expiry
- Fort becoming active because team are offline
- Fort being deleted due to member leaving team
Default Zone Size
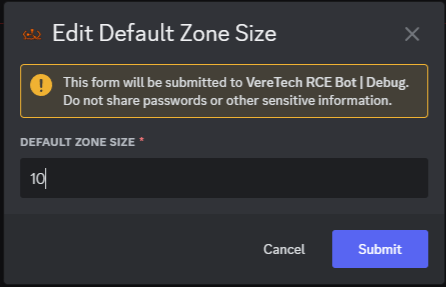
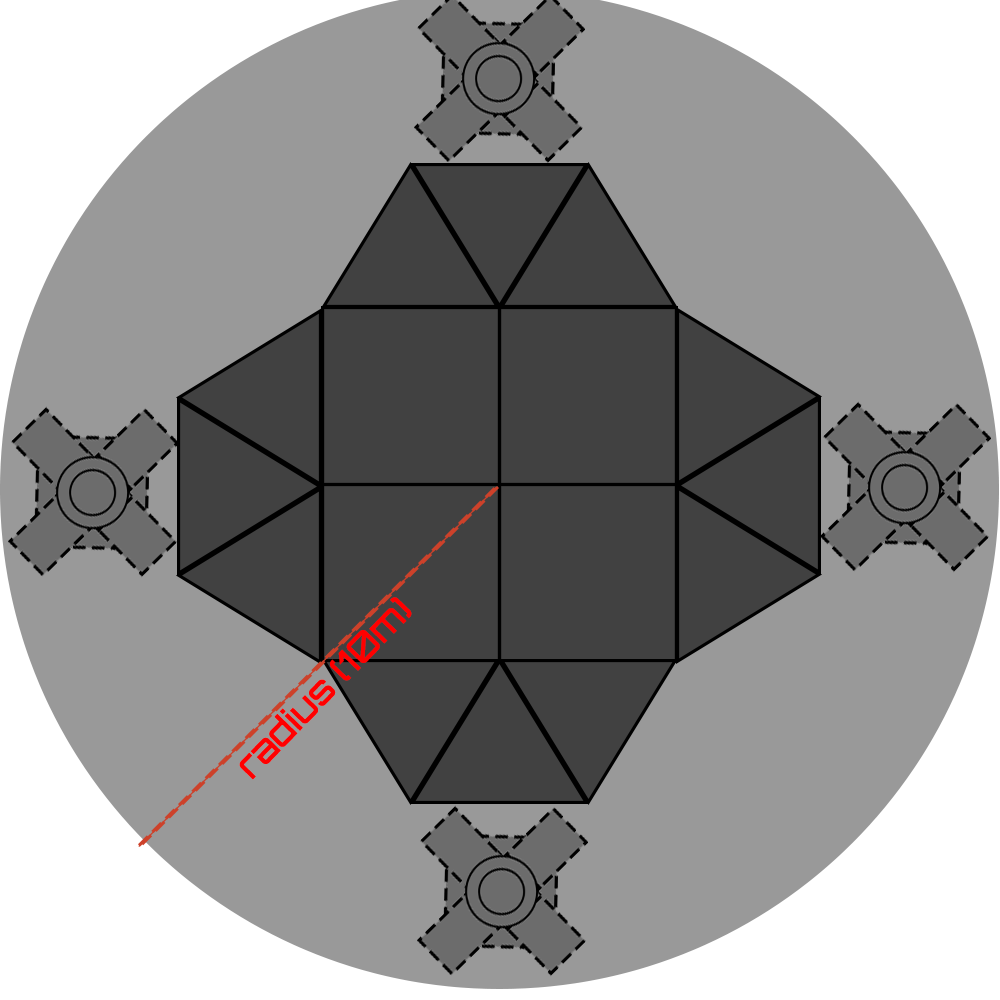
Default zone size is measured in meters and by default VereTech sets these at 10 (Radius), 10 meters in radius is approximately enough space for a single layer of honey comb on a 2x2 base inclusive of a large furnace on each end. By clicking this button you will be triggering a pop-up text box, for assistance in measurements, please also see below the diagram example
To change this, simply enter your wanted measurement (in whole numbers) and click "Submit" to confirm your choice.
Minimum Distance Between Forts
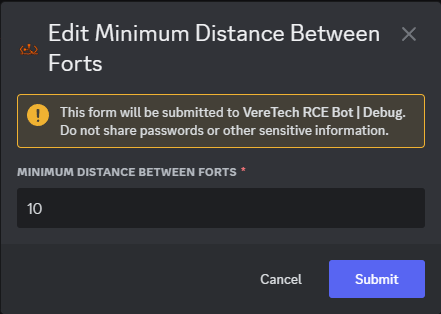
To change the minimum Distance between Forts you will need to select the "Edit Minimum Distance Between Forts" button and again you will trigger a text box to pop up on screen, again, by default, 10 meters is set,
Protected Fort Limit Per Clan
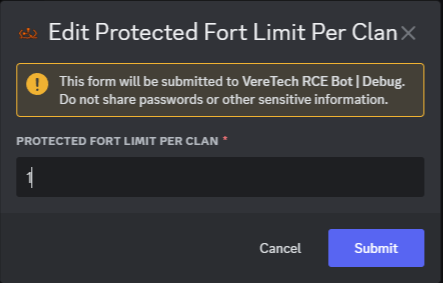
We also have the ability to allow Clans to have more than one Fort, this enables clans, should you wish to allow it, to have protection on as many bases as you choose, this could be for boat bases, farm bases and much more! Simply click "Edit Protected Limit Per Clan" this time by default we set this at 1, but you have the choice to set this limit and again confirm using the "Submit" button.
Minutes to Activation
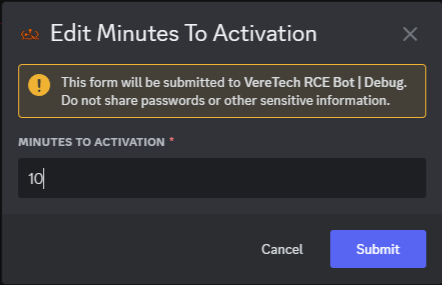
The minutes to activation is for the Offline Mode ONLY and dictates how many minutes will pass from the last player logging offline until the Fort activates, this blocks users from being able to block raids the moment they start by simply logging off - The default for this is 10minutes which can be changed by clicking the "Edit Minuted To Activation" button - Again, you will see a text box pop up asking for your input, this is in minutes.
Edit Hours to Expire
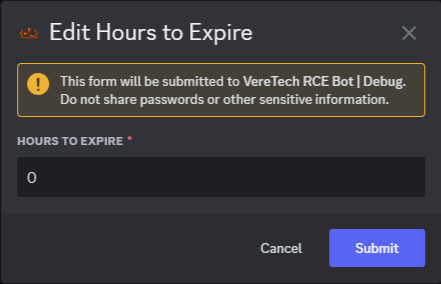
This setting again is for the Offline Mode & No Raid Mode ONLY and denotes how many minutes shall pass until the Fort is automatically switched off - Meaning that this number indicated how many minutes will pass after ALL clan members log off until the Fort will go down, essentially stopping unlimited protection. This can be useful to void players using alt accounts whilst their main accounts being offline holds up the Fort continuously. By default this is set to 0 which indicates NEVER, Should you change it to another value and wish to return it to never simply enter 0.
Edit Active Fort Configuration
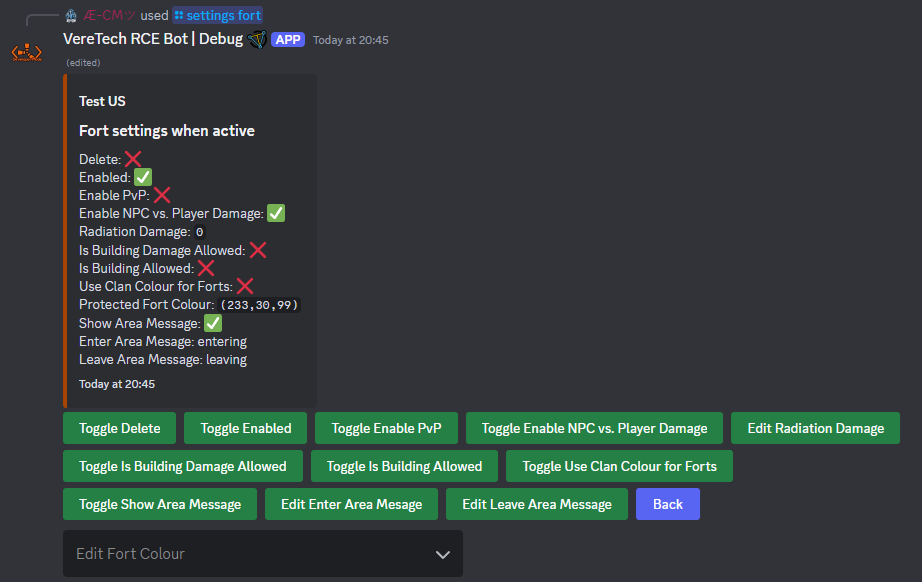
This setting allows us to configure specifics to the Fort when it is active and the Clan assigned to that Fort are all offline - These settings include the following;
Toggle Delete
Toggle Enabled
Toggle Enable PvP
Toggle Enable NPC vs. Player Damage
Edit Radiation Damage
Toggle "Is Building Allowed"
Toggle "Is Building Damage Allowed"
Toggle Use Clan Colour for Forts
Toggle Show Area Message
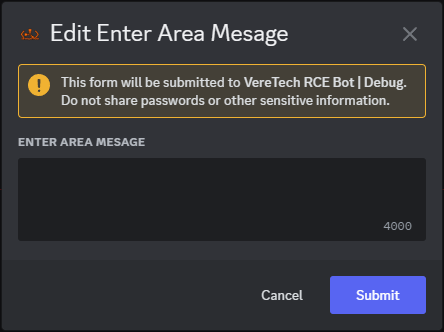
Edit Enter Area Message
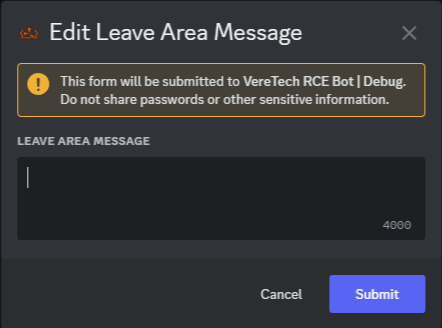
Edit Leave Area Message
Edit Fort Colour
These settings mentioned above will be covered later in the documentation, please click on the relevant setting if you wish to TP to that settings instructions.
Edit In-Active Fort Configuration
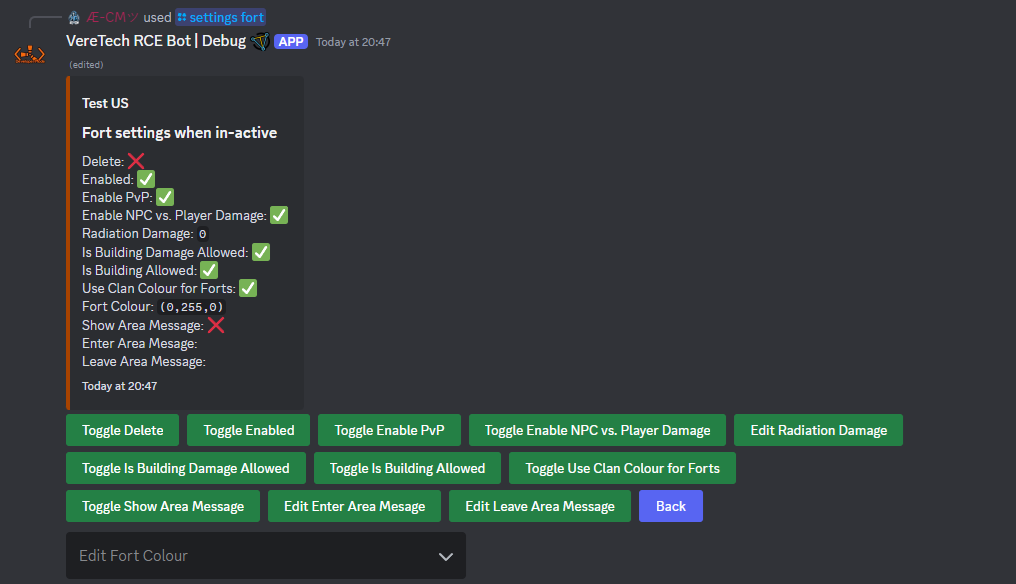
This setting allows us to configure specifics to the Fort when it is in-active and the Clan assigned to that Fort are online - These settings include the following;
Toggle Delete
Toggle Enabled
Toggle Enable PvP
Toggle Enable NPC vs. Player Damage
Edit Radiation Damage
Toggle "Is Building Allowed"
Toggle "Is Building Damage Allowed"
Toggle Use Clan Colour for Forts
Toggle Show Area Message
Edit Enter Area Message
Edit Leave Area Message
Edit Fort Colour
These settings mentioned above will be covered later in the documentation, please click on the relevant setting if you wish to TP to that settings instructions.
Configuring Active & In-Active Fort Settings
Show Area Message
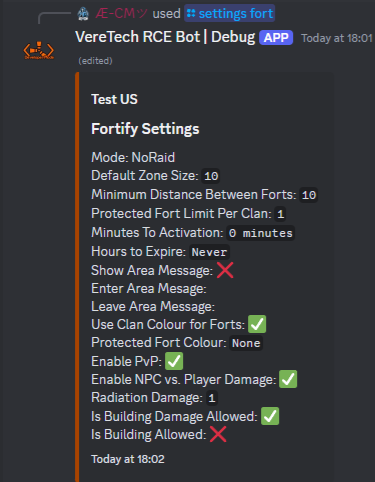
This settings allow us to choose weather we want there to be a message shown upon players entering/leaving the area, this is an On/Off toggle which will be indicated in the message as you click the button;
Enter Area Message
When selecting the button "Edit Enter Area Message" we can enter a custom message for when players enter a Fortified area, these are blanket messages which cannot be set for each individual Clan, however, you can use the Clan placeholders to make them personal - Please click here to head to the placeholders specifically available for Fortify - Click submit and your message will be set.
Leave Area Message
As with the entering area we also can choose our own custom leave message, by clicking the button "Edit Leave Area Message" you will again be greeted with a text box which you can use, again these are blanket messages which cannot be set for each individual Clan, however, you can use the Clan placeholders to make them personal - Please click here to head to the placeholders specifically available for Fortify - Click submit and your message will be set.
Use Clan Colour for Forts
We can choose if we wish to allow clan colours for the setting of the Forts, meaning the "Fort Bubble" will be that of the colour of the clan, just a simple toggle switch which will update the settings message as seen below.
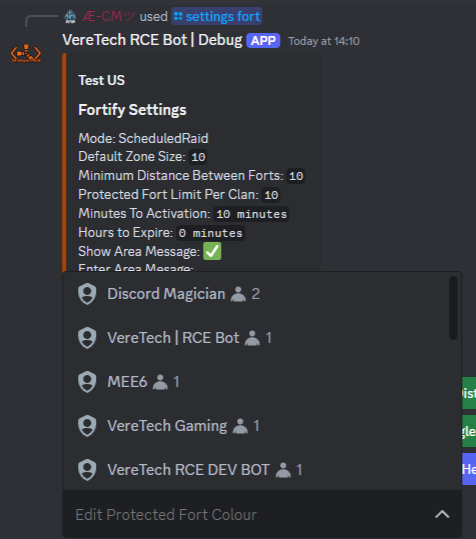
Protected Fort Colour
Because Discord has no option for a selective pallet - You will need to create roles for specific colours you wish to use for Forts - Simply head into discord server settings and create a role and select the colour you wish the Forts to show, once that has been created you will see upon triggering the /settings fort command that at the bottom we have an "Edit Fort Colour" menu which is prefilled with our roles, simply select the role that you just created and the Fort settings will be applied from the colour of that role.
Please Note: You are more than welcome to delete this role following this being applied, we simply needed it to be able to set the colour. Also, if you have Use Clan Colour for Forts switched on then this will be overridden by that setting.
Enable PvP
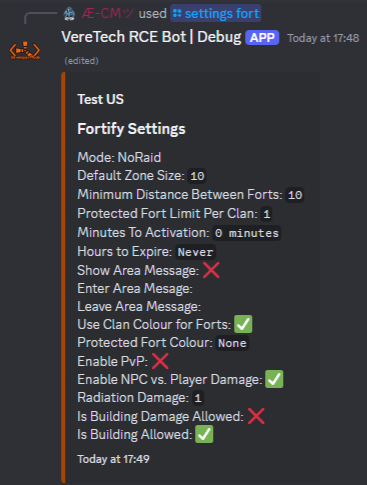
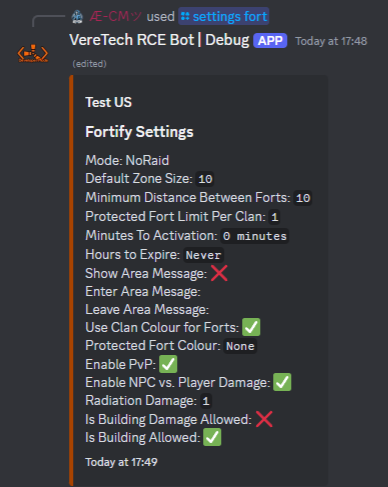
The enable PvP button is an On/Off toggle, enabling or disabling weather players can deal damage to other players within the Fort, simply click the button "Toggle Enable PvP" and watch the message update;
Enable NPC vs Player Damage
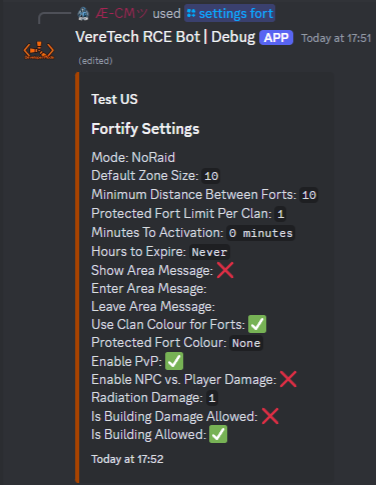
The enable NPC button is an On/Off toggle, enabling or disabling weather NPCs can deal damage to other players within the Fort, simply click the button "Toggle Enable NPC vs. Player Damage" and watch the message update;
Radiation Damage
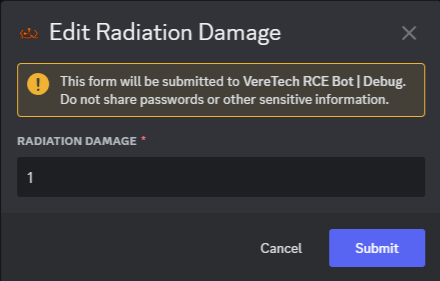
You can also adjust the radiation damage, allowing radiation to occur when another player enter the Fort, this is a value based adjustment, by clicking "Edit Radiation Damage", you will be greeted with a text box - Please enter here the value you wish damage to be at between 1 - 300. Default is set at 0;
Building Damage
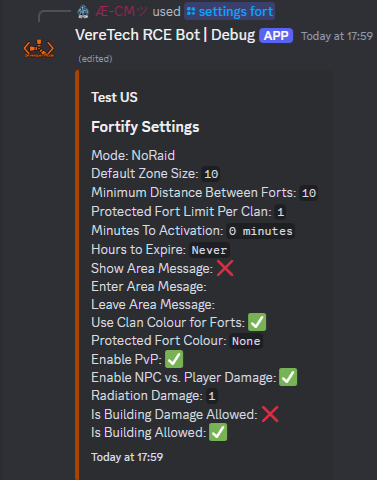
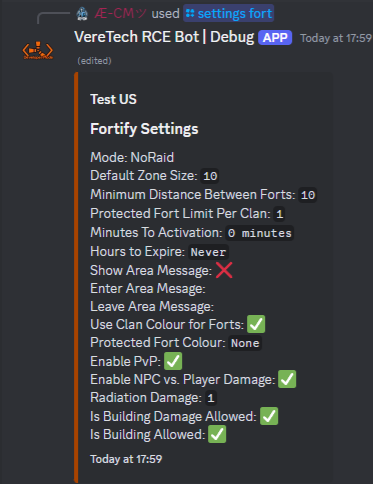
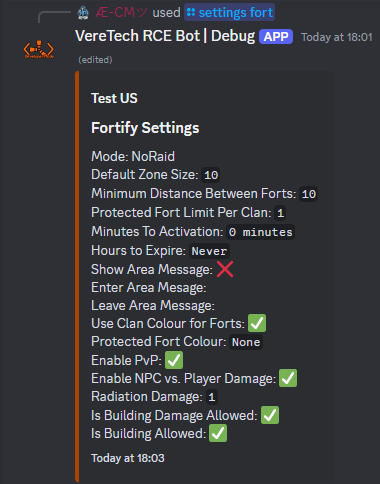
You can toggle On/Off building damage within an active Fort by players, by simply clicking the button "Toggle is Building Damage Allowed" you can toggle On/Off. This will be updated within the message;
Building Allowance
You can toggle On/Off building structures within an active Fort by players, by simply clicking the button "Toggle is Building Allowed" you can toggle On/Off. This will be updated within the message;
Schedules
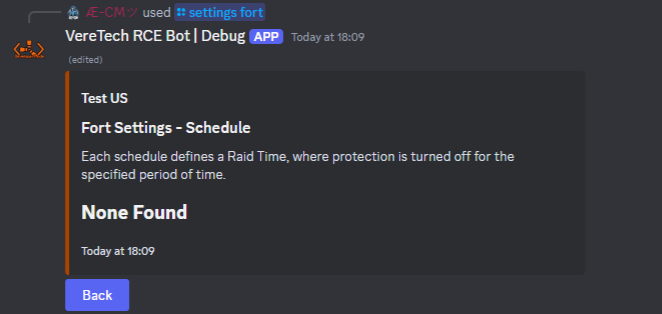
We will get onto schedules later within this documentation, however, the schedules button is one to use to recall all schedules you have programmed. This is ONLY for use with the mode: ScheduledRaid and will not work with any other mode;
Help
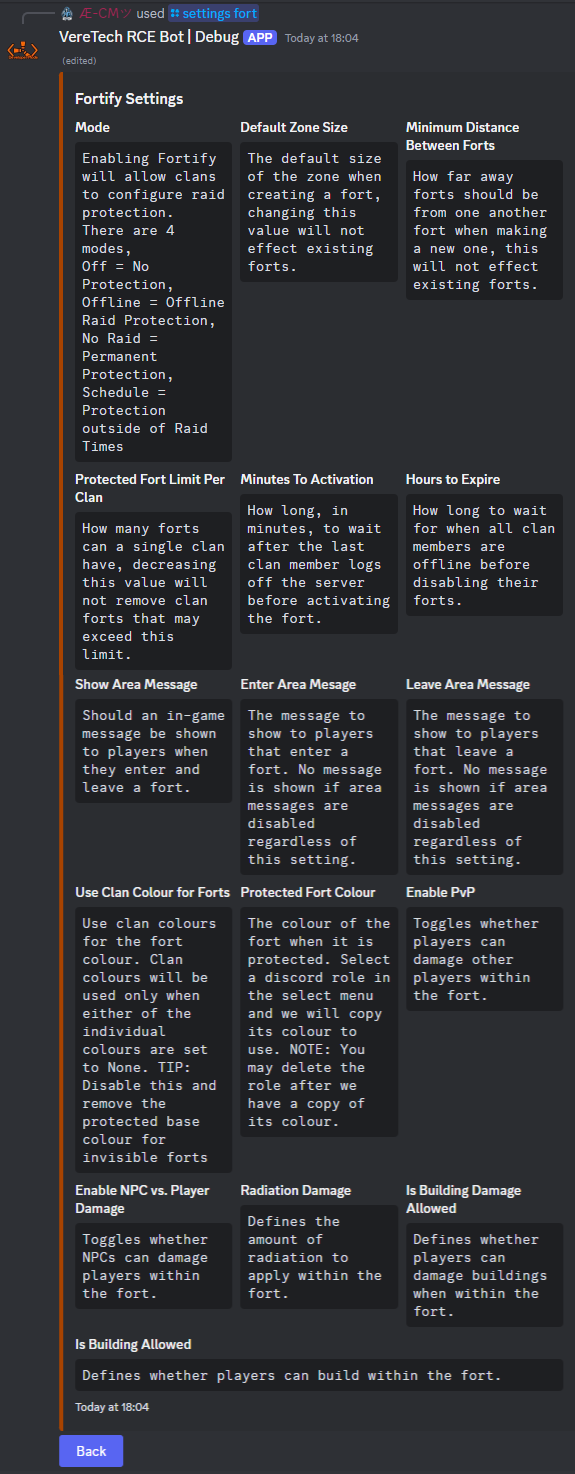
We have also included a handy Help button should you need it, by clicking this it will give you all the information you need should you need reminding of any of the features in Discord;
Editing Forts of Individual Clans/Teams
You can also, as Admins, carry out edits to individual Clan/Team forts should they out grow your default Fort size, maybe you want to reduce it following a clan Disband? By using the command /settings fort-edit you can do this, selecting your gameserver and the Clan tag or Team ID from the pre-filled menu, remember, should you have over 25 clans or team with forts, due to Discord limitations on auto-fill menus you will need to start typing the clans name or gamertag for the option to display.
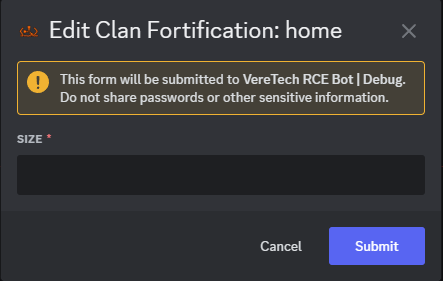
Once you choose your Clan/team, you will be greeted by a text box with the Clan/team's Fort information, including the Fort name(s), the current active Forts for that clan and the size, choosing from the drop-down menu you can select which Fort to edit. Once selected you will be greeted with a text box where you can enter the new Fort size reposition or delete the fort.
Scheduling Fortify
We have also allowed or scheduling within fortify, should you want to run events such as, Raid Evenings, Raid Weekends, End of Wipe Raids... This is the system for you! Allowing you to turn off ALL Forts at the click of a button!
You must be in the mode: ScheduledRaid for this system to take effect
Adding a Schedule
Using the command /settings fort-add-schedule you can set up custom schedules for your raid times and when you want these to be active for example - If you want raids to only be Friday through to sunday we can do this on one schedule.
By selecting our gameserver we then get the following options;
Timezone: Please select your timezone or the time zone you want the schedule to be on.
Name: Simply name the schedule, eg: Raid Weekend
day-of-week: Please choose the day of the week that you wish the scheduler to be started on
hour-of-day: Please choose the hour of the day that you want this to be started eg: 20:00 = 8pm
duration: Please select the duration of the schedule to then be de-activated - This is in minutes, so to gain sunday we would want 2 days = 2880
Listing and Deleting Schedules
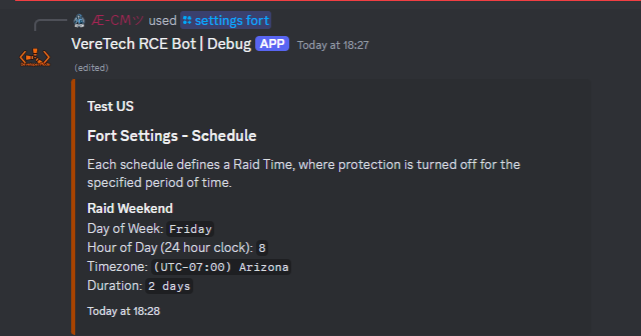
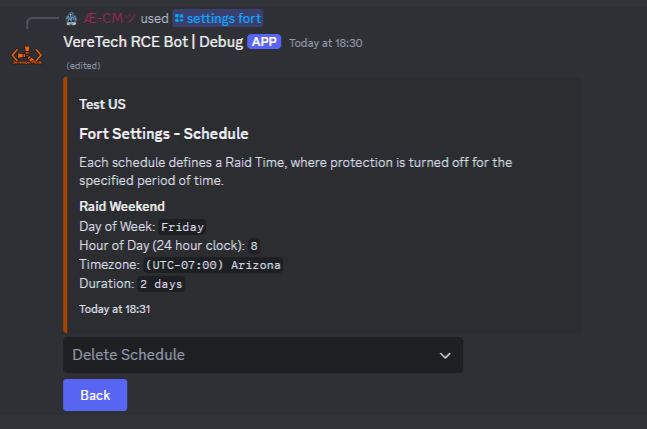
To show a list of your schedules we will need to go back to using the command /settings fort and notice the button names "Schedules" if we click here we will be show a list of all of our current schedules, notice also there is a drop down menu named "Delete Schedule"
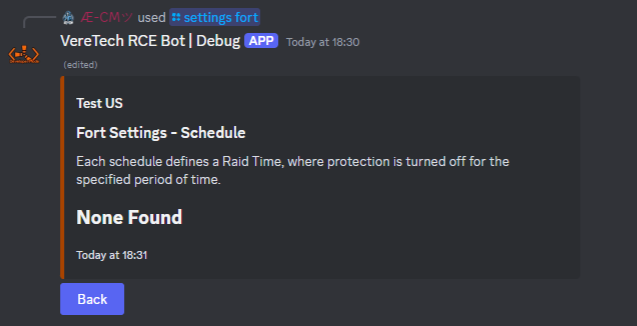
Once you choose a schedule you want to delete, simply use the drop-down menu, select your schedule and you will see that the schedule you have chosen has been removed and the text box has been updated;
Placeholders Available for Fortify
| Placeholder |
Effect |
Example |
| {FortName} | Shows the registered name of the Fort. |
HME |
| {FortPosition} | Shows the position of the Fort. |
(5,0,-1100) |
| {FortColour} | Shows the colour of the Fort in Hex Code format. |
#123456 |
| {FortId} | The ID of the fort as registered in the database. |
1307e956-32a2-40be-8546-fc11b2a80de7 |
| {FortSize} | Shows the Fort size in meters. |
50 |
| {ClanTag} | Shows the Fort owners Clan Tag |
[VVT] |
| {ClanColour} | Shows the Fort owners Clan colour in Hex Code format. |
#123456 |
| {ClanTagWithColour} | Shows the Fort owners Clan tag in its respective colour. |
[VVT] |

