
Adding your Nitrado Gameserver
Greetings and welcome to the in initiation of your gaming journey with VereTech – the ultimate killfeed Discord bot. In this segment, we will guide you through the process of integrating the VereTech RCE Bot into your Nitrado Gameserver.
To establish a connection you will need to create an account on our website, available at https://rce.veretech.systems.
Steps Overview:
- Create an Account
- Link External Providers to your new VT account.
- Add your Gameserver.
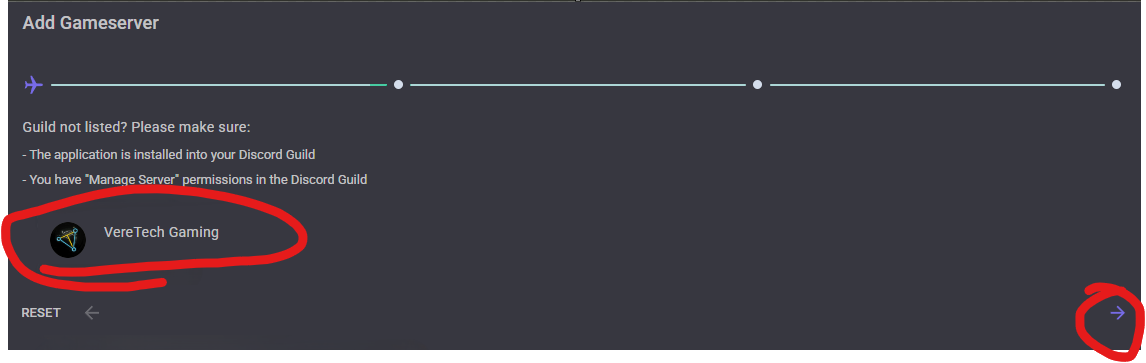
- - Choose the Discord Guild
- - Choose the hosting provider "Nitrado"
- - Choose the gameserver you want to install.
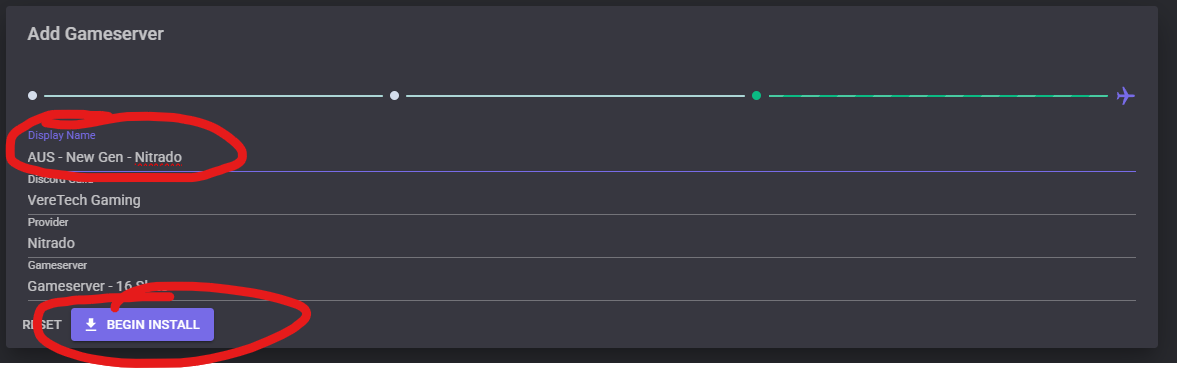
- - Rename gameserver and confirm.
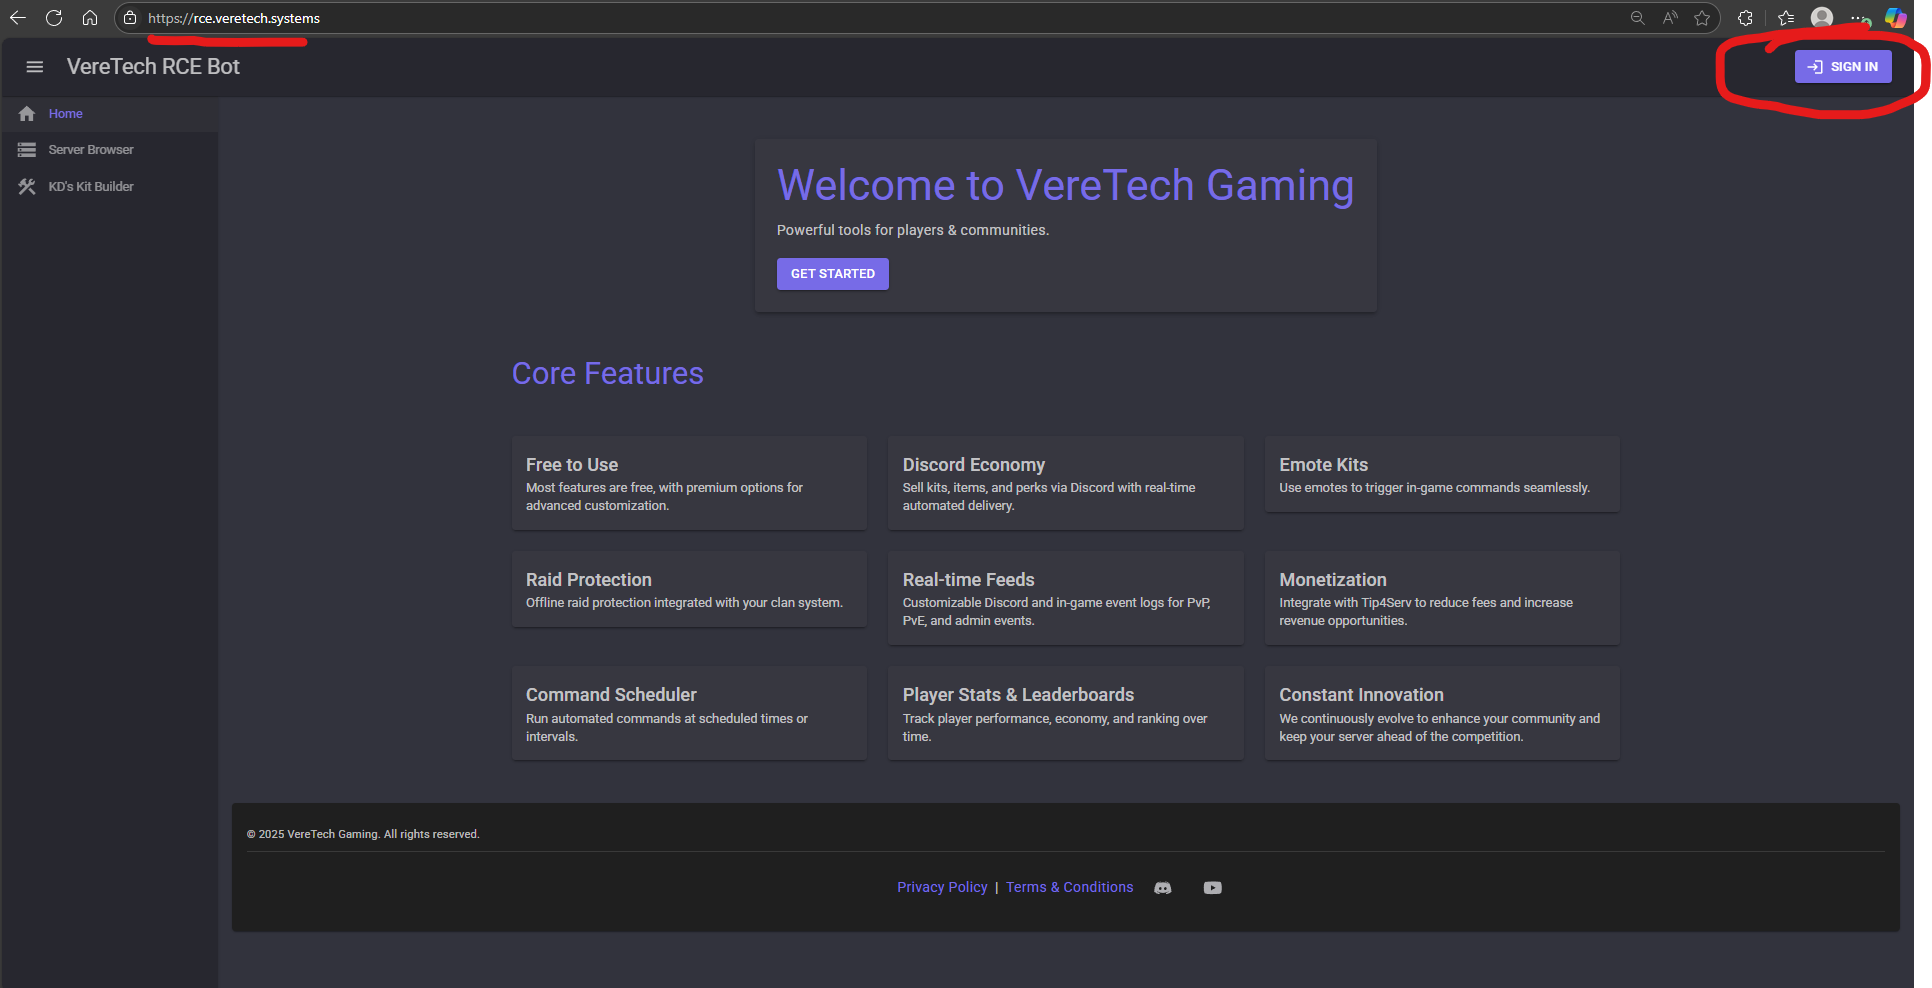
To get started, first click "Sign In" on the homepage:
You may either create your account by signing in with an external provider like Discord or Nitrado, or create a username + password and later connect Discord and Nitrado to your account.
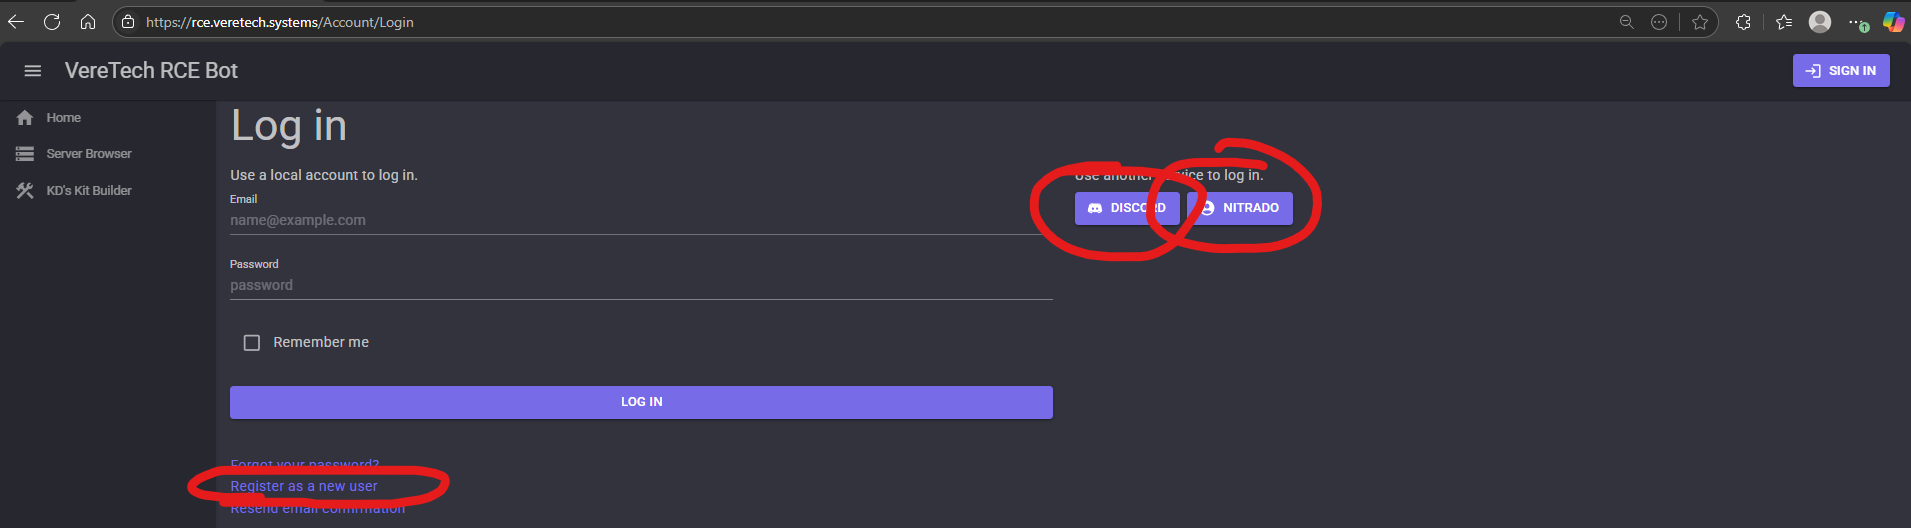
Each provider has a unique way of signing you in, please follow the steps accordingly.
I choose to login via Discord, lets follow the steps to know link Nitrado to our newly created VT account.
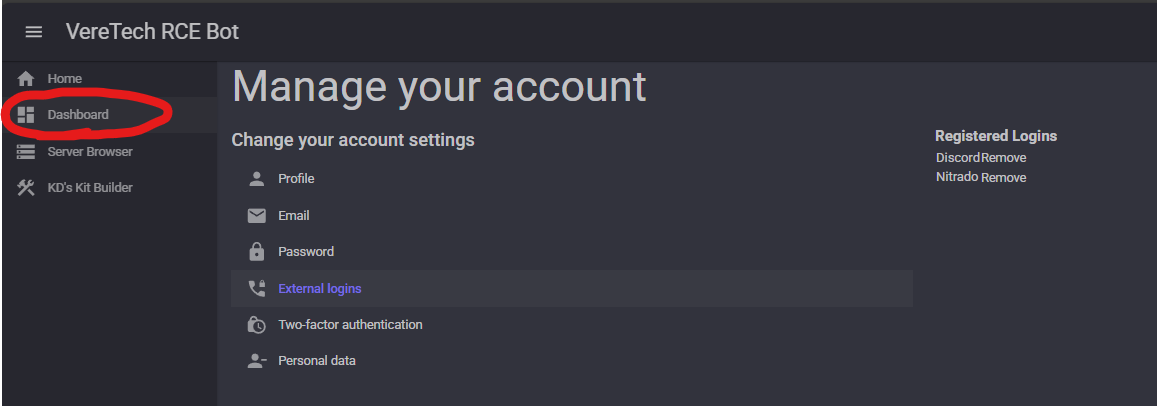
Navigate to "Manage Account"

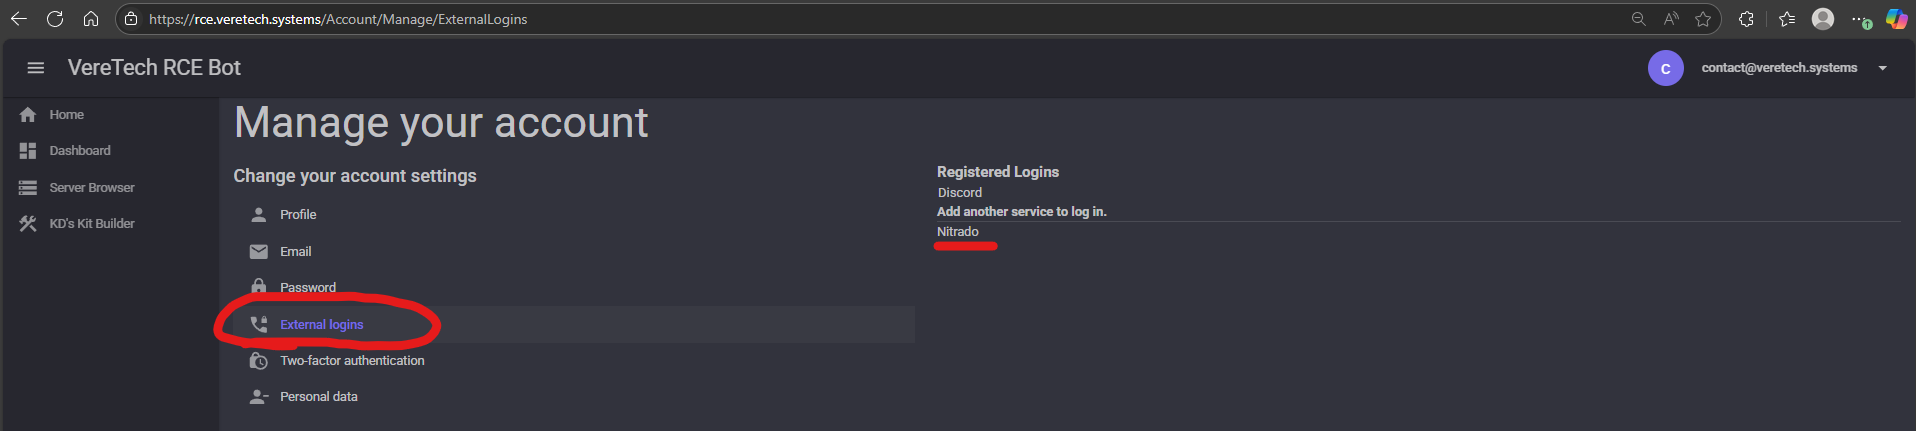
You will be taken to Nitrado's website where you can continue to login with your Nitrado account.
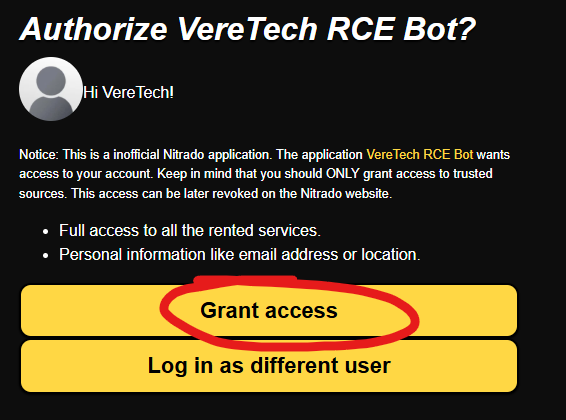
Once you have logged in, Nitrado will ask if you wish to provide VereTech RCE Bot access to your account. You may decline this, but please understand we cannot connect to your gameserver without it.
You should now see that you have linked both your Discord and Nitrado accounts to your VT account, if you do, you can proceed to your "Dashboard".
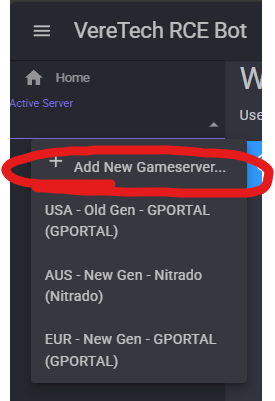
On the left hand side drawer bar (on mobile you may need to click on ), there is an "Active Server" dropdown, which will contain a button "Add New Gameserver"
Select the Discord Guild you wish to install the gameserver into, then click Next.
Select the hosting provider "Nitrado", then click Next.

Now select the Gameserver from the list that you want to install, then click Next.

Now you have the opportunity to rename the gameserver, this does not rename how your gameserver is displayed in game, only how the Gameserver is displayed when using our services. Then click "Begin Install".
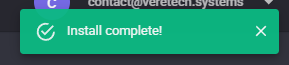
If all went well, you should see the below message in the top right of your screen:
Your bot can be tested for connection on the coming pages.
Your Next Step is to Enable your Game Feeds, Head over to Discord Configuration to get started.