VereTech RCE Bot
- Installation
- Adding Your GPORTAL Gameserver
- Adding Your Nitrado Gameserver
- Updating your GameServer (GPORTAL)
- Testing your Connection
- VereTech Premium
- Deleting your GameServer
- Discord Configuration
- Discord Bot Permissions
- Configuring PvP Feeds
- Configuring PvE Feeds
- Configuring Event Feeds
- Configuring Player Online Feeds
- Configuring Admin Channel
- Customizing Feeds
- Community Created Feeds
- Online Players Voice Channel
- Syncing Auth Levels with Roles and Resetting Auth Levels
- Player Management
- Introduction into Player Management
- Linking Discord to GamerTags/PSNs
- Discord/Console Aligning
- Player information
- Player Leaderboards
- In-Game Chat
- Command Groups (CMDs)
- Timed Commands (Premium)
- Emote Wheel Actions
- Tip4Serv Integrations
- Introduction into Tip4Serv
- Getting Started & Connecting my Server
- Adding Purchasable Items & Subscriptions
- Adding/Taking Discord Currency
- Claiming Purchases
- Economy (Premium)
- Economy Introduction
- Configuring Categories for Economy
- Adding Items to Economy
- Adding Kits to Economy
- Adding Command Groups To Economy
- Adding Teleportation to Economy
- Setting Role Specific Economy Items & Kits
- Player Wallets, Balances, Rewards and Logs
- Players Manual
- Players Command Guide
- Linking & Economy
- Player Information & Communication
- Redeeming Tip4Serv Purchases
- Clan System
- Fortify - Raid Protection System
- 96.9 KDFM - RF Broadcaster Alerts
- Clans & Teams
- Fortify Raid Protection (Premium)
- Skip Night (Premium)
- 96.9 KDFM - RF Broadcaster Alerts (Premium)
- Commands Overview
- Troubleshooting, Tools & Suggestions
Installation
An in-depth guide to install VereTech RCE Bot.
Adding Your GPORTAL Gameserver
Greetings and welcome to the in initiation of your gaming journey with VereTech – the ultimate killfeed Discord bot. In this segment, we will guide you through the process of integrating the VereTech RCE Bot into your GPORTAL Gameserver via Discord.
To establish a connection you will need to navigate over to https://www.g-portal.com/ and sign in. Once you have successfully signed in you will need to locate the server you wish to install on and select it.
Once selected you will notice that there will be a tab to the left of your screen named “Permissions” as seen on the image below;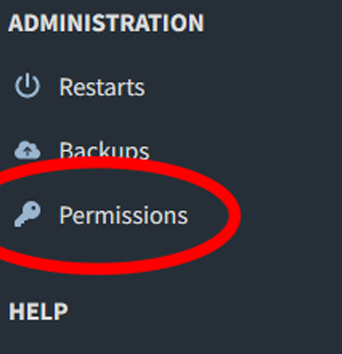
Once you have clicked the permissions tab you will see the option to “Add User” please click on this button and then enter the following username.
de91e108-fd4e-423a-acc3-7ab55926b90c
It is important that this is absolutely correct, including any and all hyphens.
Before we leave the G-Portal page there are 2 very important pieces of information we need to make a log of.
- Server ID
- Region
Both of these can be located in the URL at the top of your screen, these pieces of information are critical in the setup so please make a note of them. Below is an example image to show you what we need:
Please Note: DO NOT copy the information in the image, you need to obtain your own ID's
INT or EU? You will notice that our Region is INT in the first highlighted code and then the 2nd is the Server ID. (Do not use the example)
There are currently only 2 that it could be,
| Region | Short Code | URL Code |
| USA | Us | int |
| European | EU | eur |
It is likely that you will know this, however, if you are unsure then please refer to the URL as seen above.
Now we have successfully completed everything on G-Portal side it’s time to head over to Discord.
Time to invite the bot! Please navigate to VereTech discord (https://discord.gg/veretech) and find the bot in the “Online” section on screen and click on it. You will see a button stating [+Add App] please use this and select which Discord Server you wish to add it to, alternatively please CLICK HERE for an instant bot invite link.
Creating the Connection
Now that we have the bot available in our Discord, we need to give it the credentials.
For the next part you will have to complete your Discord Permissions, you can do so by clicking the blue text.
For this we will need the information we gathered from G-Portal earlier. To do this please use the command /gs add-gp. Once triggered this command is going to give you 3 options, all of which are mandatory for connection;
- Gameserverid - This is the 7 digit number found in the final 3rd of that URL earlier, again, please do not use the example
- Region - Using the table above, please select the region of your gameserver
- Nickname - You are free to call it whatever you please, I recommend using a similar name to your game server.
Once you have filled in these options, you will be shown that a connection has been made, and to please allow 5 minutes for the connection to complete.
Your bot can be tested for connection on the coming pages.
Your Next Step is to Enable your Game Feeds, Head over to Discord Configuration to get started.
Adding Your Nitrado Gameserver
Greetings and welcome to the in initiation of your gaming journey with VereTech – the ultimate killfeed Discord bot. In this segment, we will guide you through the process of integrating the VereTech RCE Bot into your Nitrado Gameserver.
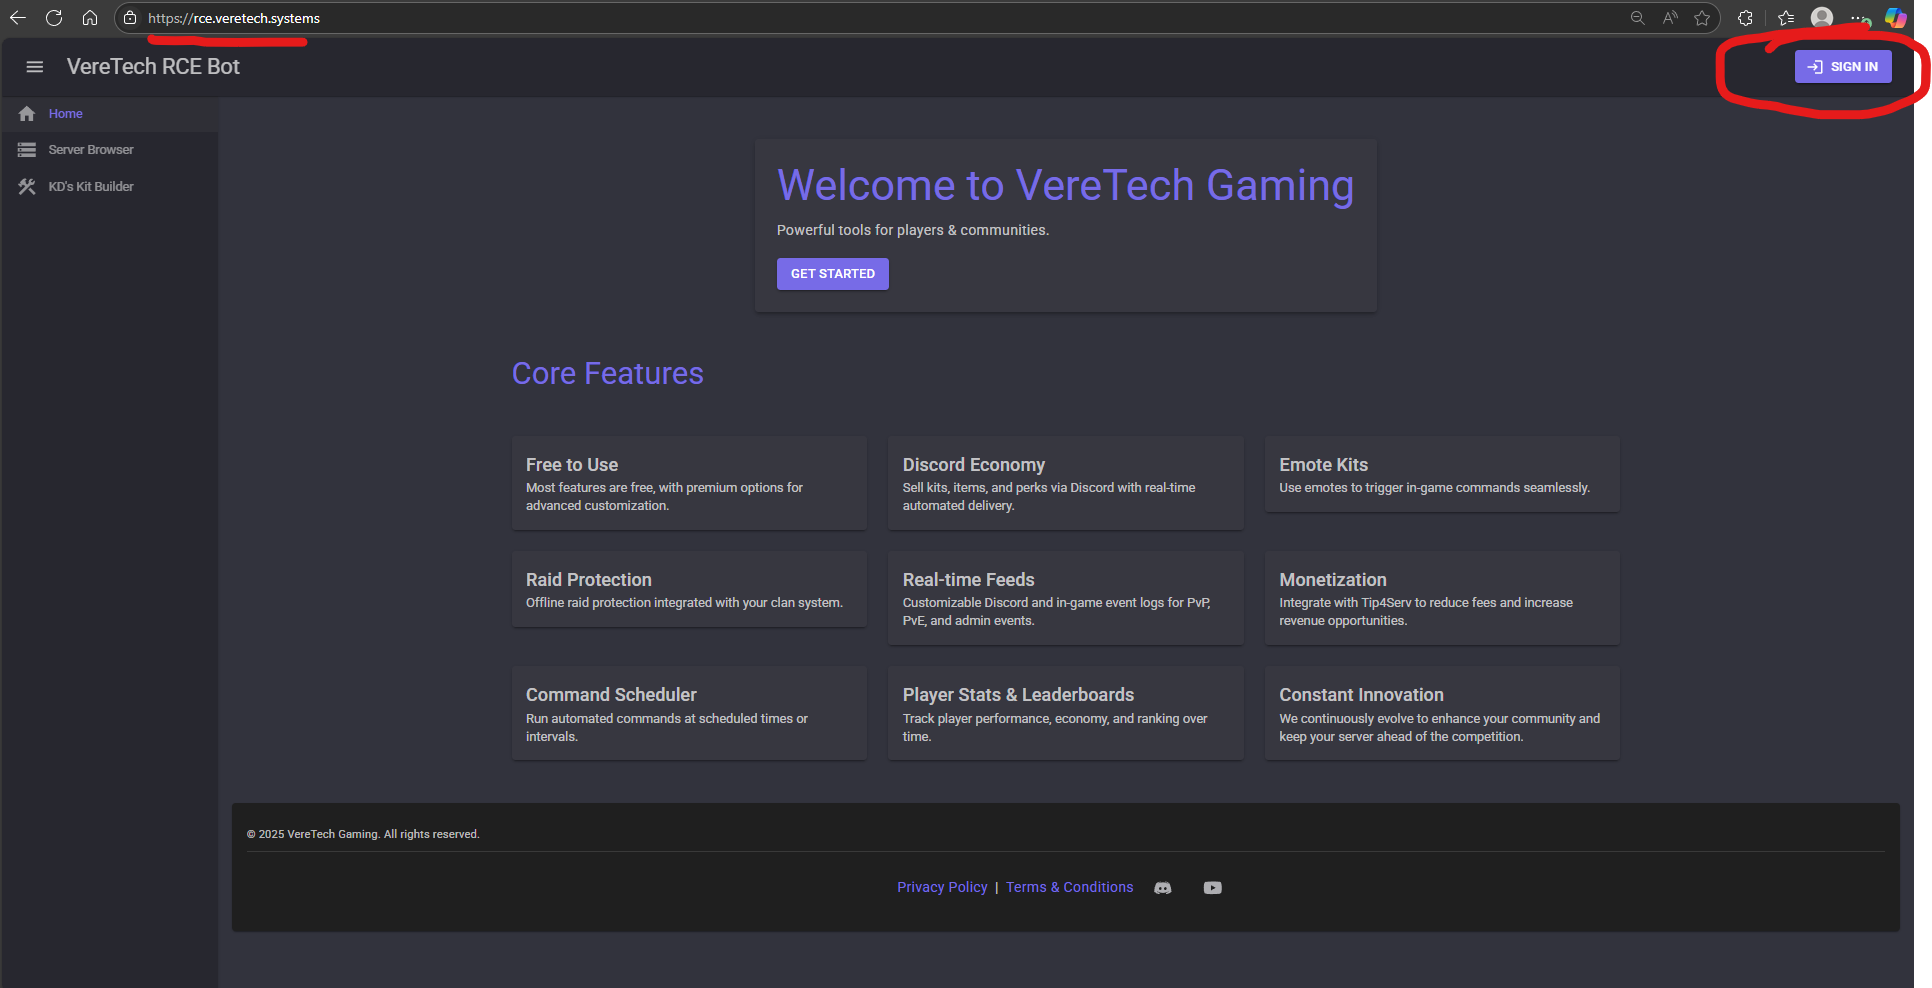
To establish a connection you will need to create an account on our website, available at https://rce.veretech.systems.
Steps Overview:
- Create an Account
- Link External Providers to your new VT account.
- Add your Gameserver.
- - Choose the Discord Guild
- - Choose the hosting provider "Nitrado"
- - Choose the gameserver you want to install.
- - Rename gameserver and confirm.
You will need to have already added the bot to your discord
You can do that by clicking the link HERE
To get started, first click "Sign In" on the homepage:
You may either create your account by signing in with Discord, or create a username + password then connect Discord and Nitrado to your account later.
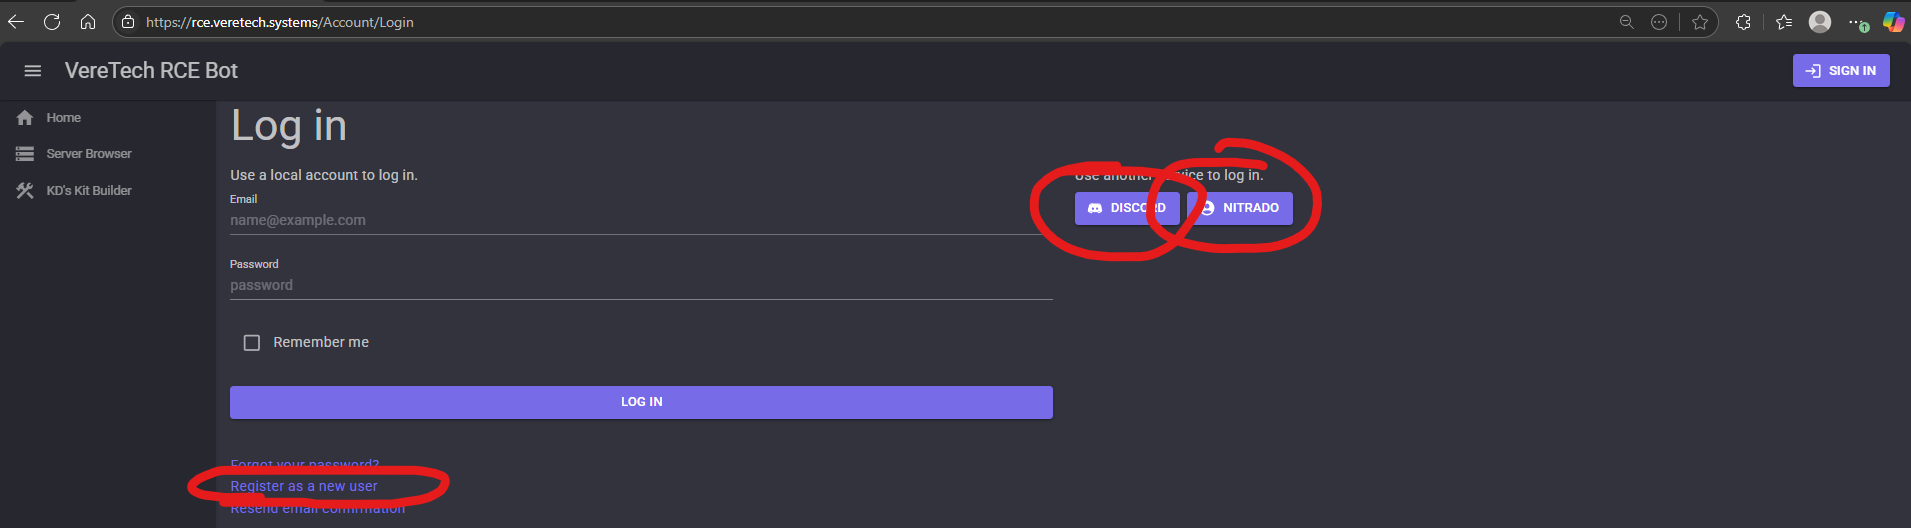
Each provider has a unique way of signing you in, please follow the steps accordingly.
I choose to login via Discord, lets follow the steps to know link Nitrado to our newly created VT account.
Navigate to "Manage Account"

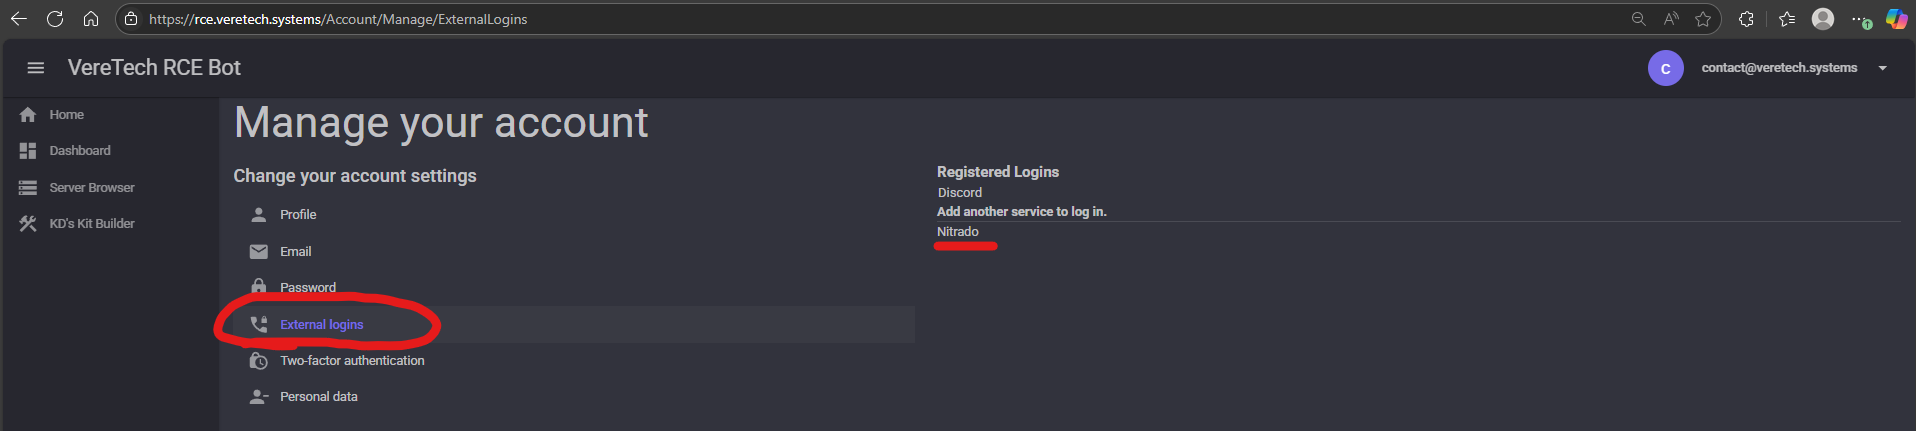
You will be taken to Nitrado's website where you can continue to login with your Nitrado account.
Once you have logged in, Nitrado will ask if you wish to provide VereTech RCE Bot access to your account. You may decline this, but please understand we cannot connect to your gameserver without it.
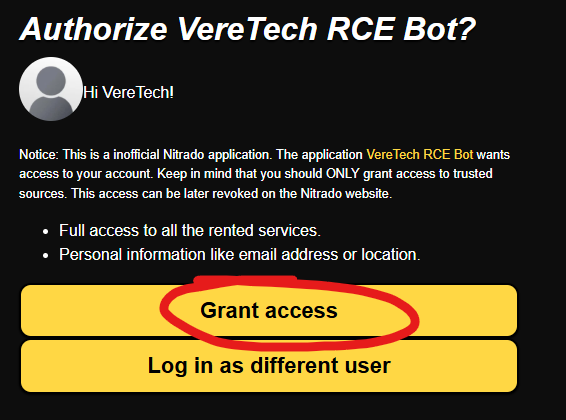
You should now see that you have linked both your Discord and Nitrado accounts to your VT account, if you do, you can proceed to your "Dashboard".
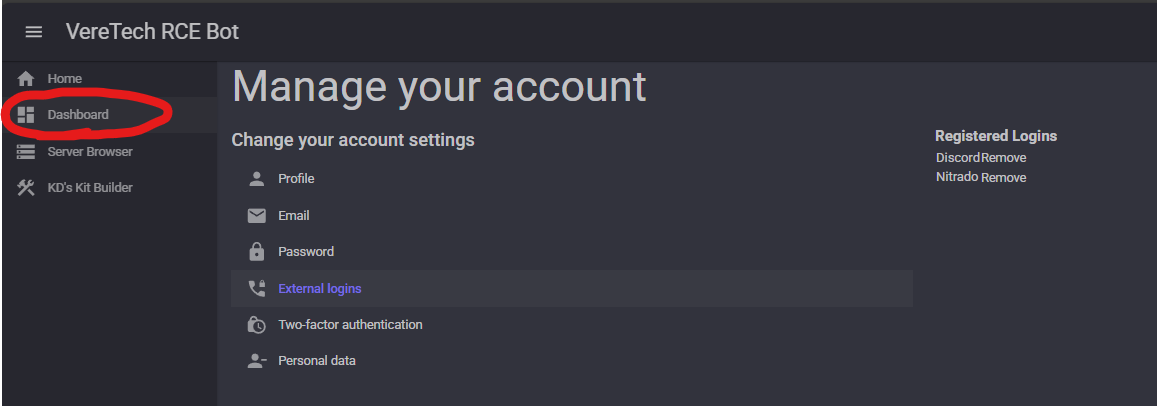
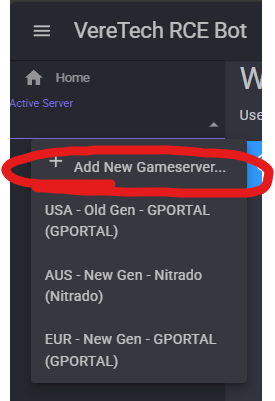
On the left hand side drawer bar (on mobile you may need to click on ), there is an "Active Server" dropdown, which will contain a button "Add New Gameserver"
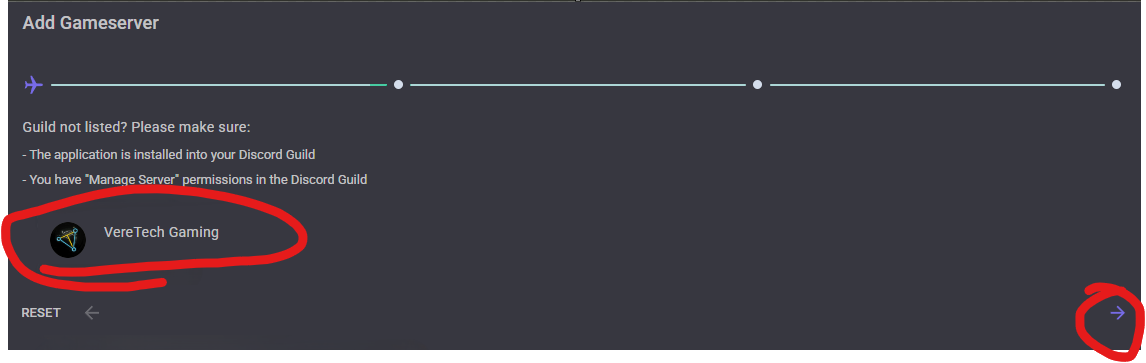
Select the Discord Guild you wish to install the gameserver into, then click Next.
Select the hosting provider "Nitrado", then click Next.

Now select the Gameserver from the list that you want to install, then click Next.

Now you have the opportunity to rename the gameserver, this does not rename how your gameserver is displayed in game, only how the Gameserver is displayed when using our services. Then click "Begin Install".
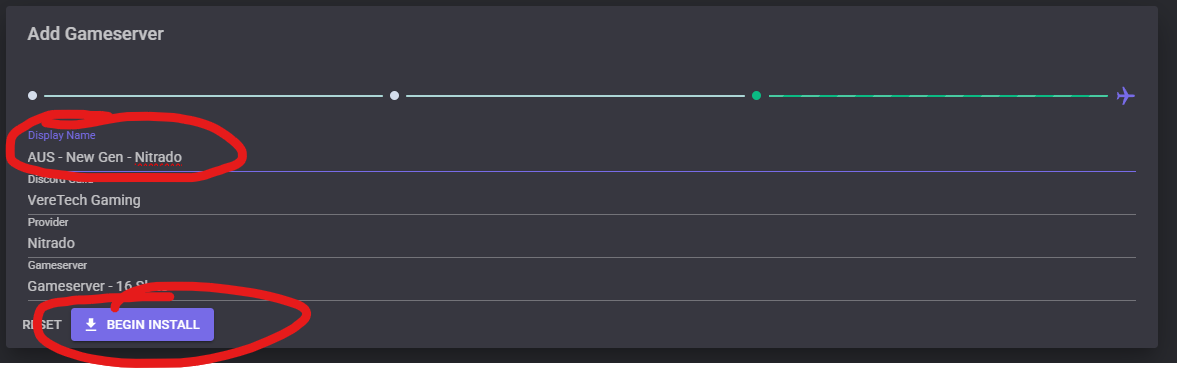
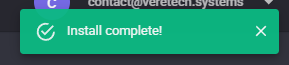
If all went well, you should see the below message in the top right of your screen:
Your bot can be tested for connection on the coming pages.
Your Next Step is to Enable your Game Feeds, Head over to Discord Configuration to get started.
Updating your GameServer (GPORTAL)
Updating your server could be needed for a number of reasons, including, but not limited to, Changing Server Nickname, Changing GameServer, changing credentials following Hardware Update.
To do this is pretty simple and is done using the command below...
/gs update-gp
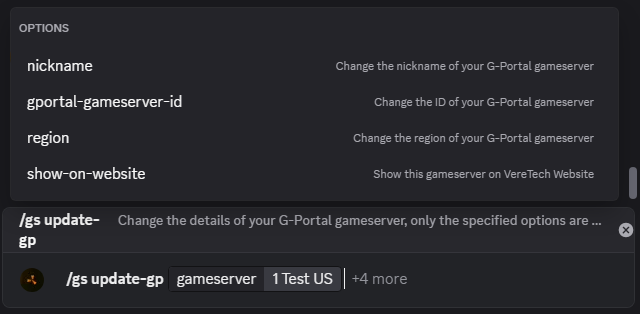
You will be greeted with the image above where you will need to select with GameServer to update, once selected, you have 4 options, you may select as many of these as required. Selecting “nickname” will change the name of your GameServer stored within the bot, this is fully customizable. If you have received new Hardware or have purchased a new server then you will need to
select both “gameserverid” and “region” to update the GameServer as required. Once you have entered the credentials, hit send and the settings will be applied.
The "show-on-website" parameter allows you to toggle if your GameServer is visible @ https://rce.veretech.systems/servers
To know what your current settings are, you can run /gs test
Using this command will force a reconnection to your Gameserver. This can take 3-5 Minutes for the bot to reconnect to your Gameserver
Testing your Connection
In the event your bot is unresponsive or not working as intended then we recommend that you run a connection test to ensure its connection is there and stable. You can do this by using the command /gs test. In doing this you will be given the option on which GameServer to test as shown below;
Once you choose your GameServer and hit send you will receive a response of either success or an error message, both are displayed below to see what you are looking for.
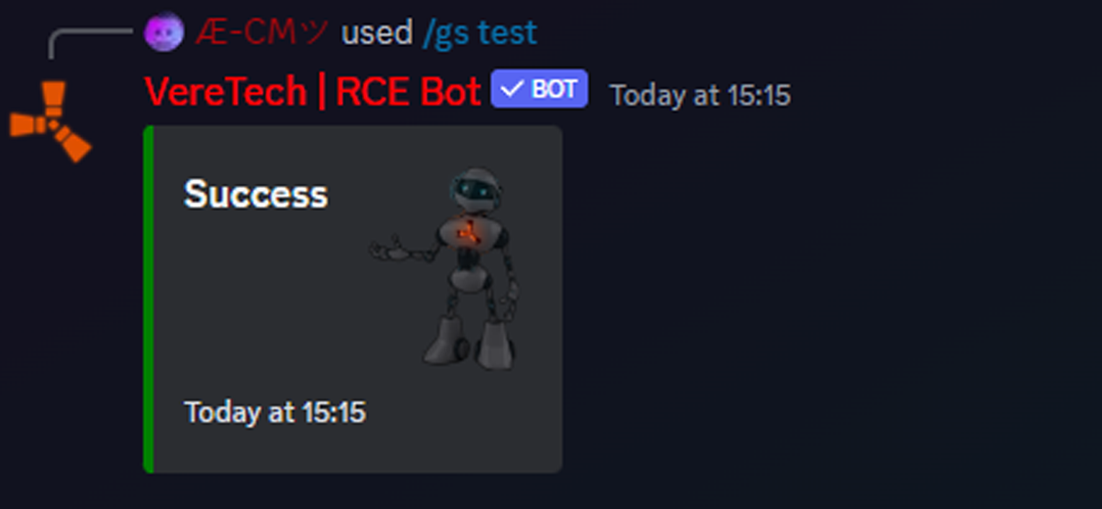
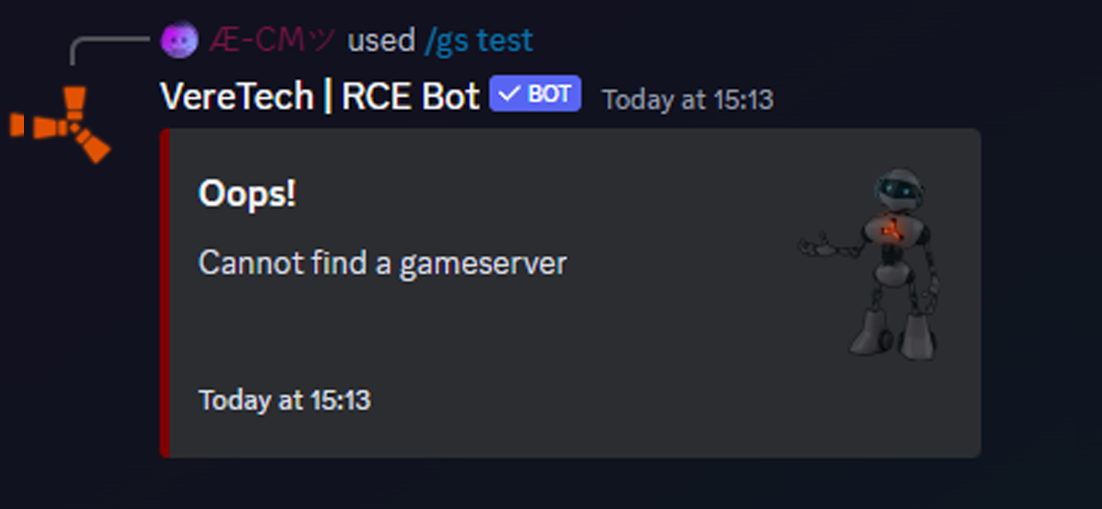
The left image represents a successful connection and you may proceed using your bot as normal. The right image represents a failed connection, this could be due to a number of things including outdated server credentials, please ensure that the information is correct and that you have not incorrectly spelt or incorrectly entered any credentials. If your credentials are all OK then please refer to the VereTech Discord for assistance.
You can open a ticket in Discord by clicking here.
VereTech Premium
Purchasing Premium
If you are considering using the premium features of the bot. Firstly... Thank you! When activating premium you will gain the following benefits;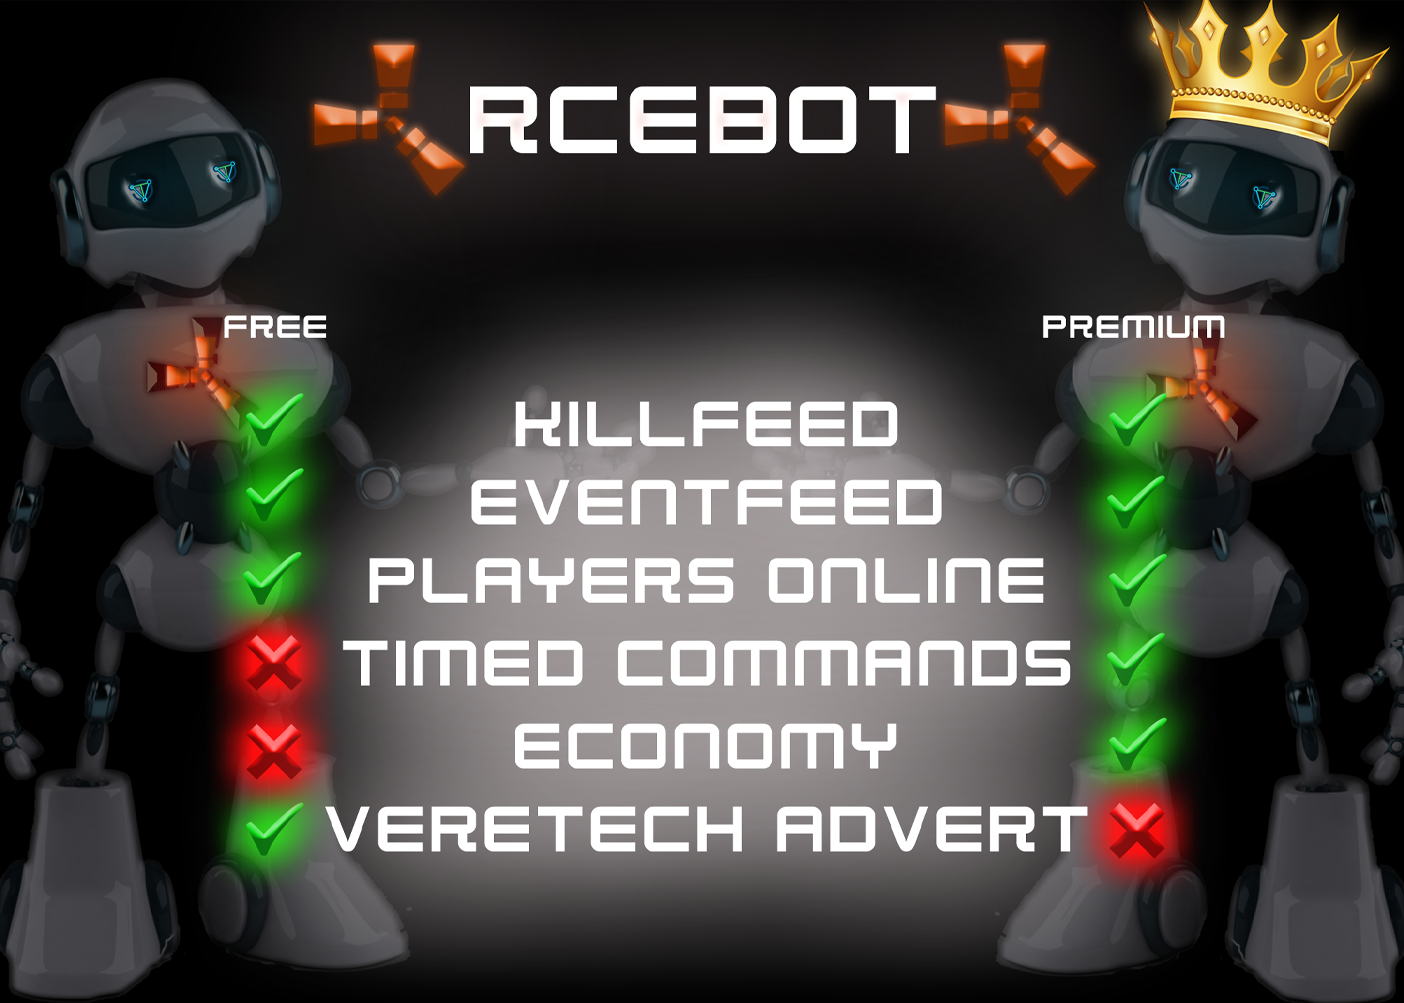
Noticeable Changes -
- Removal of the VereTech Discord link which shows on-screen in-game.
- Addition of Economy, where you will be able to set up your own Discord RCE store for direct and instant in-game delivery.
- Addition of Timed Commands which will allow you to set-up commands on a timer for repeated required in-game
commands for things like on-screen text, item spawns and event spawns
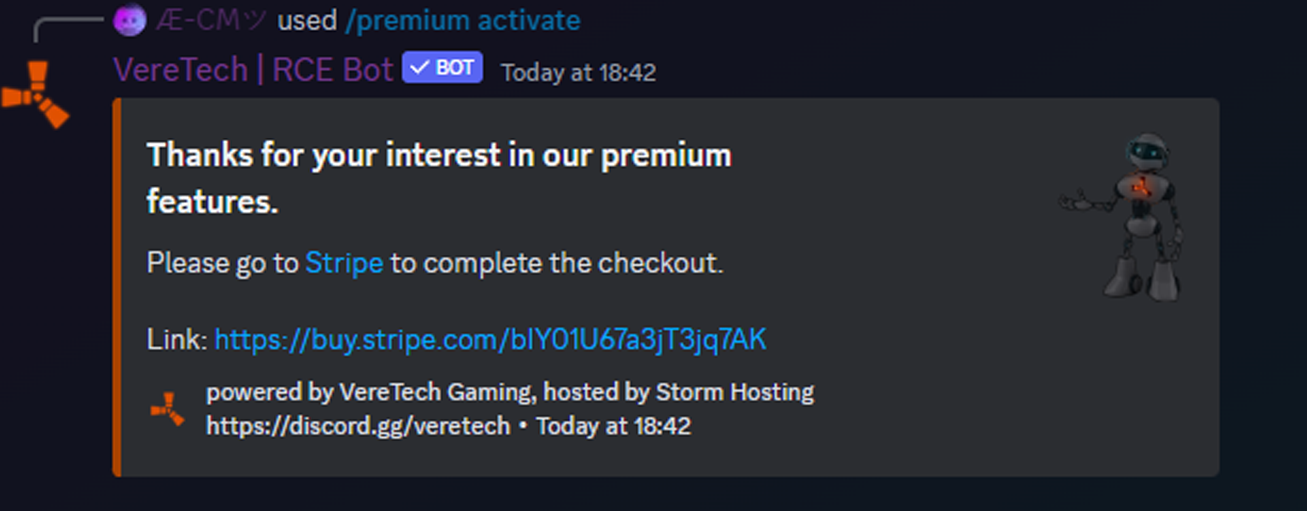
Stripe is our payment provider who accepts payments from quite a number of methods depending on your region. Please click the link to learn more:
Stripe - Payment Methods: https://docs.stripe.com/payments/payment-methods/overview
Once payment has been approved, it can take up to 30 minutes for premium to activate.
Premium Status
Following your purchase of Premium you also have the ability to test it within the bot to see if you subscription is now active.
To test the status of your premium, you can do this by using the command /premium status. Once you do this inside your discord you will get the following options;![premistats].png](https://docs.veretech.systems/uploads/images/gallery/2024-02/uFrmzlYrBCq7MZNT-premistats.png)
Please select your GameServer and hit enter. The bot will then think for a moment whist it gathers your premium information. Once it has obtained the info you will be greeted with one of the following messages;

This response shows you that Premium is active with all of your important dates, the next bill cost and your cancellation details.
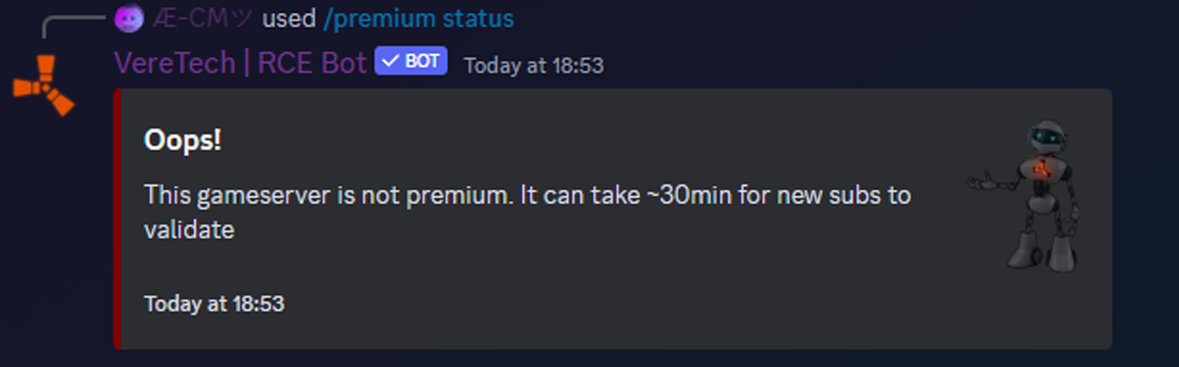
This response shows either Premium is not active, or, it is not active yet following a successful payment, please check back again in a moment if you have made a payment.
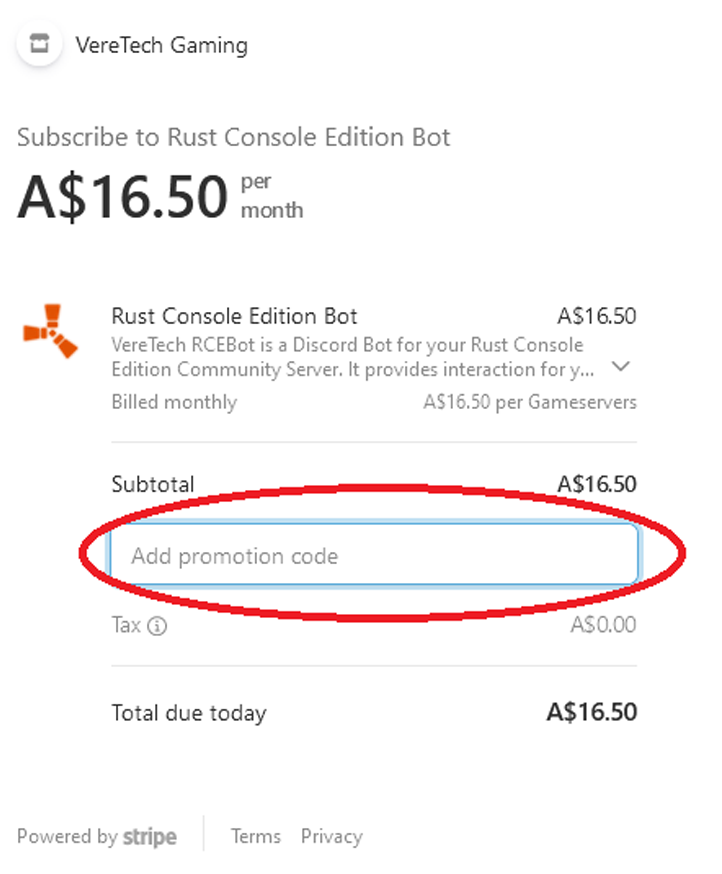
Coupons
VereTech periodically offer coupons for various reasons, including but not limited to; Orders for 3 or more premium servers, Reaching Discord Milestones, Celebration Moments and much more. If there are coupons available then you need you have 2 options, in the image below you can see that the checkout offers a coupon code option, this is for people buying premium for the first time via their personal Stripe link who have a coupon code;
Coupons that need to be applied to an existing premium subscription can be done so by using a command in discord, that command is /premium coupon;
Once sending this command you will be given the following options;
- gameserver: Please select the GameServer from the list which you wish to apply the coupon.
- coupon: Please use this box to enter the coupon code.
- overwrite: You are only allowed one active coupon at once, if you select YES to overwrite and you already have a coupon then you will lose the previous coupon, if you select NO to overwrite then it will return an error and not apply the coupon, however, if you have no coupon active then it will apply the coupon regardless of what you input into this field.
Transferring your Premium
If you have multiple GameServers or you have decided that you would like to purchase a new one and simply transfer your premium, you can transfer over without losing any if your configurations. You can do so by using the command;
/premium switch, in doing so you will be greeted with the following options;
![]()
Here you will need to select which GameServer you want to remove premium from and secondly choosing which GameServer you want to move the premium license to and simply hit enter.
Please note: The new GameServer will have to have an active connection to the bot for it to recognize and give you the [to] option.
Cancelling Your Premium
If you have an active subscription to premium and wish to cancel it for whatever reason then all you need to do is use the command /premium cancel If you have multiple servers then this will need to be repeated for each GameServer which you have an active premium subscription on.
BuymeCoffee (Donations)
As you know we offer a vast amount of our services absolutely free of charge, our dedication to continually offer 70% of the bot for free does sometimes rely on your generosity, although it is never expected yet always appreciated.... If you wish to help towards the cause then please use the command /premium buymecoffee where you will receive a response from the bot with a donation link to our Stripe account.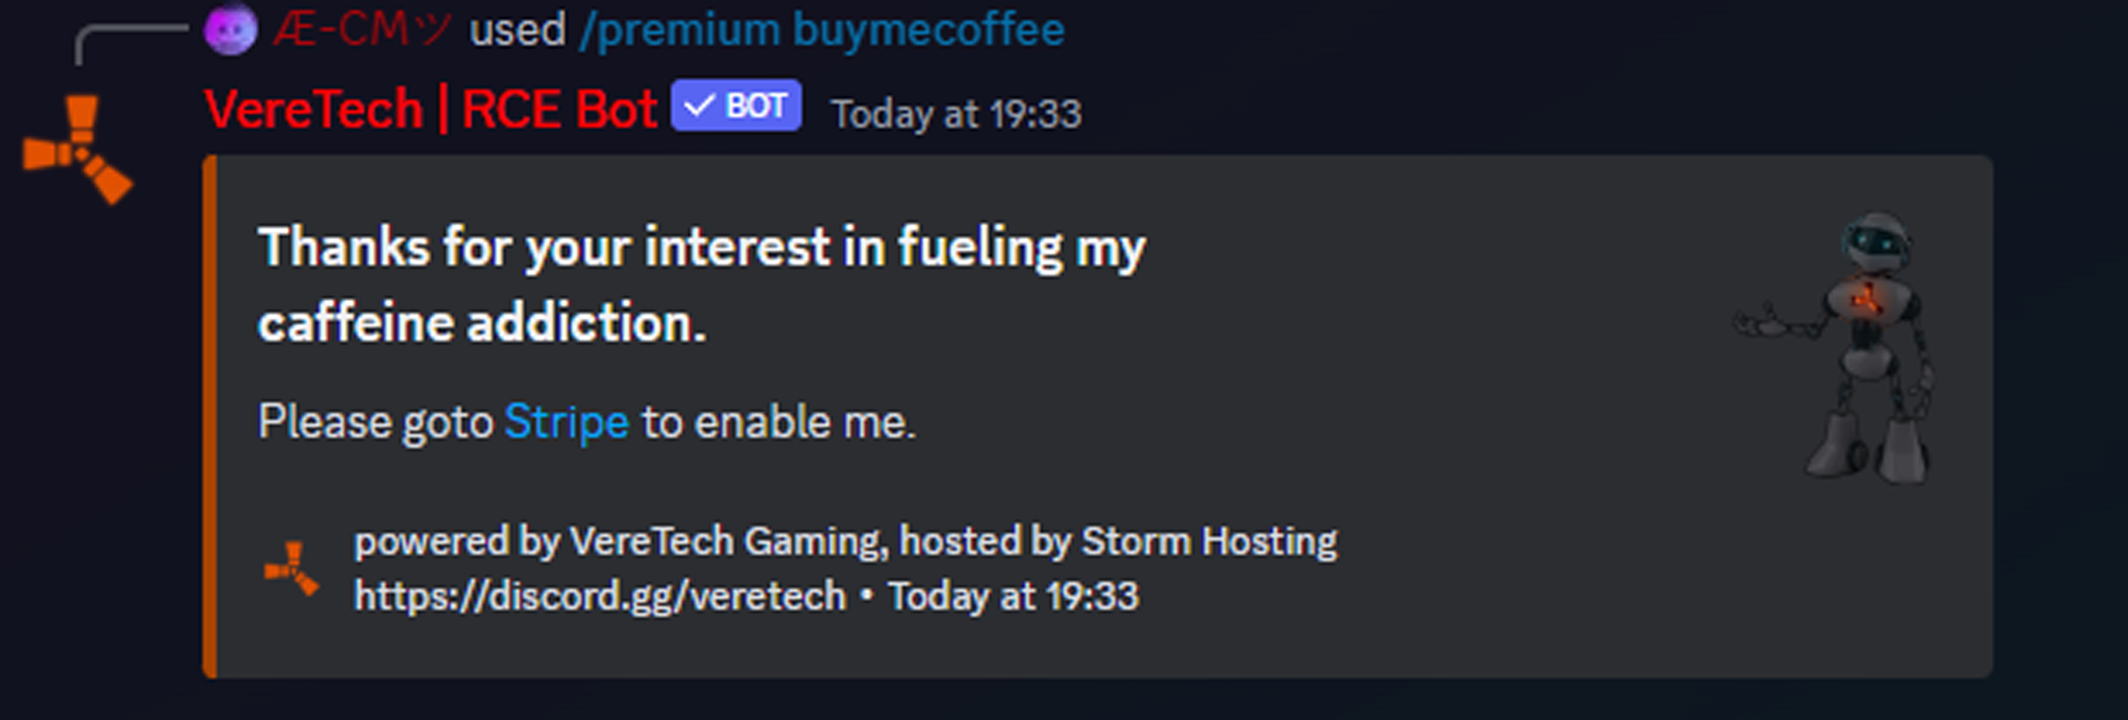
Deleting your GameServer
Should you no longer want or require the VereTech RCE bot, or are dissatisfied with it then removing it is a pretty simple process.
Please Note: If you are a PREMIUM user, you must cancel your premium first before following the steps below using the command /premium cancel, for more information on this please click here
Using the command /gs delete you can remove the GameServer at the click of a button below you will see the command as it appears on screen;
You will be greeted with the drop down showing all of your connected servers, please select as appropriate to delete the server, if you have multiple then you will need to repeat this process.
Once you have done the above steps, now simply “Kick” the bot from your Discord
Finally please remember to head over to GPortal at https://www.g-portal.com to remove the VereTech bot from the permissions of your GPortal Gameserver.
Discord Configuration
A brief description in how to set up Discord and the necessary permissions to seamlessly run the bot.
Discord Bot Permissions
Congratulations! Now that you have successfully connected the bot, lets get down to the Discord configuration...
Setting a Role
To start with we need to add some permissions to the BOT - I recommend creating a Role solely for the VereTech bot so that it only receives the permissions it requires to get its job done. To do this, head over to server Settings and then select the tab "Roles"
As you can see to the right of the image we have a "Create Role" button, please click this so that we can start to configure the role, you may name it and color it as you please, for the purpose of this documentation we have named it "VereTech Killfeed". Following that you will see a tab named permissions, slightly off to the right as shown in the image below;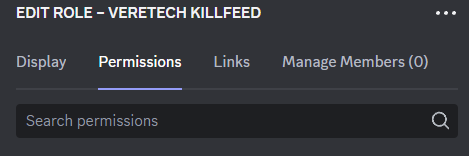
From here we need to turn on some of the sliders in order to allow the bot the permissions it requires to complete its tasks, these are;
Required Permissions
Text Channel Permissions:
View Messages - ![]()
Send Messages - ![]()
Embed Links - ![]()
Manage Nicknames - ![]()
Manage Roles - ![]()
Mention @everyone, @here and All Roles ![]()
Voice Channel Permissions:
Connect - ![]()
Set Voice Channel Status - ![]()
Please also ensure that the Bot role is higher than any player roles, as this is a hierarchy thing with Discord.
Now all that is left to do is hit "Save Changes" and apply the role to the "VereTech RCE Bot"
Configuring PvP Feeds
Creating the PvP Channel
Now that the bot is ready to go we can go ahead and create our first channel in our discord - We personally recommend creating a "Category" named "Killfeed" first as you can set the permissions for the category and the channels inside that category will sync the permissions but this isn't completely necessary.
To create the channel please use the "+" symbol in your channel list and name the channel whatever you would like it to be called, for the purpose of this documentation, we are going to call it #pvp-feed
Setting the Channel Permissions
Once the channel is set we need to apply some permissions to it, here are what we recommend, again, it is entirely your choice, but we like to try and keep the channel clean.
@everyone
View Channel ![]()
Add Reactions ![]()
Read Message History ![]()
Add your custom bot Role also and don't edit any permissions, the role permissions will override anything it needs.
Entering the Command
From here we can click save and head into the channel where we need to launch the following command; /feeds config pvp
Below is an image where you will see the options, lets go through them, 
- gameserver - Please select your GameServer from the drop down provided
- in-game - Yes or No, would you like the PvP feeds to print in-game
- in-discord - Yes or No, would you like the PvP feeds to print in-Discord (They will print in the channel that you launched the command, hopefully you've done it in the #pvp-feed channel.
Once you have selected your parameters, hit enter and you will be shown a success message to tell you that the page has been registered and will start to print kills in the coming moments. These are being batched so you can expect to see results as follows if you have plenty of kills in quick succession with live timestamps;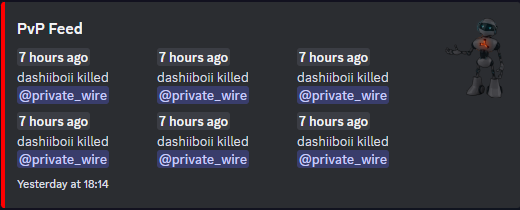
Customizing the Feed
The feeds are fully customizable by using the command /feeds game add for in-game custom feeds or /feeds discord add for custom Discord feeds. Both methods are pretty similar in terms of setup. Below is the response you can expect when launching these commands;
You will need to select your GameServer which you wish to edit and then the "type".
The type holds quite an extensive list which exceeds the 25 limit on the drop down menu, so to find the PvP option we need to type the word "pvp" into the "type" box, we will then see the option for PvP, once we click it and send the command we will be greeted with the image shown below;
Once we have this message box pop up we need to be very precise on what we enter into this field, we will need to use "Placeholders" to print the correct information, all information on customizing text can be found by clicking here.
Configuring PvE Feeds
Creating the PvE Channel
Now that the PvP feeds are ready to go we can go ahead and create our next channel in our discord -
To create the channel please use the "+" symbol again in your channel list and name the channel whatever you would like it to be called, for the purpose of this documentation, we are going to call it #pve-feed
Setting the Channel Permissions
Once the channel is set we need to apply some permissions to it, here are what we recommend, again, it is entirely your choice, but we like to try and keep the channel clean.
@everyone
View Channel ![]()
Add Reactions ![]()
Read Message History ![]()
Add your custom bot Role also and don't edit any permissions, the role permissions will override anything it needs.
Entering the Command
From here we can click save and head into the channel where we need to launch the following command; /feeds config pve
Below is an image where you will see the options, lets go through them, 
- gameserver - Please select your GameServer from the drop down provided
- in-game - Yes or No, would you like the PvE feeds to print in-game
- in-discord - Yes or No, would you like the PvE feeds to print in-Discord (They will print in the channel that you launched the command, hopefully you've done it in the #pve-feed channel.
- show-scientists - Yes or No, would you like the scientist kills to be a part of your PvE feeds
Once you have selected your parameters, hit enter and you will be shown a success message to tell you that the page has been registered and will start to print PvE kiils in the coming moments. These are being batched so you can expect to see results as follows if you have plenty of kills in quick succession with live timestamps;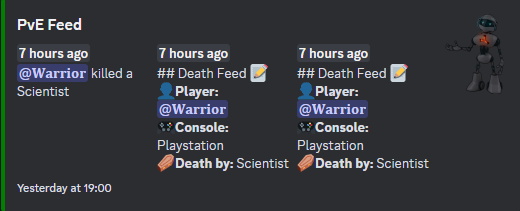
Customizing the Feed
The feeds are fully customizable by using the command /feeds game add for in-game custom feeds or /feeds discord add for custom Discord feeds. Both methods are pretty similar in terms of setup. Below is the response you can expect when launching these commands;
You will need to select your GameServer which you wish to edit and then the "type".
The type holds quite an extensive list which exceeds the 25 limit on the drop down menu, so to find the PvE options we need to type the word "pve" into the "type" box, we will then see the options for PvE, there are quite a few and you have the ability to customize them all one at a time, once we click one and send the command we will be greeted with the image shown below;
Once we have this message box pop up we need to be very precise on what we enter into this field, we will need to use "Placeholders" to print the correct information, all information on customizing text can be found by clicking here.
Configuring Event Feeds
Creating the Events Channel
Now that the PvP and PvE feeds are ready to go we can go ahead and create our final channel in our discord for the feeds -
To create the channel please use the "+" symbol again in your channel list and name the channel whatever you would like it to be called, for the purpose of this documentation, we are going to call it #event-feed
Setting the Channel Permissions
Once the channel is set we need to apply some permissions to it, here are what we recommend, again, it is entirely your choice, but we like to try and keep the channel clean.
@everyone
View Channel ![]()
Add Reactions ![]()
Read Message History ![]()
Add your custom bot Role also and don't edit any permissions, the role permissions will override anything it needs.
Entering the Command
From here we can click save and head into the channel where we need to launch the following command; /feeds config event
Below is an image where you will see the options, lets go through them, 
- gameserver - Please select your GameServer from the drop down provided
- in-game - Yes or No, would you like the Event feeds to print in-game
- in-discord - Yes or No, would you like the Event feeds to print in-Discord (They will print in the channel that you launched the command, hopefully you've done it in the #event-feed channel.
Once you have selected your parameters, hit enter and you will be shown a success message to tell you that the page has been registered and will start to print triggering events in the coming moments. Please note: These will only print natural events, using the command call.heli will not print on screen or in-Discord.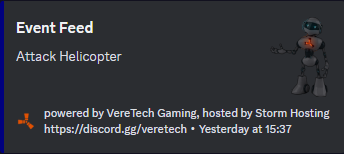
Customizing the Feed
The feeds are fully customizable by using the command /feeds game add for in-game custom feeds or /feeds discord add for custom Discord feeds. Both methods are pretty similar in terms of setup. Below is the response you can expect when launching these commands;
You will need to select your GameServer which you wish to edit and then the "type".
The type holds quite an extensive list which exceeds the 25 limit on the drop down menu, so to find the Event options we need to type the word "Event" into the "type" box, we will then see the 4 options for Events, once we click one and send the command we will be greeted with the image shown below;
We dont need to use the "Placeholders" like we did on the PvP and PvE events, so the event is completely down to your imagination.
Configuring Player Online Feeds
Creating the Online Feed Channel
Now that the PvP and PvE and Events feeds are ready to go we can go ahead and create our final channel in our discord for the online player feeds -
To create the channel please use the "+" symbol again in your channel list and name the channel whatever you would like it to be called, for the purpose of this documentation, we are going to call it #Online-Players-Feeds
Setting the Channel Permissions
Once the channel is set we need to apply some permissions to it, here are what we recommend, again, it is entirely your choice, but we like to try and keep the channel clean.
@everyone
View Channel ![]()
Add Reactions ![]()
Read Message History ![]()
Add your custom bot Role also and don't edit any permissions, the role permissions will override anything it needs.
Entering the Command
From here we can click save and head into the channel where we need to launch the following command; /feeds config online
Below is an image where you will see the options, lets go through them,

- gameserver - Please select your GameServer from the drop down provided
- in-game - Yes or No, would you like the Online Player feeds to print in-game
- in-discord - Yes or No, would you like the Online Player feeds to print in-Discord (They will print in the channel that you launched the command, hopefully you've done it in the #Online-Player-Feeds channel.
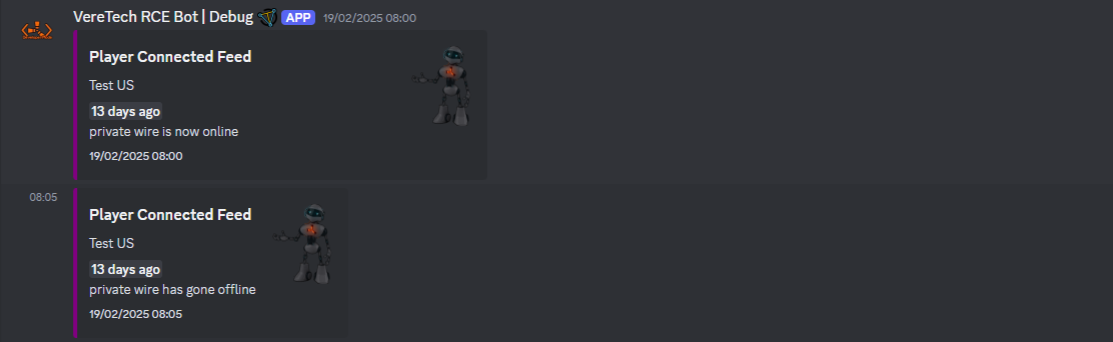
Once you have selected your parameters, hit enter and you will be shown a success message to tell you that the page has been registered and will start to print online player feeds as embeds.
Customizing the Feed
The feeds are fully customizable by using the command /feeds game add for in-game custom feeds or /feeds discord add for custom Discord feeds. Both methods are pretty similar in terms of setup. Below is the response you can expect when launching these commands;
You will need to select your GameServer which you wish to edit and then the "type".
The type holds quite an extensive list which exceeds the 25 limit on the drop down menu, so to find the Event options we need to type the word "Event" into the "type" box, we will then see the 4 options for Events, once we click one and send the command we will be greeted with the image shown below;
With the release of the Online Player Feeds, we do see the introduction of 2 new Placeholders, as shown below;
|
{PlayerCurrentOnlineTime} |
Shows the time the player has actively spent on the server in their latest single session. |
WW:DD / DD:HH / HH:MM Limited to 2 units of measurements, once hours has been exceeded, minutes will no longer show. |
| {PlayerServerOnlineTime} | Shows the time the player has actively spent on the server in their history of playing the server. |
MM:DD / WW:DD / DD:HH / HH:MM
Limited to 2 units of measurements, once hours has been exceeded, minutes will no longer show. |
All of the Placeholders for PvE are also available for use within this feed type - Please click here to head over to the table for that information.
Configuring Admin Channel
Welcome to the Admin Channel configuration. The admin channel is designed to print a live feed from in-game spawns. This enables you to keep an eye on your Admins to ensure there are no admin abusers within your team. To set this up we will require a dedicated channel within your Discord.
Creating your Channel
Before we get started you will need to create a dedicated Discord channel which will require the permissions in line with the permissions you give your admin team if you want them to view it - If you'd rather keep this on an owner bases then you will just need to adjust the permissions for the VereTech RCE Bot only,
To create the channel , simply select which Category within Discord that you want it to be listed under and use the "+" symbol to create the channel.
You may name this whatever you wish, but its recommended that you take the time it configuring your permissions to exactly how you want them.
Bot Permissions
Within the new "Admin Channel" you will either "Sync" your permissions (Please Note: It will sync permissions of all roles in that category) or set dedicated permissions. Please ensure for full function that you select the following permissions for the VereTech RCE Bot;
View Channel ![]()
Send Messages ![]()
Embed Links ![]()
Admin/Mod Permissions
Should you wish for your Admin/Mod team to also view this channel then we highly recommend that you set separate permissions within this channel to avoid messages being deleted should someone spawn item in-game. Although you are free to set this channel how you please, our recommendations for this channel for anyone besides the server owner and the VereTech RCE Bot are;
View Channel![]()
Read Message History ![]()
Setting the Admin Channel
Now that we have completed the permissions we can go ahead and set the channel, to do this we need to use the command /gs adminchannel within the newly set channel , you can then select the GameServer on which you wish to use and have the option to select a channel, should you not choose a channel then it will disable the admin channel feed, so be sure to select the channel that you just created; Please see the example below -

Depending on its success you will receive one of the following messages;
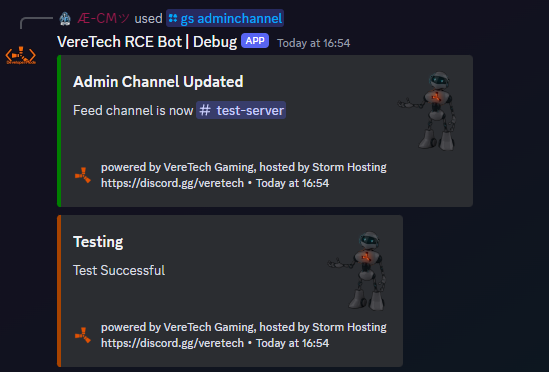
This indicates a successful allocation of the Admin Feed and will now start to record and send embeds within this channel.
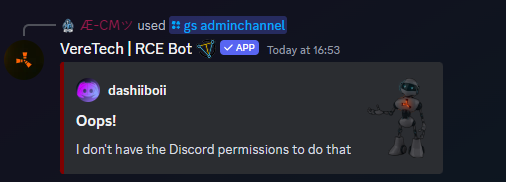
This response will require you to revisit your permissions set for this page.
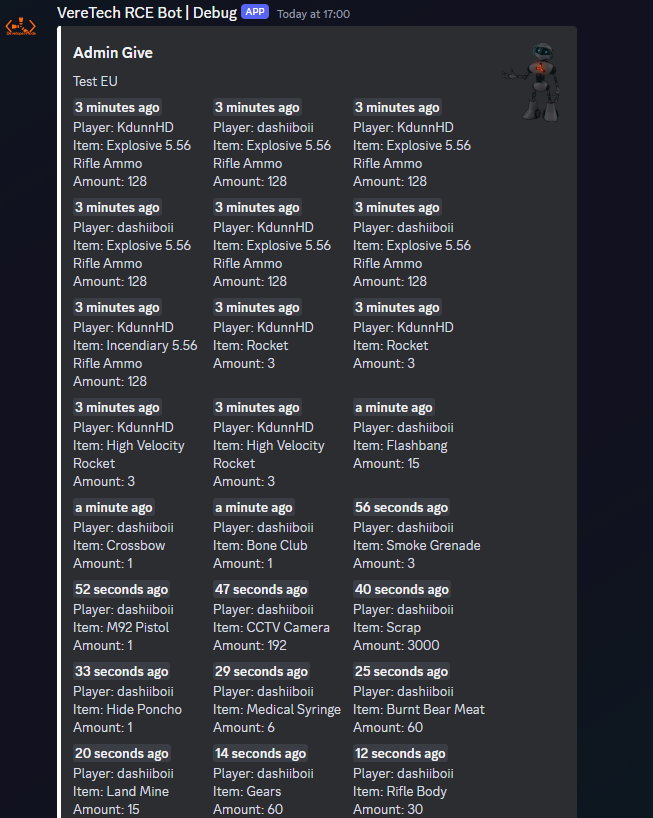
Once a successful connection has been made you will start to receive your feeds in you nominated channel - This will be in 5 minute intervals or once a list of 25 has been populated, whichever comes first. Please see below for the example of the Admin Channel feed;
Changing Nominated Channel
Should you wish to have a different channel show these feeds then all you need to do is repeat the above process with you new channel (Please Note: Admin Feeds will only show on ONE channel)
Disabling the Admin Channel
To disable the "Admin Channel" you have 2 options - You can either delete the channel and it will stop recording and sending the messages, or you can again run the command /gs adminchannel This time when you select the Server, do not select a channel and hit send. This will now disable your Admin Channel Feed
Customizing Feeds
Introduction
VereTech RCE Bot provides the ability to customize both in-game and in-discord feeds to suit your style of server.
We have already created some default messages to get you going, and as soon as you add your first custom message for a "Feed Type", the default message will be disabled.
You can create up-to 25 different messages for the same "Feed Type", and 1 will randomly get chosen to display.
Adding a new feed
To add a new feed you will have to do a little studying on the table below, select your placeholders, learn how to lay them out and have some fun with it, should you mess it up, just delete it and try again.
To add you new feeds you will have to use one of the following commands, depending on which feeds you want to change;
/feeds game add - This will create feeds to show in game.
/feeds discord add - This will create feeds to show in Discord.
Please see below for examples;


For this example we are going to follow the /feeds game add, however the rules and method is exactly the same. Once you have selected where you want to edit them you will be greeted with "type".
Please Note: Discord only allows a certain number to show in the list, you wont see "PvP" but it is there, you will need to type "PvP" and you will see the option appears.
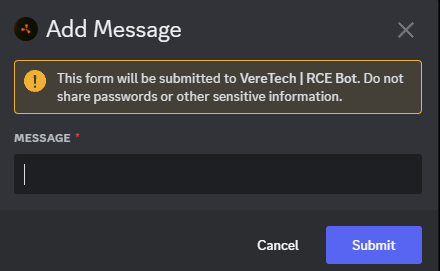
Once you have selected the type, you will then need to hit send, upon sending you will then be greeted with a pop-up on screen names "Add Message", this is where you need to type out your custom feed, I highly recommend that you use a text editor for this part so you can see it all before entering; Notepad, Notepad ++, Word, ect. Please see below for the example of the text box;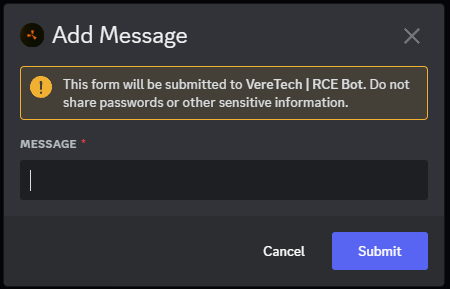
You will then need to enter you entire code, following the parameters set out below in the table, these are super sensitive so please try to use copy/paste where possible to avoid mistakes.
Once you have entered your feed you then need to hit submit and the bot will respond with the feed code in its entirety, please don't be alarmed, it will show you it in code format, providing the code is correct the game will then show its true form. You may need to play with this a little to get it exactly how you wish to see it.
Listing your custom feeds
Once we have our feeds, it is also a great idea to be able to see them in a list as you may have more than one feed per type, the bot will select one at random for that particular type every time you register a kill/death. To see out feeds we will need the command;
/feeds game list
/feeds discord list
depending on which one you choose will show either the custom game feeds or custom discord feeds, you also have the option for "type" should you only wish to see a certain type, if you leave this blank, then all types will be displayed, please see below for the example;

Once you select your server, and a type if you choose to do so, hit send and you will be greeted with an interactive embed of all of your current custom feeds for that gameserver or type;
Deleting your custom feeds
If you've made a mistake, wish to change a feed or just simply want to remove one then do so using one of the following commands;
/feeds game delete
/feeds discord delete
Doing this will enable you to select your server and type, please see below;

Once you select your parameters, hit send and you will again see an interactive embed showing all of you current feeds in a drop down format, please select the feed you wish to delete from the dropdown.
Tips 'n Tricks
| Where? | Usage | Result |
| Game Feeds | <b>Bold</b> | Bold |
| Game Feeds | <i>Italic</i> | Italic |
| Game Feeds | New<br>line |
New line |
| Discord Feeds | **Bold** |
Bold |
| Discord Feeds | *Italics* |
Italics |
| Discord Feeds | ***bold italics*** |
Bold Italics |
| Discord Feeds | __underline__ |
Underline |
| Discord Feeds | __*underline italics*__ |
Underline italics |
| Discord Feeds | __**underline bold**__ |
Underline bold |
| Discord Feeds | __***underline bold italics***__ |
underline bold italics |
| Discord Feeds | ~~Strikethrough~~ |
|
Default PvP Messages
These are the default messages for PvP Feed Types.
|
Feed Type |
Default |
|
PvP: Player Killed Player |
{KillerPlayerName} killed {VictimPlayerName} |
Default Event Messages
These are the default messages for Event Feed Types.
|
Feed Type |
Default |
| EVENT: Heli | Attack Helicopter |
| EVENT: Cargo Ship | Cargo Ship |
| EVENT: Chinook | Chinook |
| EVENT: Airdrop | Airdrop |
Default PvE Messages
These are the default messages for PvE Feed Types.
|
Feed Type |
Default |
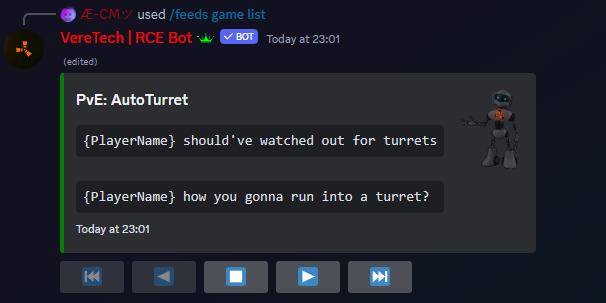
|
PvE: AutoTurret |
{PlayerName} was spotted by an auto turret |
|
PvE: Bandit Sentry |
{PlayerName} didn't obey the bandits rules |
|
PvE: Bear |
{PlayerName} couldn't out run a bear |
|
PvE: Bled Out |
{PlayerName} gave up |
|
PvE: Bleeding |
{PlayerName} bled out |
|
PvE: Boar |
{PlayerName} was mowed down by a boar |
|
PvE: Chinook |
{PlayerName} was gunned down by chinook |
|
PvE: Code Lock |
{PlayerName} was electricuted by a code lock |
|
PvE: Cold |
{PlayerName} turned into an ice statue |
|
PvE: Drowned |
{PlayerName} ran out of oxygen |
|
PvE: Fall |
{PlayerName} could never get the hang of gravity |
|
PvE: Heat |
{PlayerName} was burnt to a crisp! |
|
PvE: Heli |
{PlayerName} was gunned down by heli |
|
PvE: Suicide |
{PlayerName} wanted to try their luck with a new life |
|
PvE: Scientist |
{PlayerName} died to a Scientist |
|
PvE: Player Killed Scientist |
{PlayerName} killed a Scientist |
|
PvE: Radiation |
{PlayerName}'s geiger counter needs repairing |
|
PvE: Wolf |
{PlayerName} was chewed alive by a wolf |
|
PvE: Metal Barricade |
{PlayerName} got stuck in a metal barricade |
|
PvE: Wood Barricade |
{PlayerName} got stuck in a wood barricade |
|
PvE: Wood Wire Barricade |
{PlayerName} got stuck in a wired wood barricade |
|
PvE: Bear Trap |
{PlayerName} was caught in a Bear Trap |
|
PvE: Cactus |
Cactus's are no joke {PlayerName} |
|
PvE: Campfire |
Roasted {PlayerName} like a marshmellow |
|
PvE: CargoShip |
{PlayerName} was ran over by Cargo Ship |
|
PvE: ElevatorLift |
{PlayerName} doesn't know how to operate an elevator |
|
PvE: Fireball PvE: Oil Fireball Small PvE: Fireball Small |
{PlayerName} died to a fireball |
|
PvE: Flameturret Deployed PvE: FlameTurret Fireball |
{PlayerName} got trapped by a flame turret |
|
PvE: High External Stone Gate PvE: High External Wooden Gate PvE: External Stone Wall PvE: High External Wooden Wall |
{PlayerName} died climbing into someones compound |
|
PvE: Shotgun Trap |
{PlayerName} was gunned down by a shotgun trap |
|
PvE: Landmine |
{PlayerName} stepped on a landmine |
|
PvE: Napalm |
{PlayerName} showered in Napalm |
|
PvE: Floor Spikes |
{PlayerName} stepped on some spikes |
|
PvE: Tesla Coil |
{PlayerName} was shocked by a tesla coil |
|
PvE: Hobobarrel |
{PlayerName} died homeless |
|
PvE: Shark |
{PlayerName} took a bite out of the ocean — and it bit back |
|
PvE: Rowboat |
{PlayerName} died to a row boat |
|
PvE: Entity: NO NOT USE |
DO NOT USE: It doesn't do anything. |
Community Created Feeds
Our Community
At VereTech we have established a very large size client base with some fantastic members who are kind enough to share their custom feeds and designs so that we can all either use them or be inspired by them, This page will be updated regularly with some of the best ones;
Shared in-game Feeds
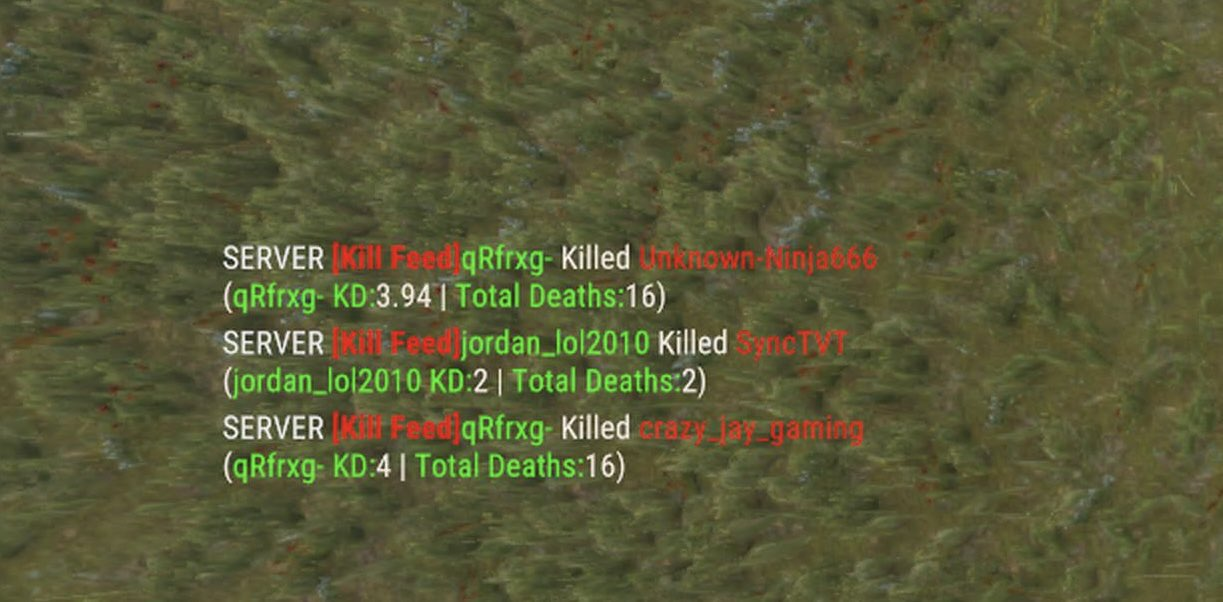
<color=#ff0000><b>[Kill Feed]</b></color><color=#20fc03>{KillerPlayerName}</color> Killed <color=#ff0000>{VictimPlayerName}</color><br>(<color=#20fc03>{KillerPlayerName}</color> <color=#20fc03>KD:</color>{KillerPvPKD} | <color=#20fc03>Total Deaths:</color>{KillerPvPDeaths})================================================================================
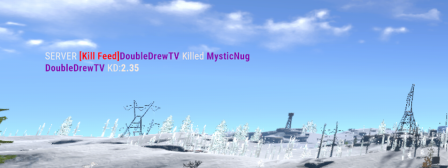
<color=#ff0000><b>[Kill Feed]</b></color><color=#8904B1><b>{KillerPlayerName}</b></color> Killed <color=#8904B1><b>{VictimPlayerName}</b></color><br><color=#8904B1><b>{KillerPlayerName}</b></color> <color=#8904B1></color>KD:<b>{KillerPvPKD}</b>================================================================================
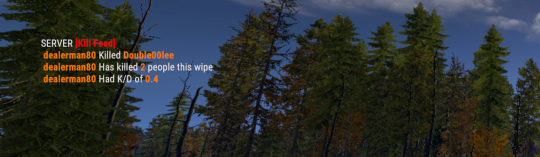
<color=#ff0000><b>[Kill Feed]</b></color><br><color=#FF7900><b>{KillerPlayerName}</b></color> Killed <color=#FF7900><b>{VictimPlayerName}</b></color><br> <color=#FF7900><b>{KillerPlayerName}</b></color> Has killed <color=#FF7900></b></color><color=#FF7900><b>{KillerPvPKills}</b></color> people this wipe<br><color=#FF7900><b>{KillerPlayerName}</b></color> Had K/D of<color=#FF7900><b> {KillerPvPKD}</b></color>================================================================================
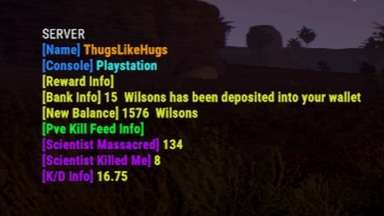
<br><color=#2a84fa><b>[Name]</b></color><color=#fc9d03><b> {PlayerName}</b></color><br><color=#2a84fa><b>[Console]</b></color><color=#28edea><b> {GameConsole}</b></color><br><color=#dded28><b>[Reward Info]<br><color=#dded28><b>[Bank Info]</b></color> <b>{Reward} {Currency}</b> <b>has been deposited into your wallet</b><br><color=#dded28><b>[New Balance]</b></color><b> {Wallet} {Currency}</b><br><color=#03fc35><b>[Pve Kill Feed Info]</b></color><br><color=#b103fc><b>[Scientist Massacred]</b></color><b> {PvEKills}</b><br><color=#b103fc><b>[Scientist Killed Me]</b></color> <b>{PvEDeaths}</b><color=#b103fc><b><br>[K/D Info]</b></color> <b>{PvEKD}</b>================================================================================
Shared in-Discord Feeds
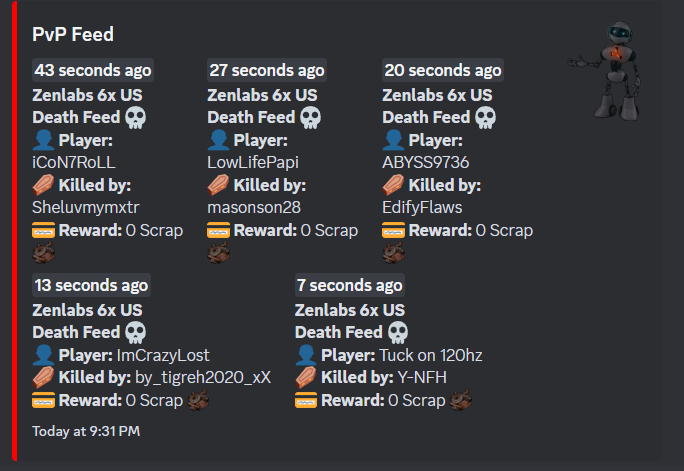
**Death Feed :skull:**
:bust_in_silhouette: **Player:** {VictimPlayerName}
:coffin: **Killed by:** {KillerPlayerName}
:credit_card: **Reward:** {Reward} {Currency}================================================================================
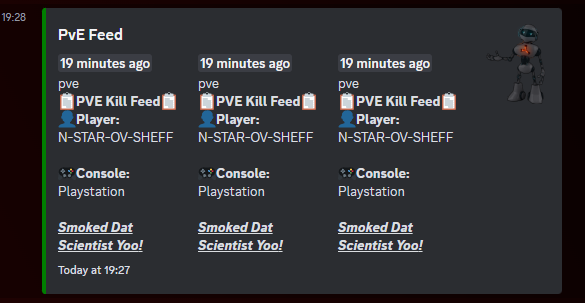
📋PVE Kill Feed📋
👤Player:
{PlayerName}
🎮Console:
{GameConsole}
Smoked Dat Scientist Yoo!
Online Players Voice Channel
Welcome to the "Online Players Voice Channel". The purpose of this channel is to be viewable to everyone and it will update in 5 minute intervals and it will update each time with the current pop on the server. Please follow the instructions below to get the most out of this feature.
Creating the Channel
Before we start configuration we need to create the voice channel for our bot to change. For this simply select one of your categories in your Discord and select the "+" symbol. Be sure to select "Voice" and at this point you can name it whatever you want.
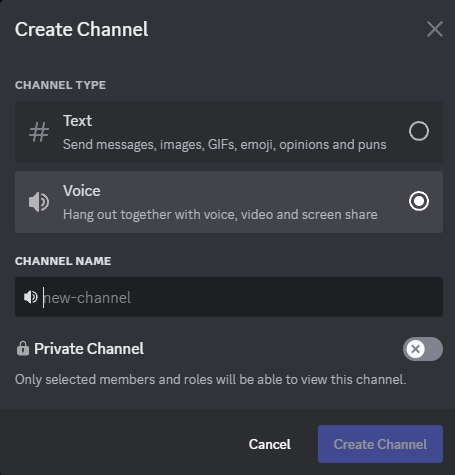
When it comes to the permissions, the minimum you will need is the following;
@everyone
View Channel ✓
VereTech RCE Bot
View Channel ✓
Manage Channel ✓
Set Voice Channel Status ✓
Click create channel and you are done.
Setting your Channel Preferences
Now that you have the channel available we can go ahead and apply this channel to the bot so it knows which channel to link to this feature. Head into any Admin channel and use the command /gs onlinechannel. You will see you have 1 mandatory and 2 optional parameters.
The "Gameserver" is mandatory - So please select your gameserver from the list.
"voice-channel", here we can select the voice channel we have set for our online players channel. If you leave this blank and run the command, then the feature will disable.
"display" - Whatever you type in this section will be how the channel is renamed every 5 minutes. Placeholders are available within this, so lets see a few examples:
- "{ServerInfoPlayers} / {ServerInfoMaxPlayers} Online" - If your server has 66 players online, and the max pop of your server is 100, then this would show as "66 / 100 Online"
- "{ServerInfoPlayers} / {ServerInfoMaxPlayers} Online, {ServerInfoQueued} Queued, {ServerInfoJoining} Joining" - If your server has 1 players in queue and 3 joining, then this would show as "66 / 100 Online, 1 Queued, 3 Joining"
NOTE: Discord channels names have a character limit of 100
Changing your Channel or Preferences
Should you require to change the channel in which you want this to show, or would like to change the way it displays, then you can do this by repeating the above step and setting it again however you wish to change it.
Removing your Online Players Channel
Should you no longer wish to use this feature, then all you have to do is delete the voice channel from your Discord. This will completely wipe the channel and any settings you have made regarding this feature.
Troubleshooting
Sometimes the player online channel will disable itself, you can check this with /gs test and see if the player online channel is still there or not.
It will disable itself if:
- The channel name character limit is hit (shorten the "display").
- It tried to rename your channel and was hit with a "Permission Denied" from discord (check bot has sufficient permission to rename channel).
Sometimes the channel just never updates, currently there is a bug where if your server name has a backslash in it, then it never updates. Please check and remove any backslashes "\" from your servername.
Syncing Auth Levels with Roles and Resetting Auth Levels
Our innovative sync system allows you to perform Discord role upgrades/downgrades with will be automatically implemented in game, allowing you to seamlessly implement any changes in game by a simple change in role in Discord. Alternatively you can also do this in the opposite direction too! Allowing you to perform the exact same action in the other Direction, allowing Discord role upgrades following a new in-game permission granted/revoked.
Lets get in to how to get this started!
Synchronizing Roles
To start the process of the initial setup you will need to ensure you have the Discord roles in place. You will need to ensure you have a role for the following; VIPs, Moderators, Admins & Owners.
To start the initial sync you will need to choose in which way you would like this to be performed, Sync Game -> Discord, Sync Discord -> Game or Complete Sync. Fist we will cover Sync Game -> Discord.
Sync Game to Discord
The purpose of this sync is that any in game role changes from Game will have effect in Discord by removing their role, however, it will not produce the other way, so, re-adding the role in Discord will have no in-game effect.
To perform this type of sync we need to use the command /gs sync-roles. Following this command we will have the following options;
gameserver: - Please select the gameserver that you want this to take effect on.
to-discord: - This is asking if you want in-game actions to sync and remove Discord roles - For this method we want to choose YES.
to-game: - This is asking if you want to have Discord actions, removing roles, to have effect in game - For this method we want to choose NO.
vip: - Please select the Discord role you want the bot to read for VIP.
mod: - Please select the Discord role you want the bot to read for Moderators.
admin: - Please select the Discord role you want the bot to read for Administrators.
owner: - Please select the Discord role you want the bot to read for Owners.

Upon sending this command the bot will now begin to synchronize You in-Game VIPs by applying the role that you have chosen in Discord.
Sync Discord to Game
The purpose of this sync is that any in game role changes from Game will have effect in Discord by removing their role, however, it will not produce the other way, so, re-adding the role in Discord will have no in-game effect.
To perform this type of sync we need to use the command /gs sync-roles. Following this command we will have the following options;
gameserver: - Please select the gameserver that you want this to take effect on.
to-discord: - This is asking if you want in-game actions to sync and remove Discord roles - For this method we want to choose NO.
to-game: - This is asking if you want to have Discord actions, removing roles, to have effect in game - For this method we want to choose YES.
vip: - Please select the Discord role you want the bot to read for VIP.
mod: - Please select the Discord role you want the bot to read for Moderators.
admin: - Please select the Discord role you want the bot to read for Administrators.
owner: - Please select the Discord role you want the bot to read for Owners.

Upon sending this command the bot will now begin to synchronize your Discord roles by applying the permission level you choose in Game.
Sync Discord & Game Concurrently
The purpose of this sync is that any in game role changes from Game will have effect in Discord by removing their role, however, it will not produce the other way, so, re-adding the role in Discord will have no in-game effect.
To perform this type of sync we need to use the command /gs sync-roles. Following this command we will have the following options;
gameserver: - Please select the gameserver that you want this to take effect on.
to-discord: - This is asking if you want in-game actions to sync and remove Discord roles - For this method we want to choose YES.
to-game: - This is asking if you want to have Discord actions, removing roles, to have effect in game - For this method we want to choose YES.
vip: - Please select the Discord role you want the bot to read for VIP.
mod: - Please select the Discord role you want the bot to read for Moderators.
admin: - Please select the Discord role you want the bot to read for Administrators.
owner: - Please select the Discord role you want the bot to read for Owners.

Upon sending this command the bot will now begin to synchronize your Discord roles and In-Game roles so any changes made in either direction will be synchronized.
PLEASE NOTE: On all above options, any existing permissions or Discord roles will be ignored as a rule, this will only work from the moment the commands are run. Future updates will change this.
We are planning on an update that will allow previous changes to be synchronized, effectively forcing a full sync and also this will include a re-sync option for changes that may have been missed following a server disconnection.
Wiping Auth Levels from G-Portal
We have now introduced a way to wipe all or selected auth levels from Discord using a single command. This command can remove all auth levels (Be aware this will also remove your own), it can wipe moderators only, Admin only, VIP only or Owner only along with a complete wipe.
To do this use the command /gs wipe-auth and you will be greeted with the following options;
gameserver - Please select which gameserver you wish to perform this wipe on - If you don't select one, it will perform the wipe on all servers within that Discord Guild
auth-group - Please select which auth-group you wish to wipe from Owners, Admins, Moderators and VIPs, leaving this blank will again wipe all auth levels.
Please see the example below;

Once you have performed the command, you will then get a confirmation question; "Are you sure?", once happy, select YES;

Finally, once the thinking is done, you will see a success message confirming the actions have been complete;

Player Management
Introduction into Player Management
Welcome to the Player Management, through out this section of the guide we will talk everything from players linking to Discord, How you can recall that information and everything in between.
One of the most important parts of players joining your Discord is that they use the link command so that you can keep track of their progress, allows them to use in-game chat, allows players to use the economy system and much more. So without further ado, let's get into it!
Linking Discord to GamerTags/PSNs
Linking Players for Them
We understand that there may be players who are unsure or don't fully understand how to link their accounts, there may also be some who just refuse to do it. To help tackle this issue we have included a command so that you can do it for them! This saves them making a mistake or having to worry about getting it wrong. For this you will need the command /pl link. Using this command will allow you to choose their Discord Username and then input their credentials following the Username selection, please see the example below should you need it.

Unlinking from the Bot
Sometimes, players make a mistake, maybe they leave, choose not to be linked or just want to play without the Discord perks following a successful link. We have also enabled them to unlink to save the frustration. To do this is pretty simple, however, it can only be done by an administrator, not by general users in the Discord. To do this you need to use the command /pl unlink where you will have to simply select the players Discord Username and hit send. This will then unlink their connection from the bot, please see below for the example;

Discord/Console Aligning
When people link themselves to the Discord using the command /link, more often than not they have different usernames on Discord to what GamerTag or PSN name they feature on console. We have noticed that this has the ability to cause some confusion and have created ways to make them correspond, or, this can cause some uncertainty when wondering if a player has yet linked at all. Lets show you how we can remedy this.
Linked Role
The first method we can use when trying to sort those who are linked and who are not is the linked role method. Using this means that we will have to create a new role, for the purpose of this we are going to call the role "Linked". If you need more information on creating a role, please click here.
If you already know how to make roles or have now completed this step, lets get into how we apply this role automatically. Using the command /pl setlinkedrole we can set the role to automatically apply when players link. Using this command you will see that it then asks you to choose a role, clicking the text box will cause your roles to show in a drop-down menu, please select the role you want and then hit enter to confirm, please see below of the example;

Refreshing Linked Role after Enabling
If you decide to make use of the above feature and are now wondering if everyone needs to link again to set the role, then fear not! If you already have 40 people linked and one day decide you want to use the feature, once active simply run the command /pl refreshlinkedrole and hit enter, you will notice there are no options on this command, as soon as you send that message all linked players will now have their role in your discord adjusted to their your stated role for linked players. Please see below the command on screen;

Auto Change Nickname
Another great way to combat the "are they linked, what is their GamerTag/PSN" question is to set the bot to automatically update their username within your Discord.
Please Note: We are not messing with peoples Discord accounts, this is done using the "Nickname" feature which is a widely known and legitimate method to change others names in your Discord, this will not effect their name in other Discords.
The way this work is when your players link using the /link command, the bot will automatically read what they have entered for their GamerTag/PSN and apply this to them in the form of a "Nickname". This is an optional feature but one I personally really find useful. To do this, the command we need to use is /pl setplayernickname and select either YES or NO, Yes will enable the feature, No will disable it. (Disabled by default). Please see below for the example;

Refreshing Nicknames after Enabling
If you decide to make use of the above feature and are now wondering if everyone needs to link again to set the nickname, then fear not! If you already have 40 people linked and one day decide you want to use the feature, once active simply run the command /pl refreshplayernickname and hit enter, you will notice there are no options on this command, as soon as you send that message all linked players will now have their names in your discord adjusted to their linked PSN/GamerTag names. Please see below the command on screen;

Player information
Whilst using owning a server, having information on your players when you need it is one of the most powerful tools in staying in control at admin level, from checking reports to checking their economy history and balances there are 2 ways that we can check information on a player.
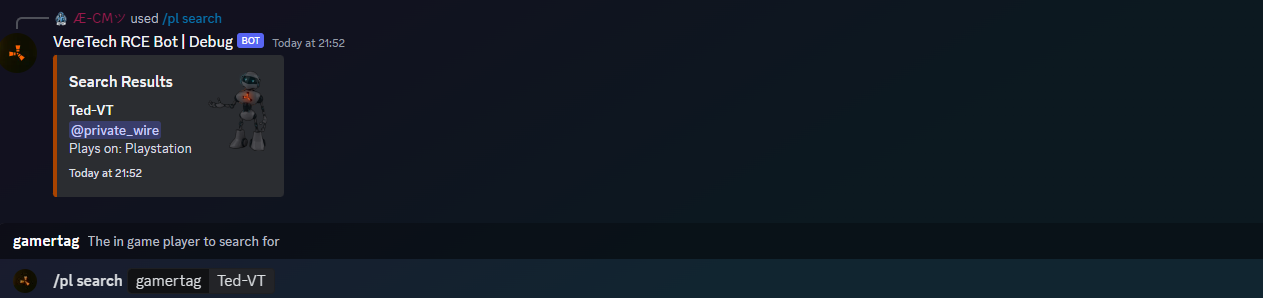
Using the Player Search Function
The first way to check information on your players is using the player search function, from this you will be required to enter their GamerTag/PSN to yield the results the bot has on that username. The most information it can give you is confirmation of the GamerTag/PSN you entered, if linked it will share with you their Discord Username and finally their console, weather it be Xbox or Playstation.
To use this feature we will need to use the command /pl search and enter the players in-game Username, hit enter and the bot will show you the information it has stored on that player, please see below for an example;
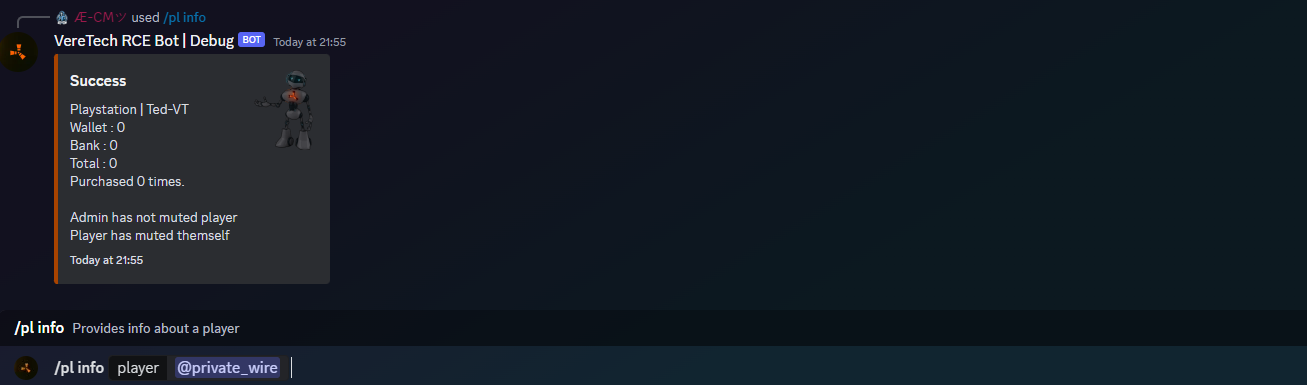
Getting Player Information
Another great way to check out your player base is using the command /pl info this will search their Discord Username instead of their GamerTag or PSN, it will be required however that they are linked to yield results. If they are linked you will see the following information;
Console Platform & GamerTag/PSN
Economy Wallet Balance
Economy Bank Balance
Total Economy Balance
Total Economy Purchases
Admin mute Yes/No
Player Mute Yes/No
We will cover the meaning of mute in the next chapter of this documentation, but for now please see below for the example when using this command;
Player Leaderboards
Player Leaderboards
Player leaderboards are a great way for you keep track of all of your players kill/death data. In this chapter we will go over the types of leaderboards we can call and also how to wipe them for those all important wipe days! These leaderboards are displayed as interactive embeds, showing up to 10 players per page.
PvP Leaderboards
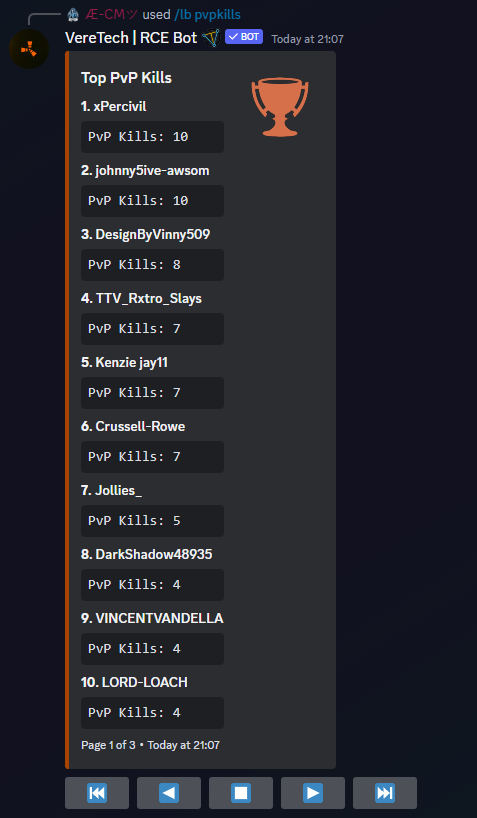
PvP Kills
Using the command /lb pvpkills we can call the leaderboard for the current top PvP players:-


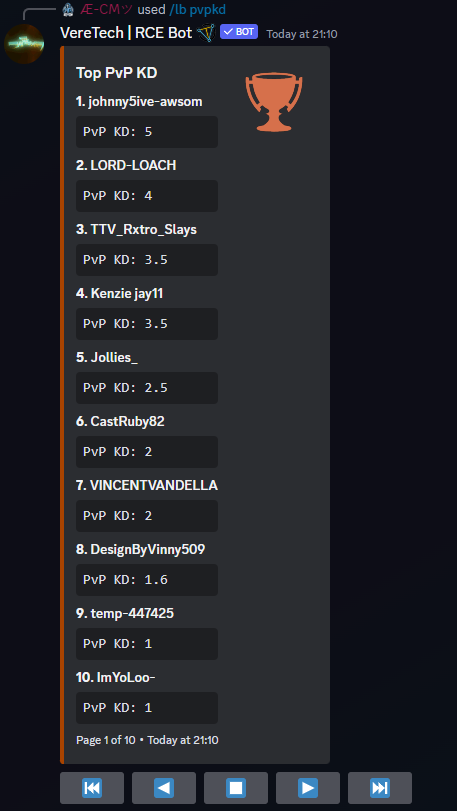
PvP KD

Using the command /lb pvpkd we can call the leaderboard for the highest K/D ratio across all PvP kills:-


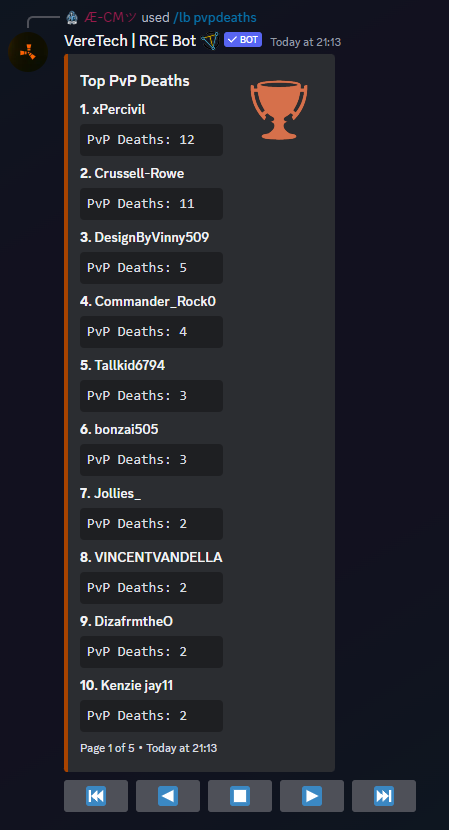
PvP Deaths

Using the command /lb pvpdeaths we can call the leaderboard for the highest deaths in PvP action:-


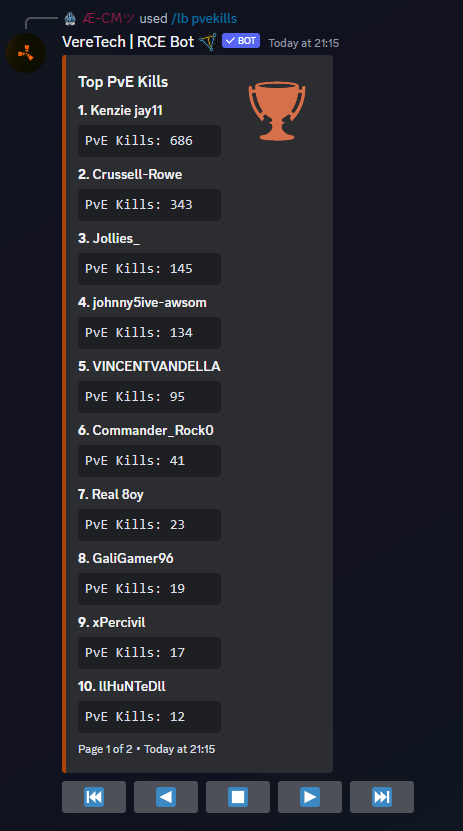
PvE Kills

Using the command /lb pvekills we can call the leaderboard for the highest PvE kills:-


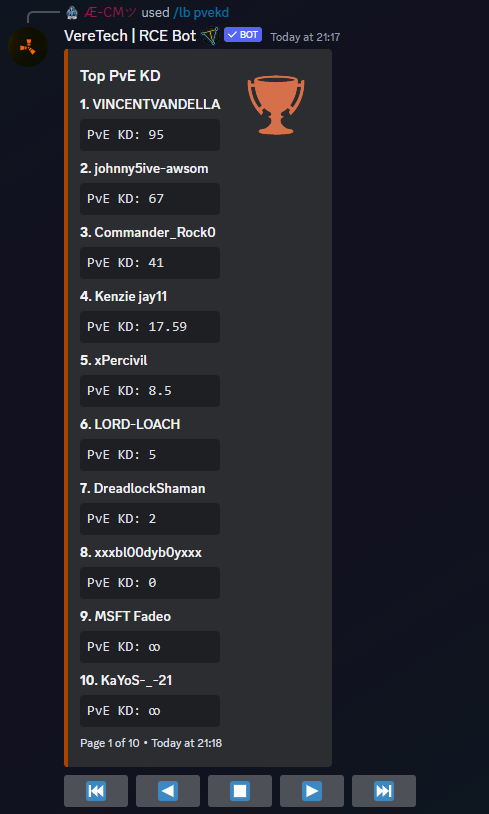
PvE KD

Using the command /lb pvekd we can call the leaderboard for the highest PvE KD ratios:-


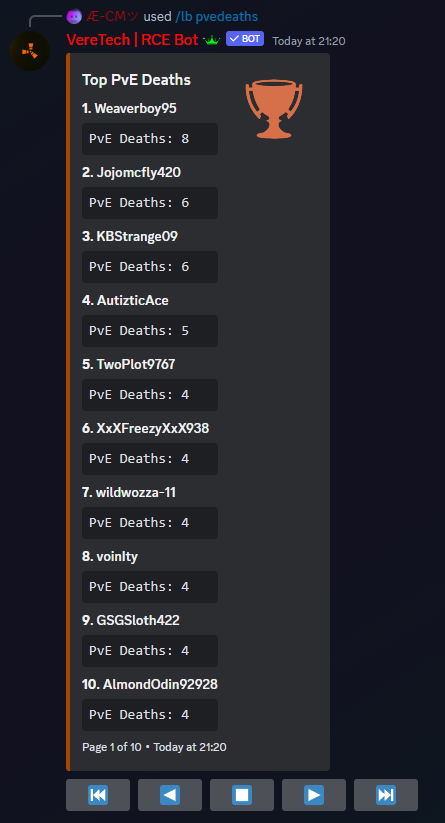
PvE Deaths

Using the command /lb pvedeaths we can call the leaderboard for all PvE deaths server wide:-


Wiping the Leaderboards

At the end of wipes, weather that be blueprint wipe, map wipe or even wiping after an event, using the command /pl wipelb and selecting your server we can wipe the leaderboards back to zero for that fresh start:-

In-Game Chat
In-game Chat (Notes and Discord)
In-Game chat - Probably one of the most requested features we have had to date. This allows players to use in-game notes and edit them for a re-print of this in the killfeed section in-game for everyone to see (I know, tongue twister right?!)
By default this is disabled as we are aware that players from mixed platforms sometimes use the notes to share things like item locations, base codes and general communication, so it will need some enabling, but before we start, please note: Players MUST be linked using the /link command, there is no exceptions, there is no way round it... lets get into it!
Enable in-game Chat (Owner)
To start the process of in-game note chat you have to activate it from within Discord & GPortal. This starts by logging into GPortal and head into your server settings, please find the header "Custom Boot Commands" and enter the following command note.lognoterenames "1" please see below for the example;
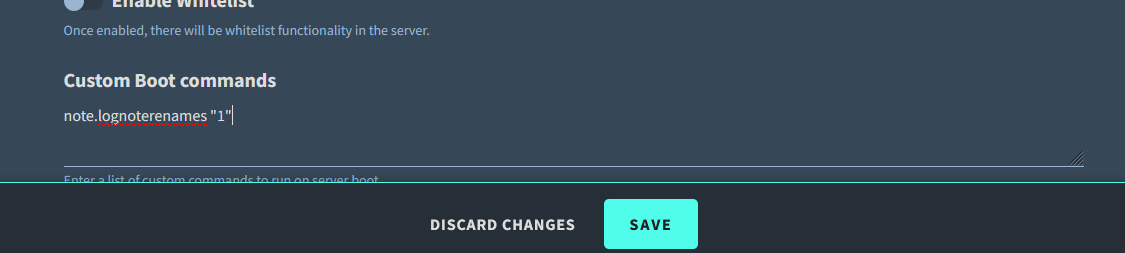
You will need to scroll down and click "Save". Following that step we will also need to enter it in the GPortal Console, on the left of your screen when in GPortal you will notice a header under the "Settings" tab named "Console", please open this page and enter the same command again into the console and hit send, please see below for the next example;

We are now done with GPortal.
We can now head into your Discord server to finish the process there. The first step is to use the command /chat setup which will then require you to select your GameServer and then choose Yes or No, Choosing Yes will enable the note chat. You will also see an option to "Admin Log Channel" - Should you wish you can set up a dedicated, private channel to store all history of note edits, I suggest making this channel private as even if the player is still muted - it will show in this channel. You will also see a user-log-channel, this channel works the exact same as the Admin channel but will follow mutes and admin mutes. Please see below for details;

You have now successfully set up In-Game chat via note edits. Players will now also have to ensure they've linked using the /link command and then to un-mute themselves to make this work.
Enable in-game Chat (Player)
Now that the admin side of it is complete we now have to rely on the players to also activate their part. Firstly players need to ensure they have linked their GamerTag/PSN via the /link command, if you are unsure how then more info on this can be found by clicking here
Now that they are linked, players will now be required to un-mute themselves. Please Note: Players are muted by default as some cross platform players use the notes to communicate their base details, including base codes.
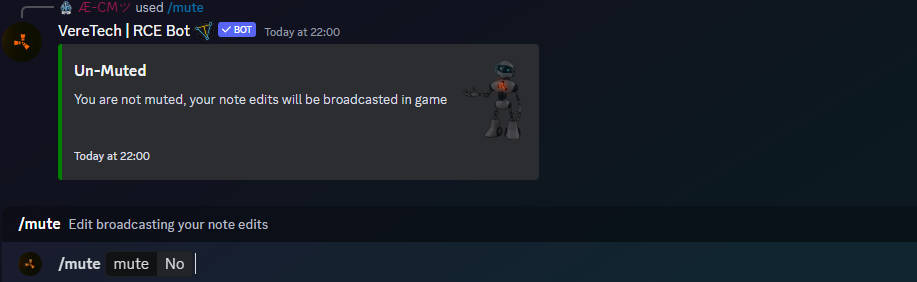
To un-mute themselves they need to use the command /mute, they will be given to options, this is either a Yes or No, No will be the option that un-mutes them and allows their messages to be broadcasted. Should they wish to re-mute, they will have to start this command over and select Yes. Please see below for the example;
Discord to game chat
We all know typing in-game notes isnt quite as easy as typing on a phone or computer keyboard, we feel you pain to this is why we have implemented a /say command.
Once players are unmuted they can use /say in any channel. They will then be required to select a gameserver followed by the message. See below for the command and Output.


Admin Log Channel
We have brought you a useful tool to keep an eye on communications via the note chat. This could be for toxic abuse, racial slurs, anything that you would potentially need to protect your users from. To do this we will need to create an admin channel which will be private to the admins, along with the Bot. This channel will then be dedicated for recording all note edits made in game, even the guys who are muted. Please Note: You will see the information on if they are muted themselves or if you as Admin has imposed a mute, so you will know straight away if this note ever got published or not.
Once the channel is set up we can go ahead and open it and launch the following command in, /chat setup ensuring you select that channel as the "adminlogchannel". Once you have, all note edits in game will be recorded here.
Mute Players breaking Rules
As we can all imagine, players just love pushing boundaries and seeing what they can get away with, using symbols, spacing and anything else they can think of to get around profanity filters to try be funny or toxic. Thankfully we have been able to empower you with a tool to combat this. Should you see anyone breaking rules then you have the ability to override their mute status with a mute of your own... Admin mute. To activate this you will need the command /chat mute, no matter the players current mute status, your mute will take precedent in determining if this player is allowed to speak with notes. Using the command you will see 2 options, the first will be to select their username, then onto the decision, Selecting Yes will mute the player until you decide to turn their mute back off. Please see below for the example on this;

Un-Mute Players Following a Ban
Should you feel that a player has learnt his lesson and you've perhaps decided that its time to remove his or her ban, you can do this, by again using the command /chat mute, selecting the players username and then selecting no, this will remove any admin chat ban invoked on the user. Please see the example below on this;

Disable in-game Chat
Should you decide that you no longer want in-game chat via notes, please feel free to delete the admin log channel if you have one set up, then using the command /chat setup you will see you have the option to select No following your GameServer selection. This will disable all note in-game chats server wide. Please see below for the final example of this chapter;

Command Groups (CMDs)
Introduction into CMDs
Welcome to Command Groups. In this section we will cover creating command groups that are pre-batched by you to trigger a chain of commands at the click of a button. These can be super useful for quick access to commonly used commands. With a limit of 25 commands per group you can create some super events, mass drop locked crates and or even just use it for singular commands. Whatever you need it for it can only be limited by your imagination.
We've seen some really great creations out there - Including an unofficial version of Underwater Labs - All designed around the Grouped Commands.
Creating CMD Groups
Getting started with Command Groups is a great way to exercise your command knowledge and put your imagination to the test. Before adding Commands we first need to create the groups for them to be placed in;
Creating Groups
The first step to this process is to create the group for the commands to go into to do this we need to use the command /cmd group-add Where we can create a group ready to install out commands, all we need to do is think of a name, for this example we will use the name Heli Trigger. Please see below the example;

Now please hit enter to install the group.
Editing Groups
If we ever need to we can adjust the name of our command groups, the command for this is /cmd group-edit Which does exactly as mentioned, it provides you with an opportunity to rename the group, all you have to do is select which group to rename and then rename it accordingly. Please see the example below;

Group Listing
Should you ever need to, you can recall a list of your command groups, this is in case you forget the name of the group or are curious in general as to what groups you have. For this, please use the command /cmd group-list Please see the example below;

Deleting a Group
Deleting a group is as simple as it sounds, should you not need the group anymore or want to combine 2 groups and make this one redundant, all you need is the command /cmd group-delete Please Note: Any commands inside that group when deleting will also delete the commands left inside. To avoid this, please move any commands you want to keep to another group. More on that in the next chapter.

CMD Management
Welcome to CMD management, where we will cover creating commands, editing commands, moving categories and even deleting commands. This stage can get a little in depth, I personally recommend writing them our digitally in a notepad or writing them down, especially if you have multiple commands (Up to 25) in a single category.
Adding a Command
When creating your command for your groups, it helps to have them precisely named so you know exactly which each command does, and ultimately what each group does.
For our command we will need the correct Discord command, which is /cmd add, here you will see that we get offered 4 options, all of which are mandatory.
command-group - Select which group you want this particular command to fall under.
name - The name of the command (This could get tricky - Be precise)
position - You can adjust the order in which these items appear in your store by clicking this menu, starting at 0
eg; 0=1st, 1=2nd, 2=3rd, 3=4th ect...
command - Here's the tricky part, you need to not only know the command, but be sure it works as intended before installing into Command Groups
Please see the example below;

Editing a Command
If you have added a command to a CMD Group but have made an error, the old remit would have been to delete the command and start again, since then, we have implemented the /cmd edit command, which will prefill the command box with the old command for you to edit at will, please then confirm hitting send, as shown below;

List your Commands
There is a fair to high chance that you won't be able to remember every command you end up storing, especially when you need it. Thankfully we have the power to show all of our commands per category in list format.
To do this please use the command /cmd list from here you will need to select which category you wish to view. Once selected you will be presented with all of the commands inside that group, please see example below;

Running a Command
Once we have all of our commands grouped and ready to go, as we require them weather that be for events, custom monuments or to giveaway kits server wide, the command you need is /cmd run. From here you will be prompted to select a group to run the commands from, select it, hit enter and your commands will begin to execute. Please see below for the example;

Deleting a Command
As always we have also included a way to delete those out of date, messed up or no longer required commands, unfortunately due to the complexity we do not offer a method to edit existing, instead you will need to delete the command and start again, to do this simply use the command /cmd delete and delete the command as you need to, please see below for an example;

Timed Commands (Premium)
An in-depth guide on how to configure timed commands and some handy links to assist with the CRON timers.
Timed Commands Introduction
Welcome to our next premium feature on the list, Timed Commands. Through this part of the documentation we will be going through how to apply an automatic timer to the CMD groups for them to run periodically at a time frame of your choice, completely automatically.
Timed commands will play a huge part in relieving some of your manual duties as a server owner, not forgetting that it also allows you to run in game messages very frequently on screen, giving you the power to now advertise your communication platform (Discord and others) on screen for all of your users to see.
Timed commands can also be used for things like enabling and disabling PVE modes in game, trigger custom automatic events, rewarding your player base on a regular basis, the possibilities for you and your players are now endless in terms of what you can do.
It is a highly recommended that if you are unsure of what Command Groups are, that you please read through its documentation by clicking here before continuing.
Configuring Commands
Timed commands use the Command Groups (CMDs) we created earlier and adds an automatic schedule to them using whats called a CRON timer. Lets go through setting a Timed Command up.
Prerequisites;
Creating a Command Group
Adding Commands to the Command Group
Please ensure you have the above configured before continuing - Clicking the blue text will direct you to the respective pages should you need it.
Adding/Updating a Timed Command
Adding and updating a timed command uses the same / command as we have already added the group earlier when we covered command groupd, to start the process of adding a timer, we need to use the command /tc addupdate which will allow us 4 options;
- Gameserver - Select the gameserver where you want the Timed Command to be triggered
- Nickname - Give the Timed command a nickname so you can identify it
- cron - We will need to obtain a CRON expression, we will cover this later
- command-group - Please select one of your earlier created command groups.
By choosing these 4 options we can successfully create a Timed Command, please see the image below for a snap shot;

Listing our Timed Commands
Whenever we need to check, edit, rearrange or remove a Timed Command, it can be hard to remember which command we need to obtain, using the command /tc list the bot will show us all current Timed Commands which we have installed.
Please see the image below for a snapshot;

Triggering a Timed Command
After we install a timed command, ideally we need to test it, however, because it is set on a timer we cannot test it until that time comes. (Can you imagine if this was really the case for a command that only triggers every 12hrs). This is why we introduced the Timed Command Trigger, it allows you to perform a "Test Run" on your Timed command so that you can be sure that it all works OK. To do this we simply need to use the command /tc trigger, this will give you the chance to select a command group to trigger for your testing. Once you select it, the command will run as if the allotted time has elapsed. Please see the image below for reference;

Deleting a Timed Command
Should you no longer need a timed command because either its now redundant or you simply don't want it, all you need to do is use the command /tc delete This will remove the timer from the command group and will leave the group stored in your bot until you choose to delete that also, So for clarity, it just removes the automation.

Using the CRON Timer
Using Cron Expressions for Scheduled Tasks
Cron expressions are a way to define when a task or job should run. These expressions consist of five fields representing minutes, hours, day of the month, month, and day of the week. Here's a breakdown:
- Minute (0 - 59): The minute when the task should run.
- Hour (0 - 23): The hour when the task should run.
- Day of the Month (1 - 31): The day of the month when the task should run.
- Month (1 - 12): The month when the task should run.
- Day of the Week (0 - 6): The day of the week when the task should run (Sunday = 0).
Example:
Let's say you want to schedule a backup task to run every day at 2:30 AM.
- Minute:
30 - Hour:
2 - Day of the Month:
*(every day) - Month:
*(every month) - Day of the Week:
*(every day of the week)
The cron expression would be: 30 2 * * *
Practical Steps:
1. Identify the Schedule:
Determine how often you want the task to run and at what specific time.
2. Use a UI or Application:
If you're using an application or service, there might be a graphical user interface (UI) where you can set up scheduled tasks. Look for a "Scheduled Tasks," "Cron Jobs," or similar section.
3. Input the Cron Expression:
In the scheduled tasks section, you may find a field asking for a cron expression. Enter the expression based on your desired schedule.
4. Examples:
-
Every 5 Minutes - */5 * * * *
- Every 30 Minutes - */30 * * * *
- Every Hour - 0 * * * *
- Every 12 Hours - 0 */12 * * *
- Every Day - 0 0 * * *
- Every Other Day - 0 0 */2 * *
- Every Friday - 0 0 * * 5
- Every Month - 0 0 1 * *
5. Save or Apply Changes:
After inputting the cron expression, save or apply the changes. The scheduled task should now adhere to the specified schedule.
Useful Links
A super useful link for a cron expression is https://crontab.guru/ - Please spend some time practicing and learning.
Emote Wheel Actions
Emote Wheel (Free Version)
Welcome to the free version of the "Emote Wheel" key binds. For the free version we have set it to be powered by the CMDs/CMD Groups - Please make sure that you have an adequate understanding of how to configure your CMDs and CMD Groups before starting your work on your "Emote Wheel". Should you need to review the documentation for them then please Click Here.
Emote Wheel Configuration (Binding)
To get started with your emote wheel binding, please ensure that you have your all the CMD Group names on which you want to bind to the Emote Wheel.
To get started we will need the command /bind add. You will now have a total of "7" options to choose from, "4"of which are mandatory. The options are as follows;
Mandatory -
gameserver: Please select the GameServer which you wish to create this bind for.
command-group: Please select the Command Group which you are going to be binding.
emote: This will be a selection for your emotes, you have 8 to choose from
channel: Because we have "Team", "Local" and "Server" selections in game when using the emotes, each one can be programmed for its own bind, giving you a total of "24" possible keybinds on the free version! If you don't want to select this option then choose the bind that will apply to "All"
Optional -
auth-group: You can select which group can claim the kit, leave blank for all or choose from one of the following; VIP, Moderator, Admin & Owner. (You cannot have more than one auth group per bind)
server-cooldown: How long the whole gameserver will have to wait between uses, as soon as one player redeems it, it is then unavailable to everyone until the cooldown has expired.
player-cooldown: How long each player must wait between each emote - If one player uses it, the cooldown only applies to that player.
cooldown-message: What to say when a player tries to use the emote with a cooldown still active. (Profanity filters will apply)
Require Discord-Role: You now have the option of requiring a user to have a discord role in order to be able to claim a bind. In order for this to work a player will need to be linked to their gamertag using /link and have the role in discord that you have set.

Once a successful bind has been configured you will receive a confirmation message with your binding information, Please see the example below;
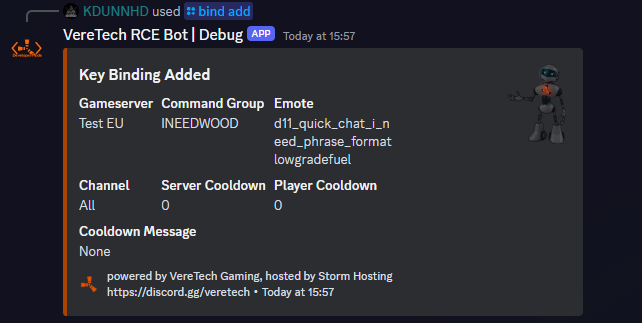
Now all your players will have to do is select the "Emote" from the "Emote Wheel" in-game, for delivery of that set bind. Please ensure that players know which chat channel it is bound to, "Team", "Local" or "Server" as this will effect delivery. As mentioned earlier, if you do not choose "channel" then the bind will apply to "All" so this issue will not apply.
Editing a Bind
Should you wish to edit your current binds, change of kit, change of cooldown, change of message - Whatever it may be... We have enabled an editing command for this. /bind edit will allow you to choose a bind to edit;
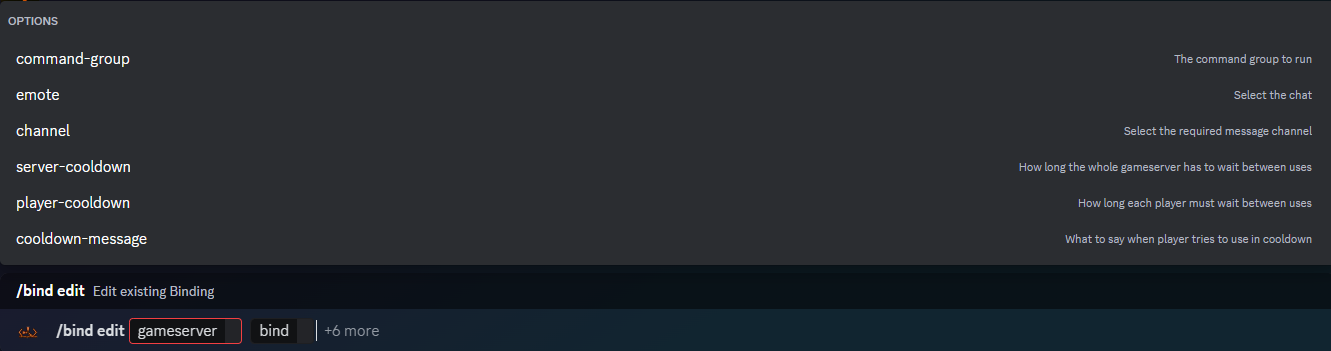
You will have "8" options, of which "2" are mandatory and "6" are optional these are;
Mandatory -
gameserver - Please select the GameServer you wish to change the keybind to.
bind - Please select the bind you wish to edit.
Optional -
command-group - Please select the Command Group you wish to change to
emote - Please select the emote you wish to change to
channel - Please select the chat channel you wish to change to
server-cooldown - Please select this option to change the server cooldown timer.
player-cooldown - Please select this option to change the player cooldown timer.
cooldown-message - Please select this option to change the cooldown message displayed on screen.
(THIS REQUIRE DISCORD ROLE OPTION IS PREMIUM ONLY)
Require Discord-Role: You now have the option of requiring a user to have a discord role in order to be able to claim a bind. In order for this to work a player will need to be linked to their gamertag using /link and have the role in discord that you have set.
Upon successful edit you will be greeted with the following message;
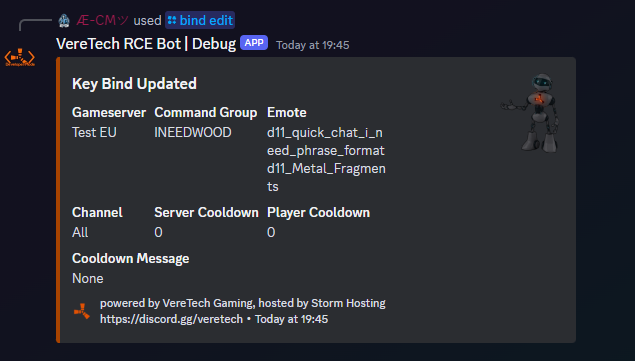
Listing your Current Binds
Should you need to see all of your binds as a collective, you can do this on a per embed page bases, simple use the command /bind list and select your game server. Upon sending this command you will be greeted with all of your "Emote Wheel" binds for that server.
Please Note: Because of character limits on embeds, these key binds are shown on pages.
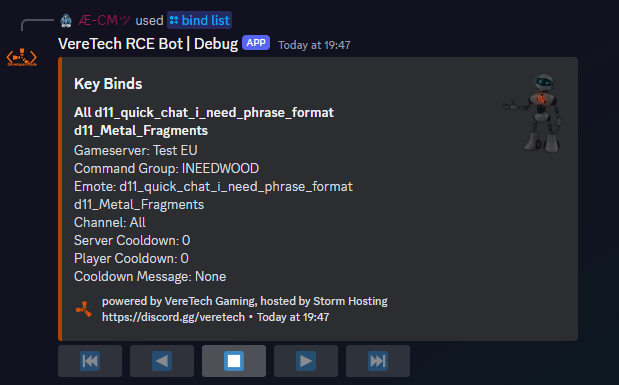
Deleting a Bind
Should you wish to "Delete" your bind then we can do that also! Using the command /bind delete we can delete your chosen bind. Simply select the gameserver you wish to remove a bind from, and then select the bind. Please see the example below;

Upon successful deletion you will receive a message of confirmation from the bot for its deletion. Shown below;
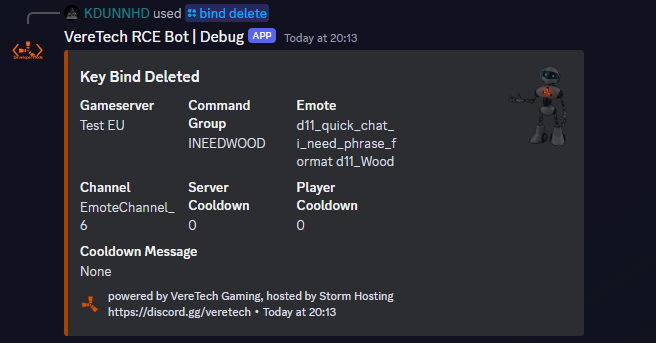
Placeholders for Use with Binds ONLY
| To display Players Name |
GamerTag/PSN |
private_wire |
{PlayerName} |
| To display Players Console |
Which Console |
XBOX |
{GameConsole} |
| To display cooldown as (DD:HH:MM:SS) |
Cooldown Timer |
1 Day, 12 Hours, 30 Minutes, 43 Seconds |
{Cooldown} |
Steps to Bind A Kit
- Create a command group using /cmd group-add. Name it anything you want, I normally use INEEDSTONE kitname servername.
- Create the command using /cmd add, for the kit use position 0 Note you will need to replace the word kitname with the kit you have created on gportal. You will then input the command below into the command: box
kit givetoplayer "kitname" "{PlayerName}" - If you want it to announce when a player receives a kit use /cmd add select position one and add the following, note you can customise the text to what you want
4. Use /bind add as explained aboveglobal.say {PlayerName} received a starterkit
Steps to Bind A Teleport
- Create a command group using /cmd group-add.
- Create the command using /cmd add, for the teleport use position 0 Note you will need to replace the word (x,y,z) with your xyz you want them to teleport to. You will then input the command below into the command: box
global.teleportpos (x,y,z) "{PlayerName}" - If you want it to announce when a player receives a kit use /cmd add select position one and add the following, note you can customise the text to what you want
4. Use /bind add as explained aboveglobal.say {PlayerName} teleported to outpost
Steps to Teleport and give a kit
- Follow the steps above but place the cmds in the same command group. Use position 0 for the kit followed by position 1 for the teleport. If you want to announce it use position 3 and add the full message once.
Emote Entity & Vehicle Spawning
Emote Wheel Binds let players trigger commands, spawns, or actions directly from their emote wheel in Rust Console Edition.
This feature can be used to spawn entities/vehicles on a player.
🔑 Key Concepts
-
Command Groups → A collection of commands. Every command in a group fires when the bind is used.
-
Emotes → The in-game Rust console emotes. E.G (I need wood)
-
Channels → The in-game chat mode: Team, Local, Server. Each emote can be bound separately per channel.
-
Placeholders → Variables that insert a live information into a command.
-
Cooldowns → Timers to prevent spam use (per-player or global) in seconds.
-
Auth & Discord Roles → Restrict access to specific groups or linked Discord roles.
1️⃣ Step 1: Create a Command Group
Before you can create a bind, you need a command group with at least one command.
A command group is a group of commands that will be ran in the order specified by you 1 second apart. When a command group is triggered every command in that command group will run.
2️⃣ Step 2: Add Your command to the command group
/cmd add has 4 mandatory fields:
-
Name – your friendly handle for the command
-
Command Group – the group you just created
-
Position – the order this command appears within the group (1, 2, 3, …)
-
Command – the actual server command to run
For player-targeted spawns we’ll use position placeholders:
-
{PlayerPositionX} -
{PlayerPositionY} -
{PlayerPositionZ}
These placeholders are maths-aware, so you can offset spawns (e.g., X+10).
Command layout
Example: Spawn a HORSE command
Example: Spawn a locked crate command
Example: Spawn a Scrap Heli (away from the player) command (10m North)
Example: Spawn a RHIB command (10m South)
3️⃣ Link the command group to a bind
To get started we will need the command /bind add.
Mandatory -
gameserver: Please select the GameServer which you wish to create this bind for.
command-group: Please select the Command Group which you are going to be binding.
emote: This will be a selection for your emotes, you have 8 to choose from
channel: Because we have "Team", "Local" and "Server" selections in game when using the emotes, each one can be programmed for its own bind, giving you a total of "24" possible keybinds on the free version! If you don't want to select this option then choose the bind that will apply to "All"
Optional -
auth-group: You can select which group can claim the kit, leave blank for all or choose from one of the following; VIP, Moderator, Admin & Owner. (You cannot have more than one auth group per bind)
server-cooldown: How long the whole gameserver will have to wait between uses, as soon as one player redeems it, it is then unavailable to everyone until the cooldown has expired.
player-cooldown: How long each player must wait between each emote - If one player uses it, the cooldown only applies to that player.
cooldown-message: What to say when a player tries to use the emote with a cooldown still active. (Profanity filters will apply)
Require Discord-Role: You now have the option of requiring a user to have a discord role in order to be able to claim a bind. In order for this to work a player will need to be linked to their gamertag using /link and have the role in discord that you have set. (THIS FEATURE IS PREMIUM ONLY)
Emote Monument Teleports
Emote Wheel Binds let players trigger teleports to monuments in Rust Console Edition—no manual coordinate updates after wipes.
This feature uses Monument Position Placeholders so your TP spots stay current automatically.
---
🔑 Key Concepts
- Monument Placeholders → Drop players at a monument’s center or a random point (inner/outer rings).
- Emotes → In-game Rust console emotes (e.g., “I need wood”) that can trigger your TP.
- Channels → Team / Local / Server emote channels; bind per channel for up to 24 binds (free tier).
- Placeholders → Variables that insert **live**, auto-updated monument coordinates.
- Cooldowns → Per-player or global timers (in seconds) to prevent spam.
- Auth & Discord Roles → Restrict TP to specific in-game groups or **linked** Discord roles.
---
1️⃣ Step 1: Update Monument Positions
Before using monument placeholders, fetch/update them from your server:
1. Run `/settings fort`
2. Click Update Monument Positions
3. Wait (this can take a while ⏳)
4. You’ll be presented with a list of **monument names** (e.g., `Outpost`, `Airfield`, `Launchsite`)
Use the names exactly as shown when building your commands.
---
2️⃣ Step 2: Create a Command Group
Create a group to hold your commands (they run in order, 1 second apart):
/cmd group-add name:"Monument TP"
A Command Group is a collection of commands that all execute when the bind is used.
3️⃣ Step 3: Add Your Teleport Command to the Group
/cmd add has 4 mandatory fields:
Name – friendly label for the command
Command Group – the group you just created
Position – execution order within the group (1, 2, 3, …)
Command – the actual server command to run
Monument Placeholder Formats (example monument: Outpost)
Center (fixed spot):
{OutpostX}, {OutpostY}, {OutpostZ}Random (anywhere inside):
{OutpostRandomX}, {OutpostRandomY}, {OutpostRandomZ}Random Outer Ring (~15m from edge):
{OutpostRandomOuterX}, {OutpostRandomOuterY}, {OutpostRandomOuterZ}Random Inner Ring (~15m around center):
{OutpostRandomInnerX}, {OutpostRandomInnerY}, {OutpostRandomInnerZ}Replace Outpost with any monument name from your updated list.
Command Layout
global.teleportposrot ({<MonumentVariantX>},{<MonumentVariantY>},{<MonumentVariantZ>}) "{PlayerName}" "1"The trailing "1" snaps the player on top of terrain/structures, not inside them.
Examples (Command Group: Monument TP)
Example 1 – Teleport to Outpost Center (same spot every time)
/cmd add
Name: TP Outpost Center
Command group: Monument TP
Position: 1
Command: global.teleportposrot ({OutpostX},{OutpostY},{OutpostZ}) "{PlayerName}" "1"
Example 2 – Teleport to Random Position anywhere in Outpost
/cmd add
Name: TP Outpost Random
Command group: Monument TP
Position: 2
Command: global.teleportposrot ({OutpostRandomX},{OutpostRandomY},{OutpostRandomZ}) "{PlayerName}" "1"
Example 3 – Teleport to Random Outer Ring (~15m) of Outpost
/cmd add
Name: TP Outpost Outer
Command group: Monument TP
Position: 3
Command: global.teleportposrot ({OutpostRandomOuterX},{OutpostRandomOuterY},{OutpostRandomOuterZ}) "{PlayerName}" "1"
Example 4 – Teleport to Random Inner Ring (~15m) of Outpost
/cmd add
Name: TP Outpost Inner
Command group: Monument TP
Position: 4
Command: global.teleportposrot ({OutpostRandomInnerX},{OutpostRandomInnerY},{OutpostRandomInnerZ}) "{PlayerName}" "1"
4️⃣ Step 4: Link the Command Group to an Emote Bind
Use /bind add to make the teleport accessible via the emote wheel.
Mandatory
gameserver → Pick the GameServer this bind belongs to.
command-group → Select your group (e.g., Monument TP).
emote → Choose from the 8 emotes.
channel → Target Team, Local, Server, or All (binds are per channel; up to 24 total on free tier).
Optional
auth-group → Restrict who can use it; choose VIP, Moderator, Admin, or Owner (only one).
server-cooldown → Global cooldown for everyone after any use.
player-cooldown → Per-player cooldown only for the user who triggered it.
cooldown-message → Custom message when a cooldown blocks use (profanity filters apply).
Require Discord-Role → Gate usage behind a Discord role on a linked account (/link). (Premium only)
Example:
/bind add
gameserver:"MyServer01"
command-group:"Monument TP"
emote:"I need wood"
channel:"Team"
player-cooldown:"120"
cooldown-message:{PlayerName} Chill! Try again in {Cooldown}.
🔄 Auto-Update Behavior
Monument positions auto-refresh each wipe.
If they didn’t update re-run /settings fort → Update Monument Positions.
✅ Tips
- Use separate command groups (e.g., Monument TP – Outpost, Monument TP – Airfield) to keep your binds organized.
- Combine with auth/roles and cooldowns for fair access during busy events.
- For public TPs, prefer Random / Inner variants to reduce player stacking.
Tip4Serv Integrations
Using Tip4Serv we are able to automate your purchases, your subscriptions and your experience!
Introduction into Tip4Serv
Welcome to the the start of seamless automated transactions for your Discord Server.
We have teamed up with Tip4Serv to enable you to set up a store page with a domain of your choice, or one which Tip4Serv will supply, to allow you to point your players to the online store where all translations can be carried out automatically! This means that you will NO LONGER be required to be online when selling items for real life currency!
What is Tip4Serv?
Tip4Serv is a platform designed to help gaming communities, content creators, and server owners monetize their content. It allows users to accept donations, sell digital content, and offer exclusive perks to their community members. Common uses include offering special ranks, in-game content, or Discord privileges to supporters in exchange for financial contributions.
Tip4Serv is particularly popular for managing game servers. It supports a variety of payment methods and offers features like subscription plans, custom domains, and easy setup within minutes!
The service comes with both free and paid plans, with a small fee on transactions. It's frequently used by server owners who want to give supporters access to exclusive content or rewards.
What can Tip4Serv do for me?
Tip4Serv helps server owners by providing tools to monetize their game servers through donations, subscriptions, and exclusive content. Here are some key ways it benefits server owners:
Donations and Subscriptions: Server owners can easily set up a page where their community members can donate or subscribe for exclusive benefits. This helps generate consistent revenue from the server's player base.
Exclusive Content and Roles: Owners can offer rewards like in-game ranks, exclusive content, or special roles on platforms like Discord. These perks encourage players to support the server financially in exchange for added privileges.
Automated Features: The platform integrates with various games and servers, automating processes like assigning roles or distributing content after a payment is made. This reduces the manual workload for server owners.
Customizability and Integration: Tip4Serv supports multiple game servers. It also allows owners to customize their store, payment methods, and even integrate with Discord, making it easy to manage all revenue streams from one place.
These features streamline server monetization, allowing owners to focus on building their community while generating revenue.
Is it free?
Tip4Serv offers both free and paid options. The Starter plan is free, with a 5% transaction fee applied to donations or purchases made through the platform.
For those who need more advanced features, there is a Pro plan, which lowers the transaction fee to 3.8%. The Pro plan also includes additional features such as custom domains, advanced customization, and a 21-day free trial.
This allows server owners to start for free and upgrade if they need more functionality or want to reduce transaction costs.
Source:
https://docs.tip4serv.com/
Getting Started & Connecting my Server
To get started with Tip4Serv you will be required to create an account and follow Tip4Serv's documentation and guidelines which can be found here.
Connecting my Gameserver
Obtaining my Tip Key
Once you have completed the setup process with Tip4Serv including your store settings and payment options, the next step will be connecting your server. To do this you will need to have progressed to the "Servers" page, Please see the image below;
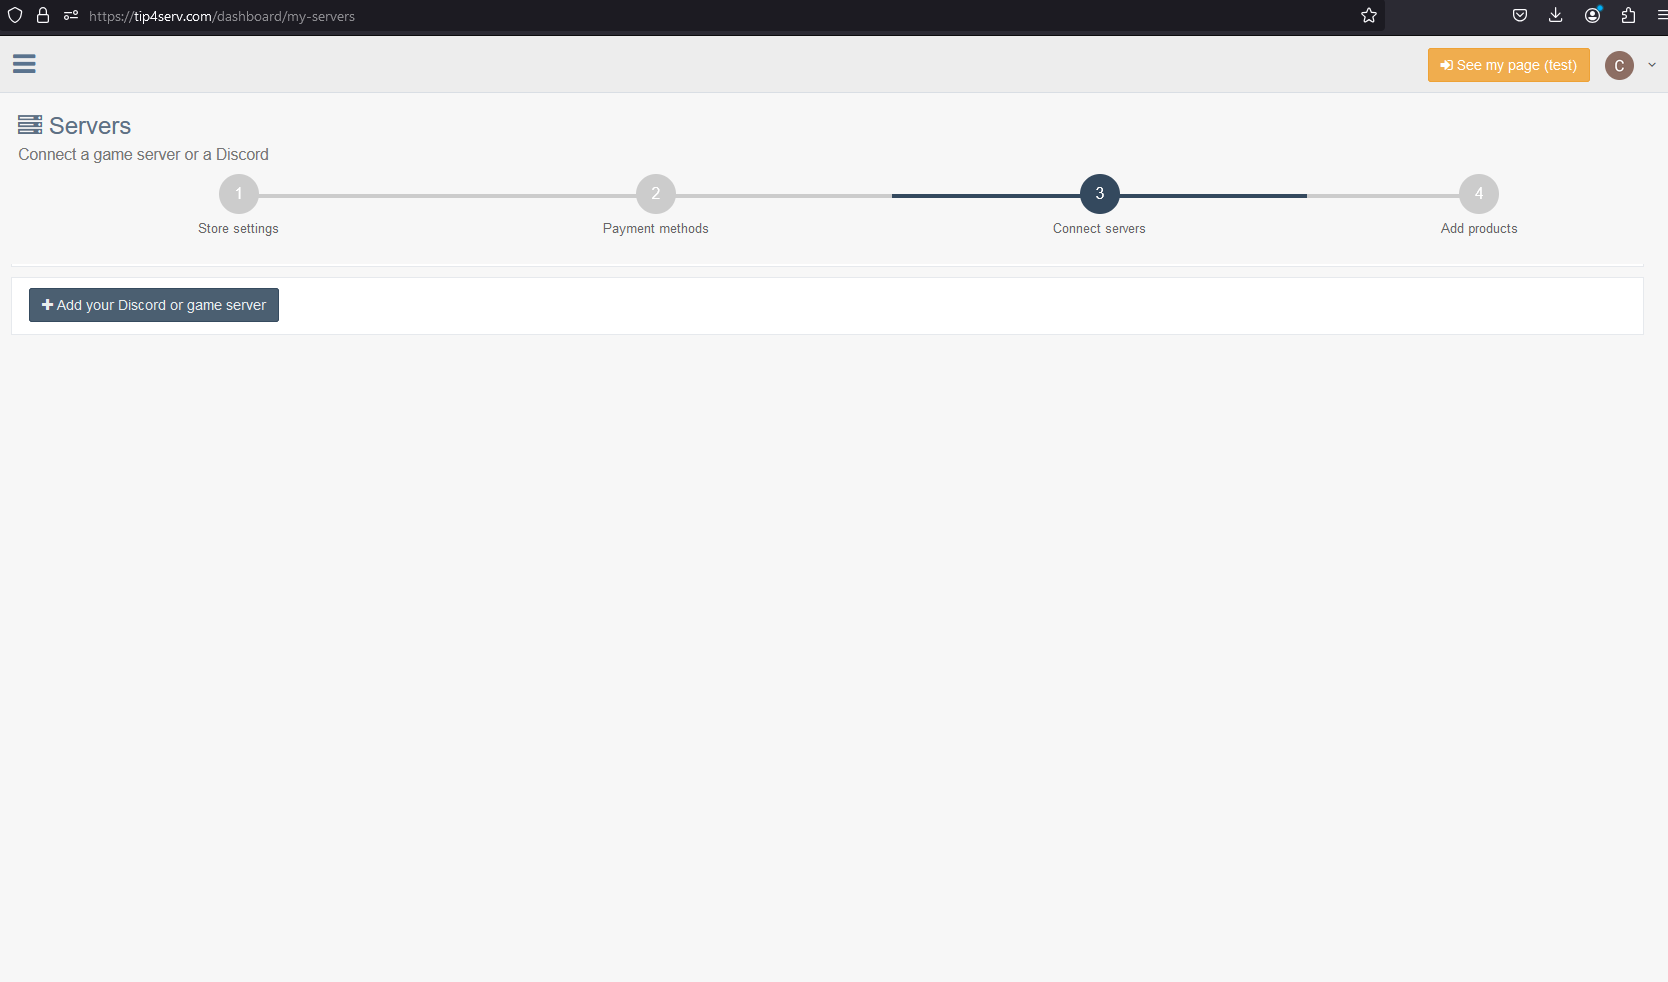
To proceed you will need to click "+ Add your Discord or game server", once you click this, you will see a pop-up appear on screen asking you for the name and type, please feel free to name the Server whatever you wish and for type we need to choose the "Rust Console Edition" option, as below;
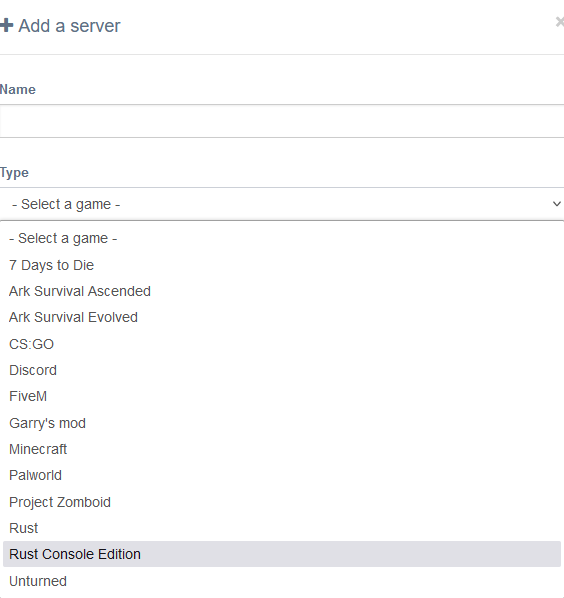
Once you have selected this you will then be greeted with another pop-up showing you your "Tip Key" - This key is very important and must NOT be shared with anyone, we will be able to recall this again if we need to but for now the code you are copying features a "Copy Key" button for your ease of use, please see the example below;
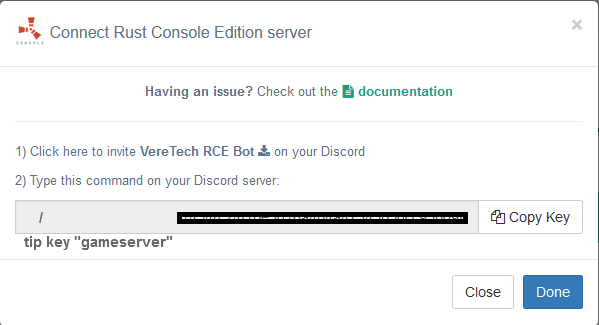
You will have this on screen but should you need a a quick link to Tip4Serv documentation then please click here. For the same ease of access for the VereTech RCE Bot invite, please click here.
Entering my Tip Key
Now that we have the Tip Key, we can head into our Discord with the VereTech RCE bot linked to your game server and use the command /tip key. In doing so you will be greeted with the following required text fields;
Gameserver - For every gameserver you will need to repeat this process (You will not need to add multiple items to suit multiple servers if prices and descriptions are identical).
Tipkey - Here we need to paste in the "Tip Key" which we obtained from the site a moment ago.
Once both of these fields are completed, hit enter and you will get one of the following responses, if you successfully linked your server it will be the first image, if there was an error then you will get a message similar to the 2nd image, if you get the error message, first try again, if that doesn't play well then please refer to Tip4Serv documentation or join their Discord for assistance;
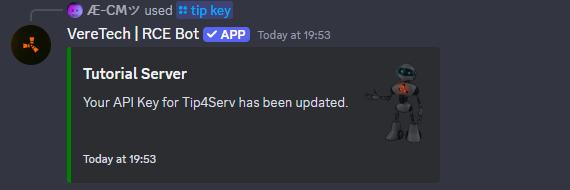
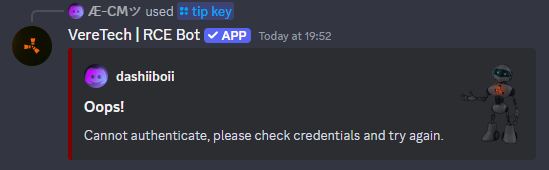
Congratulations - Your server is now integrated with Tip4Serv!
Adding Purchasable Items & Subscriptions
Now that we have you connected we can look into how to add items into your store for automated purchases!
Creating Categories
To get yourself started I personally recommend categorizing your items, this is only an opinion and is not mandatory, it just helps keep everything nice and clean! In your control menu you will see an option for "Products" click this to bring up your current Tip4Serv store, as seen below;
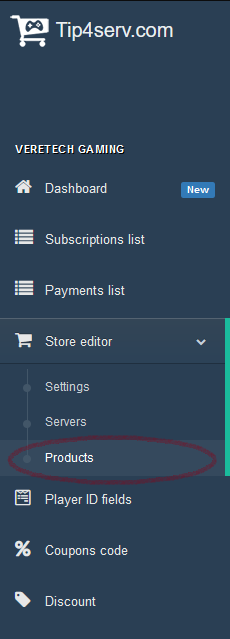
Once you have selected this you will see that we have multiple options on screen including "+ Add Category" here you can name your category & pro users can also add a thumbnail to these for a better looking store!
Adding a Product
To add a product to our store, we will see on screen a large blue button titled "+ Create Product/Subscription" if we click here we will see that we have an array of options including Name, Category, Slug (Use this for images), Price, Description and much more - Its worth taking a moment to read through the Tip4Serv documentation as the possibilities are unimaginable!
From here we need to go and select out gameserver, once this is chosen you will see that not only have Tip4Serv given us a hyperlink directly to the D11 GitBook, we have the option "Command", because we are selling an item, we need to turn this on, either "Run" or "Only run when player is Online", for an item delivery, we need to choose only when player is online.
Now for the command, here we can use any command we wish as long as it is a valid command, for a single item the command could be; inventory.giveto "{PlayerName}" "itemshortcode" "quantity" for the example I am going to add an AK ensuring that we use the placeholders set to us by our Discord bot, please see the example below;
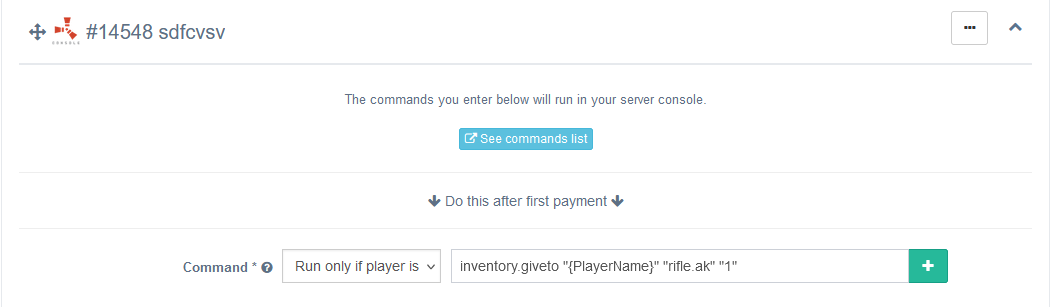
You can also add multiple commands by clicking the green "+" symbol and adding a command - Once you're happy, go ahead and click "Submit" and you will see this prompt at the top of the screen if your product has been successfully added;

The above method will work for selling kits, triggering events, teleportation and much much more, just be sure that you use valid commands and are entering valid placeholders!
Adding a Subscription
To add a subscription to our store, we will see on screen a large blue button titled "+ Create Product/Subscription" if we click here we will see that we have an array of options including Name, Category, Slug (Use this for images), Price, Description and much more - Again, Its worth taking a moment to read through the Tip4Serv documentation as the possibilities are unimaginable!
To the right of the screen you will see that we have our subscription options, again, the documentation is there for Tip4Serv should you need it, but to enable this product as a description, we need to enable the "Enable" slider to then be greeted with an array of options and terms for your subscription(s), please see the image below for the example;
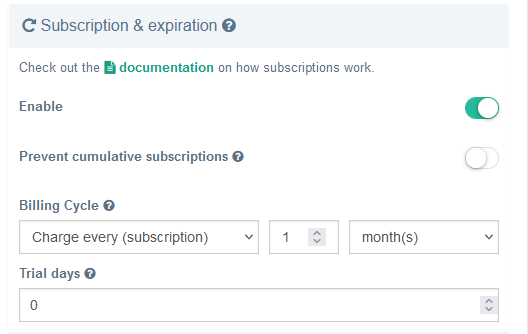
From here we need to go and select out gameserver, once this is chosen you will see that not only have Tip4Serv given us a hyperlink directly to the D11 GitBook.
This time we have 3 options;
After first payment - This is the command that will trigger following the first payment
After each Renewal - Following renewal payments, this command in this box will then trigger
Do this if the subscription expires - This is where we will remove the subscription automatically should the payment fail or if the user cancels
Now for the commands, the example we are going to use is a VIP subscription, so, following the first payment we need to grant the VIP role in game - To do the the command we need to enter here is VIPID "{PlayerName}" - This grants the user who purchased the VIP role in-game
After each payment, although the command shouldn't be needed, for a sure safe we are going to enter that command again
After subscription expires we will need to remove the command, to do that with the VIP role the command is - RemoveVIP "{PlayerName}" - Please see below for the example;
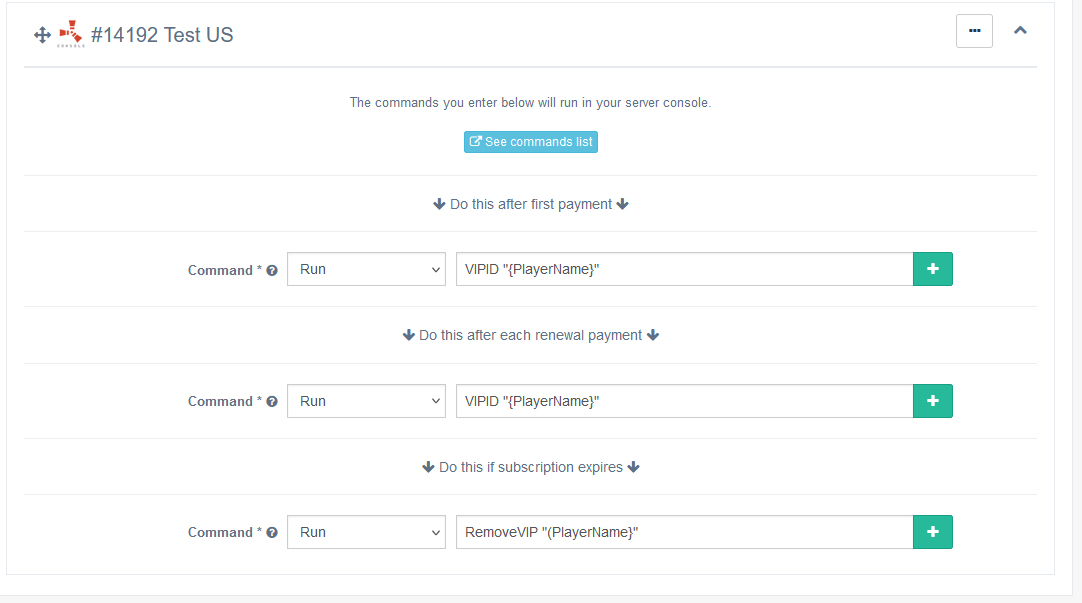
Scroll up and "Submit" and you will have a fully automated VIP subscription for your gameserver!
Adding/Taking Discord Currency
As well as items, the Tip4Serv is also designed to work seamlessly with our economy system. Thanks to the integration we are able to sell Discord currency for use with the VereTech economy right in our Tip4Serv stores!
Selling/Giving Discord Currency
There are many ways/reasons to be giving Discord currency for purchases, maybe you want the store to remain in Discord and just want to sell currency on Tip4Serv, maybe your looking at giving your VIPs something as a thank you along side their VIP subscription purchase.
To do this we need to add a command to the text box, please see the breakdown below;
vt.give 10000 bank
vt.give - This is the command to give currency to the purchaser
10000 - This number is just as an example, but this example tells the store we want to give 10000 points to that players bank/wallet in discord
bank - We only used bank as an example, however, here you have 2 options wallet or bank
Once we enter this and your commands are complete, click submit/save and your store product will be registered.
vt.giverole 10000 bank 1153096426000240662
vt.giverole - This is the command to give currency to all members of a discord role
10000 - This number is just as an example, but this example tells the store we want to give 10000 points to the players bank/wallet in discord
bank - We only used bank as an example, however, here you have 2 options wallet or bank
1153096426000240662 - The discord role ID; all members of this role will receive the currency.
If you want to give everyone in your discord the currency, use either the @everyone role ID, or your discord guild ID.
This is often used for "nukes", where the purchaser gives scrap to everyone.
Once we enter this and your commands are complete, click submit/save and your store product will be registered.
Redeeming/Taking Discord Currency
As well as the above, we can also allow players to use their currency in the opposite direction, weather it is to redeem some currency as an item, or ensure that players actually have to contribute from played time rather than just a pay to win server, or if you want them to be able to use some of their discord currency in the webpage.
The command is very similar as you can see below;
vt.take 10000 bank
vt.take - This is the command to take currency
10000 - This number is just as an example, but this example tells the store we want to take 10000 points to that players bank/wallet in discord
bank - We only used bank as an example, however, here you have 2 options wallet or bank
vt.takerole 10000 bank 1153096426000240662
vt.takerole - This is the command to take currency away from all members of the discord role
10000 - This number is just as an example, but this example tells the store we want to take 10000 points from all players bank/wallet in discord
bank - We only used bank as an example, however, here you have 2 options wallet or bank
1153096426000240662 - The discord role ID; all members of this role will "donate" their currency for the cause.
If you want to give everyone in your discord the currency, use either the @everyone role ID, or your discord guild ID.
Claiming Purchases
Although players have completed their purchase from your Tip4Serv account, they still have a little work to do;
Claiming
For players to claim items following their purchases, they will be required to return to you Discord server and there they will need to use the command /claim, this is true for BOTH items AND subscriptions.
Once they have used the command they will need to select the gameserver on which they wish to redeem it and then the order-id will be an auto populated list, listing all of the orders, please see below;
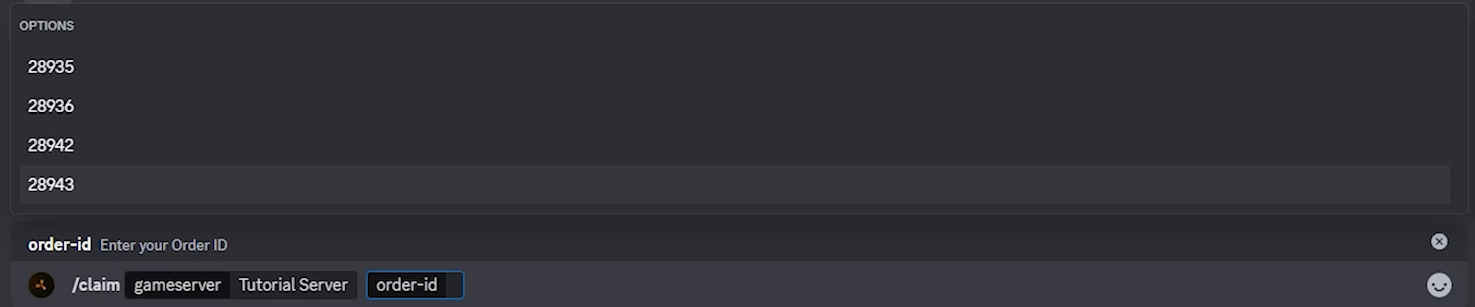
Once they select their order and hit enter, they will receive a notification showing its been processed and then again confirming its delivery; as below;
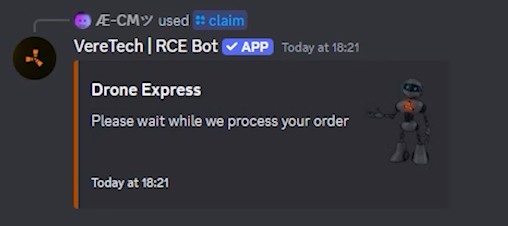
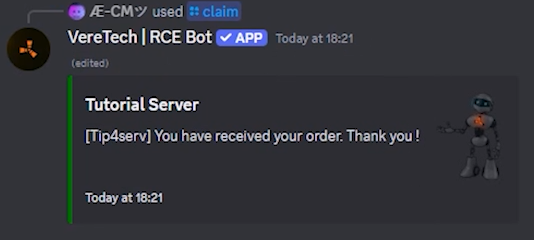
Please Note: If your order contained an item AND a subscription then these will ALWAYS be separated into 2 order ID's.
If there are any concerns or repetitive failures and/or errors then please reach out to Tip4Serv for their support.
Economy (Premium)
An in-depth guide on how to configure and run your economy system within Discord.
Economy Introduction
Welcome to the Economy for VereTech, because this is a premium feature please allow us to extent our gratitude and say thank you for signing up to the project.
With the Economy you have the ability to hold a store within your Discord for all of your players to use.
Abilities from allowing daily or weekly claimable kits, to selling weapons, resources, ammo, literally anything - You even have the power to have a secret hidden store for VIPs which only VIP members will have the ability to view.
There are a number of ways you can have players earning that all important currency which you set, from earning through PvP & PvE kills, Claiming in-Discord events and ever our own Bandit Spin Wheel! As seen in Bandit Camp in-game!
All sales within the store have the ability to be instantly delivered or even have a delay of your choice!
Configuring Categories for Economy
Adding a Category
Before we start adding items and kits to the store we first need to give the bot some categories so that we have places to add our items. To do this we need to use the command /category add, this will give the option below;
The first option is selecting a name, this name can be whatever you want it to be, for the purpose of this document we will be calling our category KITS.
The other options we have are as follows;
position: These are whole numbers starting from 0 to set the order of the categories, eg - 0=1st, 1=2nd, 2=3rd and so on...
server-cooldown: Server cool downs will mean once someone claims an item from this category, no-one will be able to claim again until the stated time has elapsed - Timer is in seconds so 30 minutes will be - 1800
player-cooldown: Player cool downs will mean once someone claims an item from this category, they personally will not be able to claim again until the stated time has elapsed - Timer is in seconds so 30 minutes will be - 1800
Once you have set your parameters hit enter and the category will be created.
Editing a Category
If you've made a mistake or want to update the settings on a category then you can do so by using the command /category edit. Once you trigger this command you will be given a drop down menu showing all of your current categories, please select the one to edit and you will be shown the image below;
As you can see you have the options to give the category a new name, new position, new cool downs, simply click the one you wish to edit and change the input as necessary, hit enter and the settings will be applied.
Listing your Categories
If you forget what categories you have available, forget which one to edit or simply just want to see them all in a list you can use the command /category list which when send, will return a list of your categories, their positions and how many items you have inside that category, as shown below; 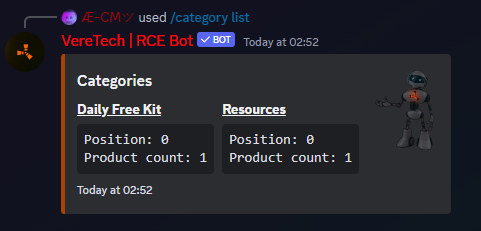
Deleting a Category
Should you require to remove a category then you can do so by using the command /category delete, from here you will be shown a list of you categories with one to choose from to delete, as shown below;
Simply choose your category and then hit enter. Please Note: If your category has items within when you delete then those items will be wiped also, recommended you check by clicking here on how to change an items category before deleting.
Adding Items to Economy
Adding Items to a Category
Welcome to the fun part of building your in Discord RCE store!
The first thing we are going to cover is how to add an item! Using the command /product add-item we can initiate the process of adding items into the store. As you will see in the image below, we have up to 12 customizable options, these aren't all mandatory except the initial 4 which are;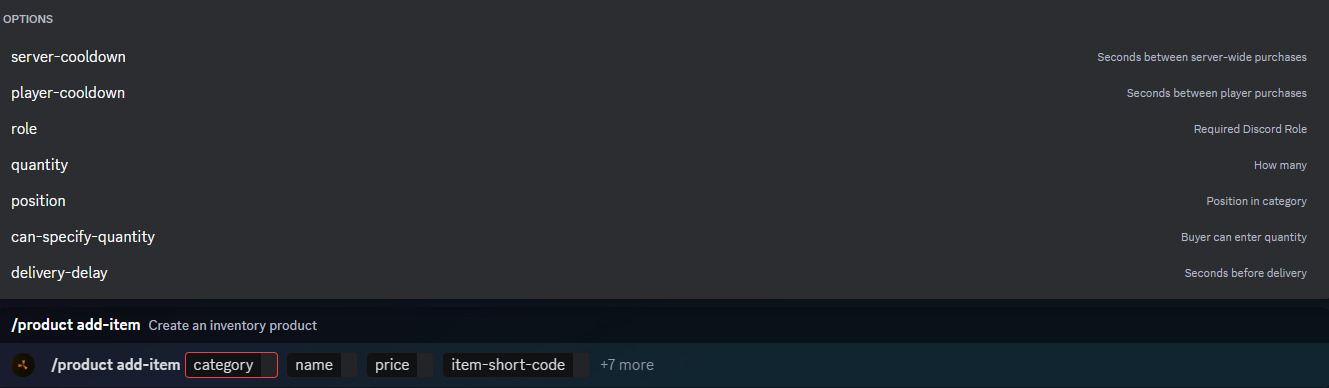
Mandatory Options
Category - Please select which category you wish for this item to be placed in.
Name - Please name the item - This is personalized and is not referring to the item name, if selling Metal Fragments in a bundle of 1,000 then maybe call it 1,000x Metal Fragments.
Price - You will need to price this item accordingly within your store.
Item-short-code - This will give you an extensive list of all items in the game, please start typing the name of the item and then click your option as it appears in the list. The bot will then code the item in using it's built in item-short-codes.
Optional Options
server-cooldown - You can specify that only one player can buy this and then a cool down timer is enabled at your required length. (Must be whole number and time is in seconds)
player-cooldown - You can specify after a player has purchased the item, how long he then has to wait to purchase it again, this will not affect any other players ability to buy this product. (Must be whole number and time is in seconds)
Quantity - By default the quantity will be 1, to set your chosen quantity then please click quantity and set your amount.
position - You can adjust the order in which these items appear in your store by clicking this menu, starting at 0
eg; 0=1st, 1=2nd, 2=3rd, 3=4th ect...
can-specify-quantity - Yes/No, players can specify if they want to buy multiple numbers of this product at once.
delivery-delay - You can specify how long after the item is purchased it takes to receive delivery, this can be extremely useful if they are experiencing a raid, it will stop them instantly sealing constantly using the shop to buy doors ect.
(Please enter whole numbers and time is in seconds).
Role - You can specify which Discord role is allowed to see this item. Please Note: Being the Discord owner does not give you automatic immunity to this rule, please ensure as owner you have every role available within your Discord.
Editing an Item
Should you require it, you also have the option to edit an item, you can do this using the command /product edit-item, using this command you will have the same options as before for editing, you will simply have to select which parameters you wish to edit, or even add. Please see the image below;
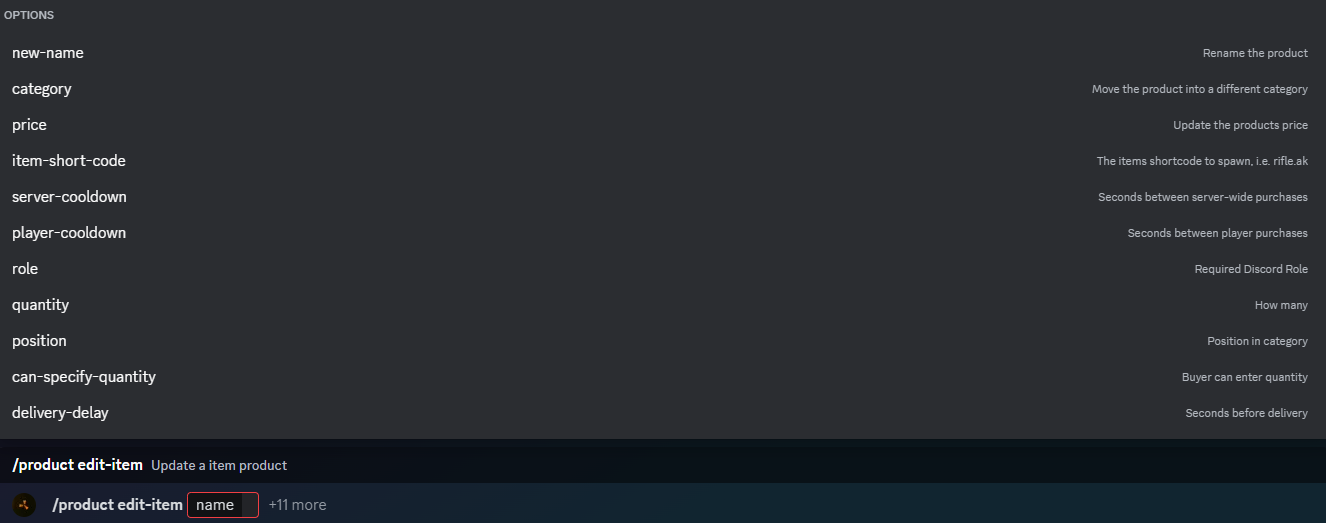
Obviously with editing, because the item exists inside your store, there are no longer "Mandatory" edits as it already has all the information it needs to be in your store.
Once the command is sent following any changes, you will receive the following response from the bot, please accept this as confirmation of your changes.
Clearing Cooldowns in Items
Following certain actions, for example wipes, there comes a time when we require a method to clear all cooldowns for products in the store. Using the command /eco clear-cooldown we can do this. Following triggering this command we have 2 options;
Category - Please select the category which you wish to clear the cooldowns from.
Product - Please select the category which you wish to clear the cooldowns from.
If you leave BOTH options BLANK - The entire shop will have all cooldowns wiped.
If you select CATEGORY and leave product BLANK, all items within that category will have cooldowns wiped.
If you select PRODUCT and leave category BLANK, Only the specified product will have cooldown wiped.
If you select BOTH, only the specified product will have cooldown wiped.

Deleting an Item
From time to time you may wish to mix up the contents of your shop, there are a number of ways to do this including removing items you no longer want there. To do this please use the command /product item-delete, this command will then send you a list of your products to select which one you want to delete, in the event you have too many items in the store, please start to type the name into the text box for it to shortlist with autocomplete. Please see the example below;
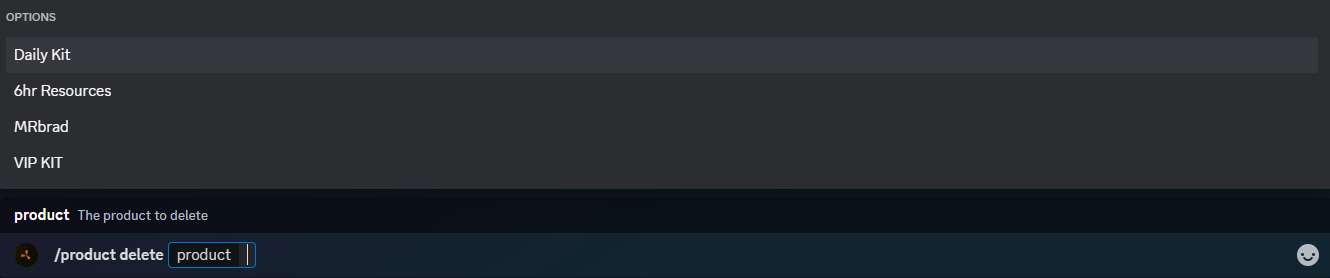
Once you select your item to delete, simply hit send and the bot will remove the item. You will be notified with a response acknowledging your request and it's success, below is the response to expect when deleting an item,
Adding Kits to Economy
Creating the Kit
Before we delve too much into how to add the kit into the store, we first need to create the kit and install it into the GPortal server, there are currently 2 options to do this, one is the traditional command method, the 2nd is using the VereTech Kit Wizard which is free to use on our Discord, please click here if you haven't yet joined us.
For information purposes, we will now cover both kit installation methods.
Creating Kits in GPortal
To create a kit in GPortal you need a string of commands which together tells GPortal a number of things, the name of the kit, the item your placing into the kit, the quantity, the condition, and finally the placement of the item, please see below an example of a kit line;

It may seem confusing, but let's break this down.
kit - we always start with the word "kit" as this is telling the Gameserver exactly what we are intending to do.
add - The word "add" tells GPortal that we are adding a kit, or adding to an existing kit.
fullmetal - The word fullmetal is the name of the kit, there are certain limitations on what you can do with the name, please refer to D11 notation which should contain information on these limitations.
rifle.ak - This is the shortname, shortnames for all items can be acquired by clicking here. Please make sure you use the "short-code" names else it will not work.
2 - This is the quantity, this number doesn't have a known limit, however it would be a waste if it exceeded your players capacity as they just won't spawn. In this instance we will be getting 2 of this item.
1 - The 2nd numerical in this code is the condition of the item which ranges from 0 to 1 in 0.1 intervals, the lower the number, the lower the condition, by using 1 we are telling the server we want a brand new item.
Belt - This final one is the placement, there are currently 3 options for this, Belt - being the player hot-bar on screen, Main, being the players inventory and lastly, Wear, the Wear bracket is used for clothing so that it spawns directly on the player.
So this entire example is showing; Add a kit named fullmetal, or add to it if the kit name "fullmetal" is taken, and we want to add 2 brand new AKs that spawn in our hot-bar.
To add further items we simply repeat the process using the same name for the kit, in this instance "fullmetal".
Using VereTech Kit Wizard
----------------------------------------COMING SOON-----------------------------------------------
As mentioned before the only way to obtain access to the Kit Wizard is to be present in the VereTech Discord, in case you missed it, you can join us by clicking here.
The process is pretty simple, you use the command /kit in the kit building channel in our discord, please see below for the example;
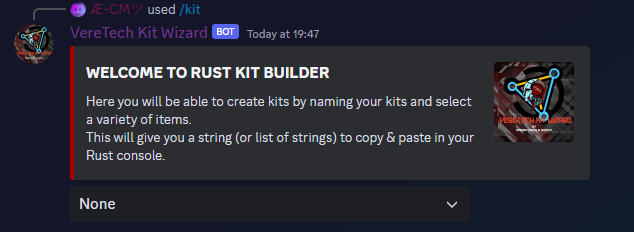
Once you have this command typed, hit enter and the Kit Wizard will guide you through the entire process of building the kit, because you are using this for the store please select "None" in the user selection.
When you approach the end you will be asked "Add Another Item" or "Build My Kit" please choose as appropriate, see the example below;
Should you be complete at this stage, please choose the "Build My Kit" option, once the kit is build you will be greeted with 2 options, the "Kit Install Code" and "Command Lines", for this demonstration we will only be interested in the "Kit Install Code" please see below;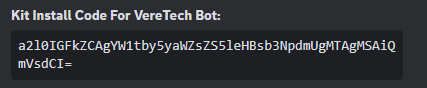
This code can be directly installed into the bot, saving you having to enter multiple lines one by one into the GPortal console. You will also see that we have designed the bot to give you a direct copy any paste button to avoid any mistakes on the next part.
Installing Kits using the Kit Code
Now that we have our code from the "Kit Wizard" we can install it directly into GPortal from the comfort of Discord, using the bot. To install the code we need to use the command /installkit you will be asked which GameServer you wish to install the kit code into followed by a text box which you will need to paste the code into, please see the image below for an example;
Simply paste the code, and hit enter. You have now successfully installed a kit ready for use in the Economy.
Adding the Kits to the Store
Now that you have compiled your kits, its time to add them to the store, the process is very similar to adding an item with a few minor differences, so lets go through them!
Using the command /product add-kit we can initiate the process of adding kits into the store. As you will see in the image below, we have up to 9 customizable options, these aren't all mandatory except the initial 4 which are;
Mandatory Options
Category - Please select which category you wish for this item to be placed in.
Name - Please name the item - This is personalized and is not referring to the item name, if selling a full metal kit then perhaps name it Full Metal Kit
Price - You will need to price this item accordingly within your store.
kit - This text box must contain the actual kit name, this is the 3rd string in the command if build through GPortal "fullmetal" or the name you selected when building it through the VereTech Kit Wizard..
Optional Options
Gameserver - If you select a gameserver here players will only be able to purchase this product on that 1 gameserver and it will not show if other game servers are selected.
server-cooldown - You can specify that only one player can buy this and then a cool down timer is enabled at your required length. (Must be whole number and time is in seconds)
player-cooldown - You can specify after a player has purchased the item, how long he then has to wait to purchase it again, this will not affect any other players ability to buy this product. (Must be whole number and time is in seconds)
position - You can adjust the order in which these items appear in your store by clicking this menu, starting at 0
eg; 0=1st, 1=2nd, 2=3rd, 3=4th ect...
delivery-delay - You can specify how long after the item is purchased it takes to receive delivery, this can be extremely useful if they are experiencing a raid, it will stop them instantly sealing constantly using the shop to buy doors ect.
(Please enter whole numbers and time is in seconds).
Role - You can specify which Discord role is allowed to see this kit. Please Note: Being the Discord owner does not give you automatic immunity to this rule, please ensure as owner you have every role available within your Discord.
Please see the example below for further information;

Once we choose out parameters, hit send and the product will be added. To check this kit, simply use the command /buy as before in the previous page.
Editing a Kit
Should you require it, you also have the option to edit a Kit, you can do this using the command /product kit-edit, using this command you will have the same options as before for editing, you will simply have to select which parameters you wish to edit, or even add. Please see the image below;
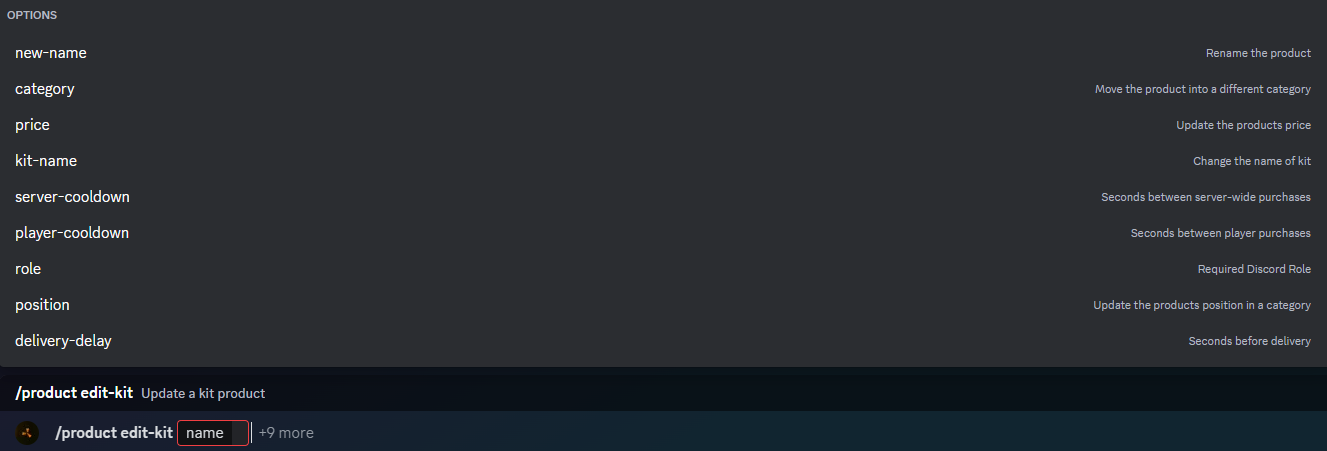
Obviously with editing, because the kit exists inside your store, there are no longer "Mandatory" edits as it already has all the information it needs to be in your store.
Once the command is sent following any changes, you will receive the following response from the bot, please accept this as confirmation of your changes.
Clearing Cooldowns on Kits
Following certain actions, for example wipes, there comes a time when we require a method to clear all cooldowns for products in the store. Using the command /eco clear-cooldown we can do this. Following triggering this command we have 2 options;
Category - Please select the category which you wish to clear the cooldowns from.
Product - Please select the category which you wish to clear the cooldowns from.
If you leave BOTH options BLANK - The entire shop will have all cooldowns wiped.
If you select CATEGORY and leave product BLANK, all items within that category will have cooldowns wiped.
If you select PRODUCT and leave category BLANK, Only the specified product will have cooldown wiped.
If you select BOTH, only the specified product will have cooldown wiped.

Deleting a Kit
From time to time you may wish to mix up the contents of your shop, there are a number of ways to do this including removing items you no longer want there. To do this please use the command /product delete, this command will then send you a list of your products to select which one you want to delete, in the event you have too many items in the store, please start to type the name into the text box for it to shortlist with autocomplete. Please see the example below;

Once you select your kit to delete, simply hit send and the bot will remove the kit. You will be notified with a response acknowledging your request and it's success.
Adding Command Groups To Economy
Adding Commands to a Category
Adding commands to your store opens up endless opportunities for your players. This allows you the opportunity for players to purchase Daytime, Purchase a Airdrop Spawn on the map etc.
Before we get started we will need to create a command group and add the command/commands to it. To do this checkout the guide here. Just to clarify when this product is purchased we will execute EVERY command in that command group.
To get started you will need to use the command /product add-cmd, much like creating a kit or an item for the store you will be greeted with a number of parameter options, please see the image below;
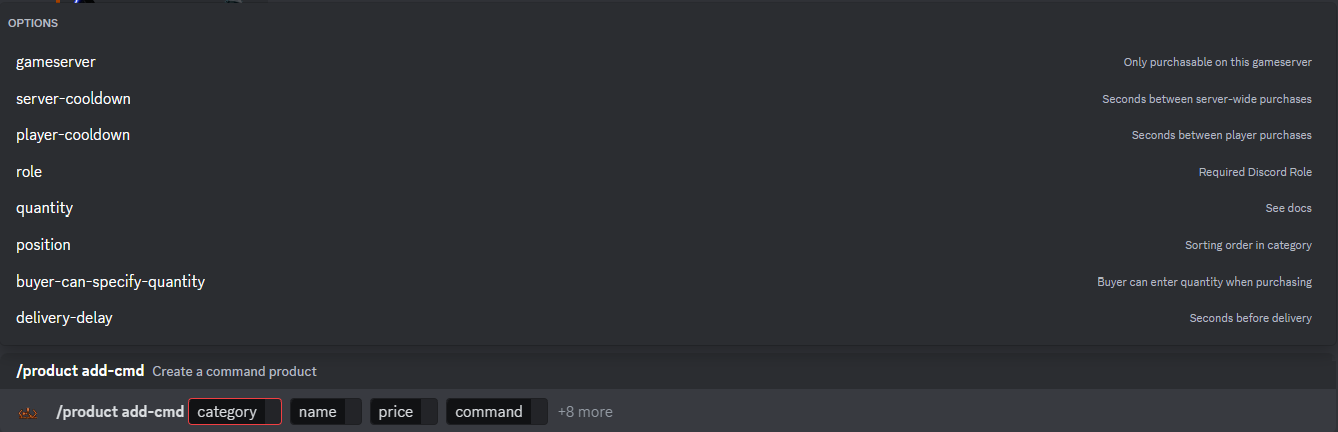
It is important to note that we have 4 mandatory fields and a further 8 optional, again, you will probably recognize this from adding the previous 2 options to the store, but we will again break them down,
Mandatory Options
Category - Please select which category you wish for this item to be placed in.
Name - Please name the item - A location is a good name to call it.
Command - This is where you select the command group you created earlier.
(Note only commands you can run from the Web console will work here.)
Optional Options
Gameserver - If you select a gameserver here players will only be able to purchase this command on that 1 gameserver.
Server-cooldown - You can specify that only one player can buy this and then a cool down timer is enabled at your required length. (Must be whole number and time is in seconds)
Player-cooldown - You can specify after a player has purchased the item, how long he then has to wait to purchase it again, this will not affect any other players ability to buy this product. (Must be whole number and time is in seconds)
Role - You can specify which Discord role is allowed to see this item. Please Note: Being the Discord owner does not give you automatic immunity to this rule, please ensure as owner you have every role available within your Discord.
Price - You will need to price this item accordingly within your store.
Position - You can adjust the order in which these items appear in your store by clicking this menu, starting at 0
eg; 0=1st, 1=2nd, 2=3rd, 3=4th ect...
Delivery-delay - You can specify how long after the item is purchased it takes to run the command.
(Please enter whole numbers and time is in seconds).
Placeholders Options
You may be asking but how do I add playernames and specified quantity. These work very much like customising feeds covered in Customising Feeds.
|
Placeholders |
Description |
Example |
| {PlayerPositionX} | Produces the X axis position of the player |
24.5 |
| {PlayerPositionY} |
Produces the Y axis position of the player | 225.6 |
| {PlayerPositionZ} |
Produces the Z axis position of the player | -114.3 |
| {PlayerPositionNorthX} | Produces the X axis position of the player 1M north of the position. |
25.5 |
| {PlayerPositionNorthY} | Produces the Y axis position of the player 1M north of the position. | 226.6 |
| {PlayerPositionNorth Z} | Produces the Z axis position of the player 1M north of the position. | -113.3 |
These could be implemented in the example below
entity.spawn recycler_static {PlayerPositionX},{PlayerPositionY},{PlayerPositionZ} (This command will cause a recycler to spawn on the players position.
This concludes adding commands to your store. It is very important you test these before announcing their sale to avoid any problems when players use it.
Clearing Cooldowns on CMDs
Following certain actions, for example wipes, there comes a time when we require a method to clear all cooldowns for products in the store. Using the command /eco clear-cooldown we can do this. Following triggering this command we have 2 options;
Category - Please select the category which you wish to clear the cooldowns from.
Product - Please select the category which you wish to clear the cooldowns from.
If you leave BOTH options BLANK - The entire shop will have all cooldowns wiped.
If you select CATEGORY and leave product BLANK, all items within that category will have cooldowns wiped.
If you select PRODUCT and leave category BLANK, Only the specified product will have cooldown wiped.
If you select BOTH, only the specified product will have cooldown wiped.

Adding Teleportation to Economy
The final type of item we have for the store is the teleportation product, this allows your users to purchase one time teleportation to your chosen locations, maybe its one of the many Safe Zone monuments for instant protection, could be an instant start to either Oil Rigs or even an instant jump to the Bradley APC. Whatever it may be, the power is in your hands!
Obtaining Coordinates
To create a teleportation we will need some co-ordinates from in-game. Please load into your server and fly over to your desired location (Slightly float above ground, standing on the ground for this part risks players falling through the map).
Now open your admin panel in game and head over to the commands tab, when your there press X (Xbox) or Square (Playstation) this then brings up your on-screen keyboard. In this text box, please type the command printpos and hit enter. You will see that the log files open with a response to X, Y and Z values, please make a note of these... See the image below for the 3 numbers you are looking for;
These are know as the X, Y and Z values (in that order) we will need this when we come to create the teleport.
Creating the Teleport Product
To create the teleport product we will need the coordinates mentioned above, to add these to the store we will need the command /product add-tp. Much like creating a kit or an item for the store you will be greeted with a number of parameter options, please see the image below;
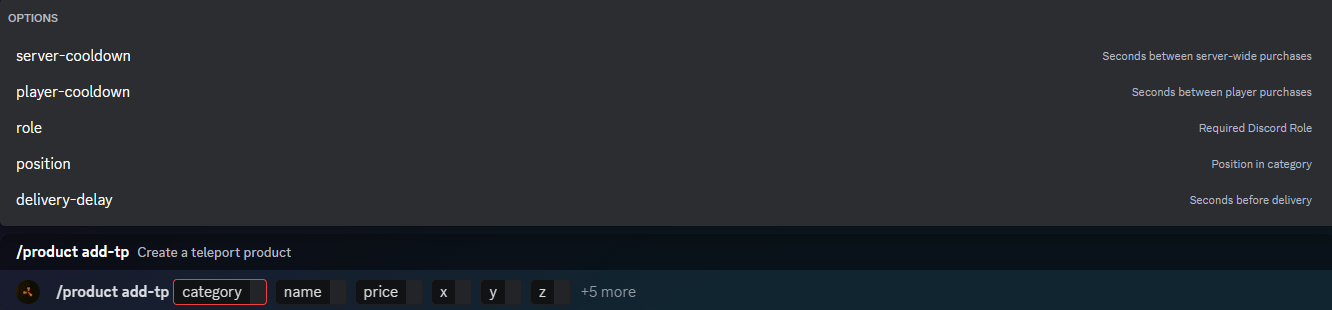
It is important to note that we have 6 mandatory fields and a further 5 optional, again, you will probably recognize this from adding the previous 2 options to the store, but we will again break them down,
Mandatory Options
Category - Please select which category you wish for this item to be placed in.
Name - Please name the item - A location is a good name to call it.
Price - You will need to price this item accordingly within your store.
x, y & z - These are the coordinates you gained earlier from using printpos - Please enter them in here in the same order as they appeared including any and all decimal places.
Optional Options
server-cooldown - You can specify that only one player can buy this and then a cool down timer is enabled at your required length. (Must be whole number and time is in seconds)
player-cooldown - You can specify after a player has purchased the item, how long he then has to wait to purchase it again, this will not affect any other players ability to buy this product. (Must be whole number and time is in seconds)
position - You can adjust the order in which these items appear in your store by clicking this menu, starting at 0
eg; 0=1st, 1=2nd, 2=3rd, 3=4th ect...
delivery-delay - You can specify how long after the item is purchased it takes to receive delivery, this can be extremely useful if they are under attack whilst out farming or trying to re-counter a monument.
(Please enter whole numbers and time is in seconds).
Role - You can specify which Discord role is allowed to see this item. Please Note: Being the Discord owner does not give you automatic immunity to this rule, please ensure as owner you have every role available within your Discord.
This concludes adding teleportation to your store. It is very important you test these before announcing their sale to avoid any problems when players use it.
Editing the Teleport Product
Editing is much the same as editing everything else within economy however the command is different, for teleports please use /product edit-tp. It will allow you to edit every and all options should you require, please see below the example of the response;
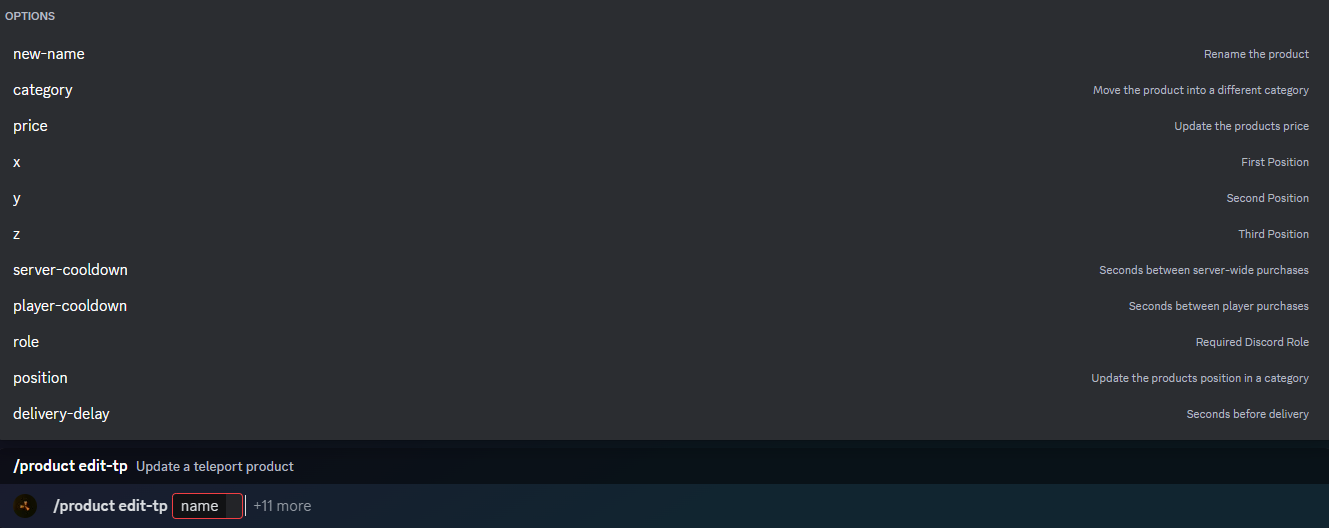
Clearing Cooldowns on Teleports
Following certain actions, for example wipes, there comes a time when we require a method to clear all cooldowns for products in the store. Using the command /eco clear-cooldown we can do this. Following triggering this command we have 2 options;
Category - Please select the category which you wish to clear the cooldowns from.
Product - Please select the category which you wish to clear the cooldowns from.
If you leave BOTH options BLANK - The entire shop will have all cooldowns wiped.
If you select CATEGORY and leave product BLANK, all items within that category will have cooldowns wiped.
If you select PRODUCT and leave category BLANK, Only the specified product will have cooldown wiped.
If you select BOTH, only the specified product will have cooldown wiped.

Setting Role Specific Economy Items & Kits
Creating the Roles
Setting role specific items in the store is a great way to give your VIPs, or anyone else for that matter, a way to be rewarded, from adding improved daily free kits, to adding their specific version of items in the store with granted discount or even to give some items VIP access only. The possibilities are truly as big as your imagination.
To do this we will need to set some roles in Discord. To do this head over to server settings, select roles and then click the "Create Role" button. Please name these appropriately as you will need them later, please see image below to show you what you're looking for;
Repeat this process as many times as you need to.
Creating Role Specific Items
Now that we have the roles set we can start to engage with the VereTech RCE Bot.
Start off by using the command /product add-item, see below;
and follow the process as normal when adding an item, if you need assistance with this then please click here to learn more, alternatively if you have added an item which you wish to change to a role specific, you will instead use the command /product edit-item and select the "Role" selection from the menu, here you can choose your dedicated roles, please see below;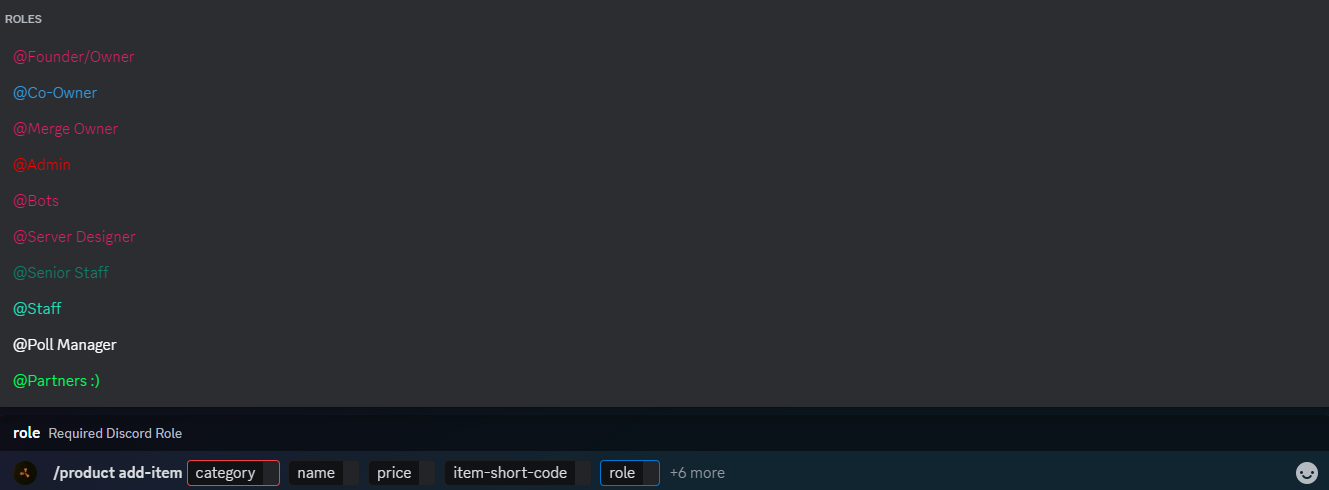
Check your Store
Once you have added any role specific items, to test these you will require to give yourself all of the new roles, even as server owner you will not have immunity to the role specific items, you must have the roles.
To carry out the test please use the command /buy to trigger the store, you will then be able to see all of your items and their permission levels, please see below of an example;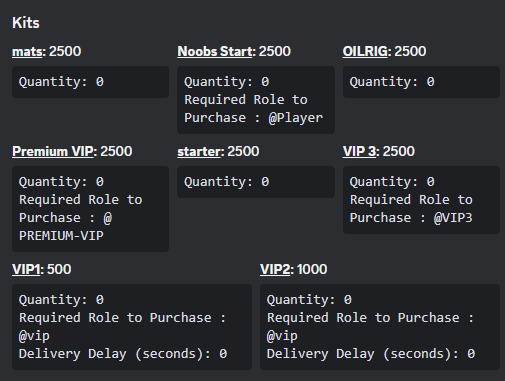
This will be an identical process for creating Role specific kits. For more information on kit building, please click here.
Player Wallets, Balances, Rewards and Logs
Within the economy, players will need a wallet and a balance to be able to spend within your store, accompanied with a way to also earn. This chapter will now focus on everything player funds and balances.
Players Must be linked using the /link command, more information can be found on this by clicking here.
Setting the Starting Balance
Setting the starting balance isn't necessarily a must do, however, we appreciate that it can be disheartening to players starting on 0. To challenge this we have introduced a way to give your players a little head start with their wallets. To configure this we will use the command /eco startbal, It is a pretty simple module to understand, the hard bit lies with creating a well balanced economy system. Please see below the image that shows how to set the starting balance;

Simply enter your desired value and hit send to set the balance.
Setting your Currency
We have enabled owners to set the name of your currency, you can even add custom emojis! I mean hey.... it's your economy right? To do this all you have to do is use the command /eco currency. See below for a snapshot of the command;

Giving Players Money
We all know that being able to give players money is a massive thing, this allows you to hold events, challenges or even just random giveaways. Lets get to it! The command for this feature is /eco give, This command allows you to choose the linked player or Discord role and then the amount to give, you can then have the choice of Wallet or Bank see below for details;

Taking Players Money
As great as it is to give money, we also have the option to take it, if its taking entry fees, removing a mistaken give or even punishment for an in game action? Whatever you reasons may be, the command for this is /eco take. Same again as above, please then select the player or Discord role followed by the amount you wish to take and where from;

Rewarding PvP Kills
Another great way for players to earn is to compete in-game, there is no default for this so it will require you to set it up before anything pays, using the command /eco reward-pvp, you will be asked which server you wish to apply this to followed by the amount, you then have 2 options, "Randomize" & "Steal".
Selecting randomize will mean your payment for PvP kills will be between 1 and your set amount, so if you set it at 200, each PvP kill will randomly be rewarded between 1-200 at complete random.
Selecting steal will mean that part or all of the payment for the reward will be made from the killed players Wallet: (Bank cannot be stolen from) - This allows players to earn and get paid automatically without admin intervention. Please see the image below for the example;

Rewarding PvE Kills
Should you also wish, we can set the payments to PvE kills, this is a great idea for the less confident fighters and even PvE only servers. The command is very similar to the PvP one, it is however, /eco reward-pve, you will again be greeted with identical options as before, select your GameServer followed by the amount. Kills only count for scientists, not animals.
You also have the option of randomize, Selecting randomize will mean your payment for PvE kills will be between 1 and your set amount, so if you set it at 200, each PvE kill will randomly be rewarded between 1-200 at complete random.

In-Discord Events
We also have an option in-Discord where events will appear in a selected channel with a claim button, please see the example below;

These events appear with a "Claim" button and must be claimed in time to get the reward, to configure the rewards the command we need is /eco reward-event, you will see upon triggering this command that it first asks you for the GameServer, followed by 4 optional events, Airdrop, Locked Crate, Attack Helicopter and Cargo - Each of this rewards can be more valuable than the other, or simply set to the same. Please see the options below;

Bandit Camp Spin Wheel
Another way for players to earn money to spend on your store is to gamble for it! We have re-created the roulette wheel that features in the almighty Bandit Camp! The pay-out multipliers are exactly the same. But there are a few variables with we can adjust and configure to stop it being abused. To configure the big wheel, the command is /eco bigwheel and you will see the following;
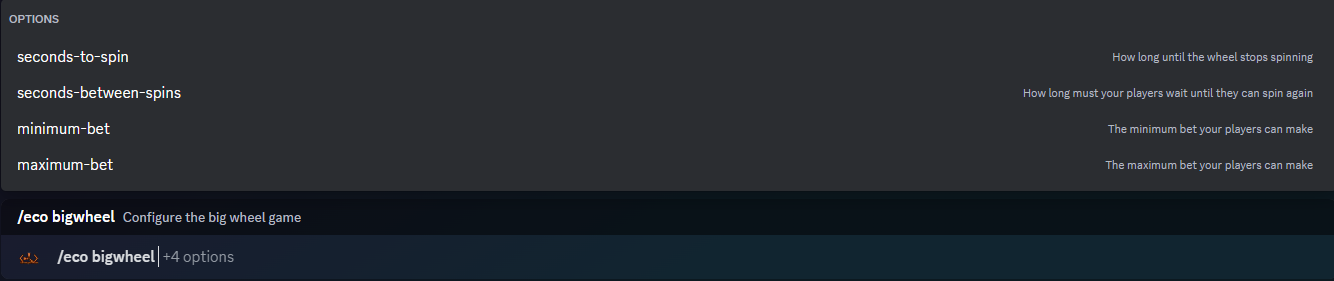
These 4 variables are as follows;
seconds-to-spin - Adjust the amount of time that the wheel is spinning before it comes to a halt and reveals the winning number
seconds-between-spins - This places a cool down on the spin wheel so that players cannot spam it, this allows you to maintain a level of control over their gambling habits.
minimum-bet Allows you to set a minimum bet on the spin wheel.
maximum-bet - Allows you to set a maximum bet on the spin wheel.
BlackJack
The final way for players to earn money to spend on your store is to gamble for it! We have added the popular card game, Blackjack. We can adjust the minimum and maximum bet amounts by using the command /eco blackjack please see the options in the image below;
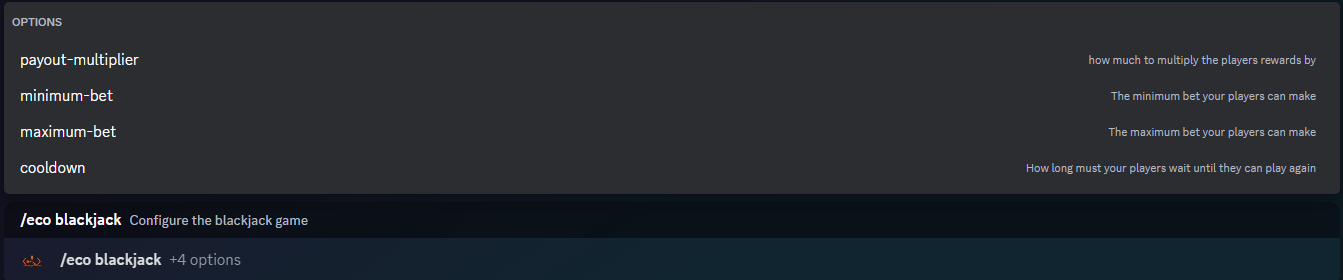
Resetting
When the joy comes to wiping your server, a useful tool to have is a way to reset their balances to a certain number, weather that be 0 or back to your stated starting amount, you can give everyone an equal start following a wipe! To do this, use the command /eco setbal. Please see the image below for the example;

Economy Admin Logging
As great as it is to have all of these options at the tips of you fingers, it is also a great idea to be able to view the logs of the Economy system. You will have the option now to use the command /eco logs, doing so will give you an option to choose a player. Upon choosing, hit enter and the players purchase history will be displayed on screen.
Here you will be able to see pages of the previous history of that player, showing a "per page" break down. You will be allowed up to 10 purchases per page and 10 pages, allowing 100 in total. Please see below for the example;
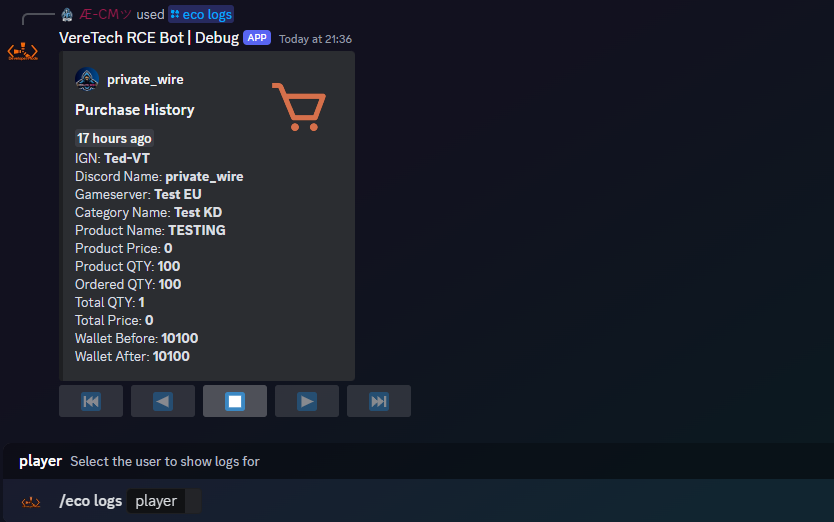
Players Manual
An extensive manual for all of your players on your server - Please feel free to copy and paste this at your leisure.
Players Command Guide
Welcome to the players command guide!
Server owners, please feel free to reference or copy and paste this documentation into your server as you please, this will hopefully help players understand how to efficiently navigate their way through the player section of the bot. Alternatively here is the URL should you wish to share it with them directly to this document [VereTech Players Guide]
Through out this guide we will be covering every interaction that players are able to make within your Discord and what the benefits could be by doing so.
So without further ado, let's get into it!
Linking & Economy
The first major advantage for you, as players to make the most of the VereTech bot is the economy feature, your server owner has the option to install an online store, should they be premium and choose to do so, which allows you to earn in-Discord currency. This currency can then be spent in store for items which carry out an automated in game delivery, directly to your inventory.
However, before we can use any of it we need to go through the notion of linking your Game Console Username to your Discord User name.
Username Linking
To link your discord to your console is a pretty simple step, all we need to do is use a / command in discord. There may be a dedicated channel in Discord for this, please speak to your server owner for more information.
Once we find ourselves in the correct channel for linking, in your message bar please type the following;
/link
Doing so will show you this option;

As you can see you need to enter your GamerTag/PSN Name and then select the console on which you play from, this may be Xbox or PS, it is important to remember that you will need to be on the rust server for this to be possible.
Once you have filled out this information please click send, the bot will respond to you to confirm or deny connection as seen below;
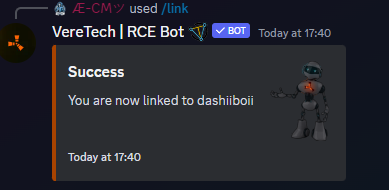
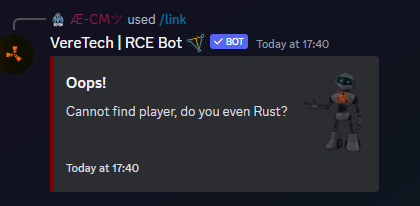
You are now linked and ready to enjoy the maximum features of economy!
Checking your Balance
As you go through Rust life, there are certain ways in which you can earn currency, for information on how your server is set up, please speak with your server owner.
Once you understand the method of earning, it will be a useful tool to be able to check your balance, to do this we need to put the following command in your text box;
/bal
The bot will reply with your total balance and break it down for you into cash, bank and them a grand total. See below the example for how it should look;
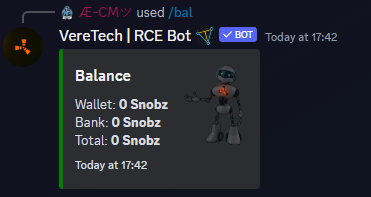
Depositing your Funds
When in-game, you can lose your all important cash if you have not yet deposited it. By being killed you are allowing other players the opportunity to steal from you following killing you, they are directly rewarded for the kill from any available cash you have in your wallet that isn't safe inside your bank. To deposit into your "Bank" you will need to use the command /dep you will then need to select the "amount" you wish to deposit (leaving this blank will deposit all of your funds). Please see the example below:-

Buying an Item or a Kit
Now that you are linked and know your balance, its time to use the store!
To browse the items for purchase please use the command;
/buy
Select your server and then hit send. You will now be shown a list of categories to choose from, should you need help understanding these, please speak with your server owner. Simply select the item you wish to purchase and hit enter.

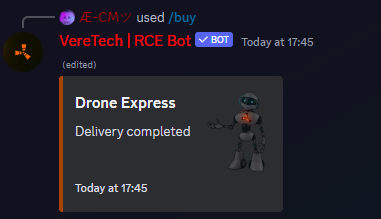
You will see that the delivery is under way.
Please Note: it is important to ensure that you have enough space in your inventory before purchasing as insufficient space could cause item delivery failure.
Gambling
Here at VereTech we have made it possible to also gamble some of your purse in the attempt to win more! We currently have 2 options;
Bandit Camp Spin Wheel
We have installed the bandit camp wheel into the bot! To use this feature, please use the following command in your text box;
/spin
From here you will be given 2 options, select amount - Limits could be in place at your server owners discretion. 2nd option is color, these directly correlate to the real bandit camp wheel;
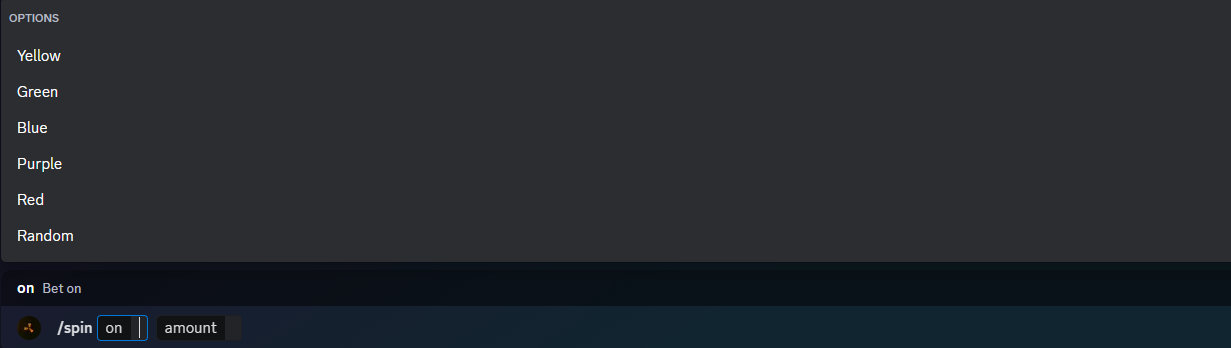
Yellow - 1x + bet,
Green - 3x + bet,
Blue - 5x + bet,
Purple - 10x + bet,
Red - 20x + bet,
And finally a random option.
Once selected hit send and watch the wheel spin! Good luck!
Blackjack
Our second and most recent gambling method is Blackjack, an old favorite. For those that have never played, please click here for the general rules of Blackjack. To launch the Blackjack feature us the command in the text box;
/bj
This launches the blackjack feature where you will be able to enter an amount to bet - Again, the server owner has the ability to set a max and min bet amount, please speak with them for more details.
When you have selected your amount and started you will be dealt your 2 cards, with the options to hit for stick, this is intractable by emoji, see below;
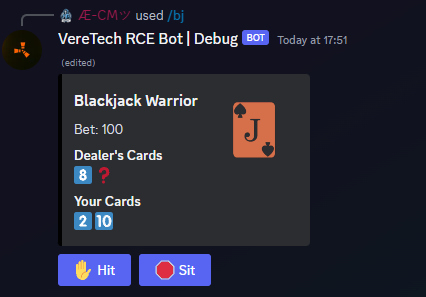
Aim of the game is to get as close to 21 as possible without going over and going bust. Once you've decided to use stick your dealers turn is then automatically completed and the winner is determined.
Player Information & Communication
Welcome.to the final chapter of the player usable commands with VereTech.
Here we are going to cover Player Information, Stats, K/D ratios, in game chat messages and everything invetween.
Player Information
The VereTech bot uses a database to store and recall information on players as requested, we have utilised this and created a feature that allows players to monitor their own stats in discord.
We can do this by using the following command;
/stats
Using the stats command the bot will use your Discord Username and Console Name to generate a snapshot of your history with the server since the bot has been connected. If you was part of the server before the bot was connected, unfortunately we have no way of obtaining that information.
Players can see some interesting stats including;
- Kill/Death Ratio (K/D
- Total PvP & PvE Kills
- Total PvP & PvE Deaths
- Current Kill Streak
- Last Player Killed
- Last Player Killed By
- Worst Enemy Info
- It also includes time stamps! Please see the image below for more info.
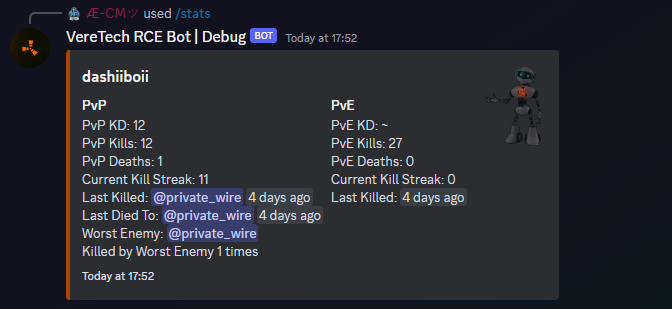
As you can see the information is quite extensive and will evolve as we are able to obtain more information.
In-Game Chat via Note Edits
Another fun and creative way of communication is in-game using the note edit system. Your server owner needs to activate this. If they haven't then please reach out to them if this is a feature you want to see.
Activate in-game Chat
To use that chat we need to use the following command in Discord by entering it into the text box;
/mute
All players are set to mute by default and will need to unmute themselves for this feature to become active, so you will see you have 2 options, Yes and No. Choosing No will activate the note chat for you so that any note edits you make will be broadcasted to the server via text on screen. Please Note: D11 and GPortal have an active profanity filter, any words that breach this filter will cause the entire message to fail so play nice! Please see the example image below;

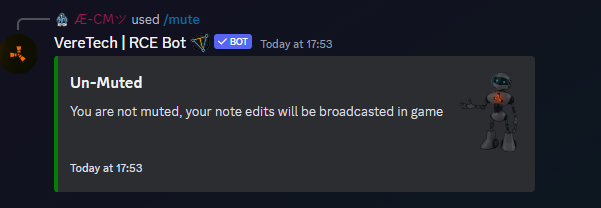
Deactivate in-game Chat
Should you no longer want to use the note chat or need to turn it off for a period of time then please repeat the command in the chat box in Discord and when prompted select Yes, this will then remute you and deactivate your noted from broadcasting. Please see image below;
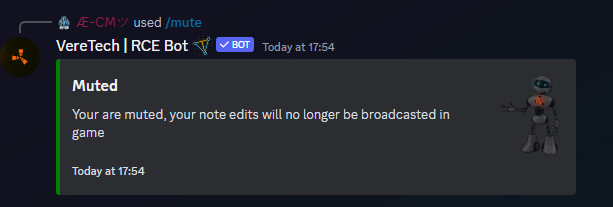
Redeeming Tip4Serv Purchases
Claiming
For you to claim items following your purchases, you will be required to return to the Discord server for the gameserver you are playing and you will need to use the command /claim, this is true for BOTH items AND subscriptions.
Once you have used the command you will need to select the gameserver on which you wish to redeem it and then the order-id will be an auto populated list, listing all of the orders, please see below;
Once you select their order and hit enter, you will receive a notification showing its been processed and then again confirming its delivery; as below;
Please Note: If your order contained an item AND a subscription then these will ALWAYS be separated into 2 order ID's.
If there are any concerns or repetitive failures and/or errors then please reach out to your gameservers Admin team for their support.
Clan System
Welcome to the feature "Clans", this system allows players to create their clan within Discord which will assign the clan with their own role, it also changes any in-game and Discord killfeed with their clan tag to be introduced in front of their name.
The clan feature has opened another avenue for us to dive down to bring you many more features in the near future with VereTech.
Player Controls
Creating a Clan
To get started with creating a clan, users can use the command /clan create which will give them the following 2 options;
tag: Users will need to enter a alphanumerical tag (ABC123) clan tag which must contain 3 characters. (These must be unique and can not be the same as another clan in your Discord server)
colour: Users will also have to select a colour for their clans, this colour must be selected from the pre-filled menu prompted by the bot. (As above, one colour can only be associated with one clan)
Please see below for the example;

Once submitted, players will receive a confirmation on screen that the clan has been created, it will confirm the clan tag and also the edge of the response will be highlighted in the chosen clan colour, this is also true with the role created within Discord, you will see that the role colour is set to your chosen colour, see below for our example;
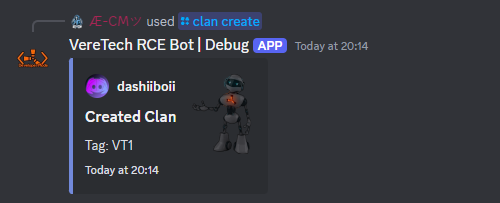

Editing a Clan
Bored of the clan name and/or colour? Or made a mistake with either option? Clan founders wan use the command /clan edit to change the name, colour or both of their clans identity, please see the example below;

Inviting to a Clan
When you want to invite members to your clan, you can do so by using the command /clan invite, this is limited to Founders and Chiefs, something that is covered further down in the documentation, you will be asked for the invitee's Discord username, this will auto fill as you start to type it, please see below for the example;
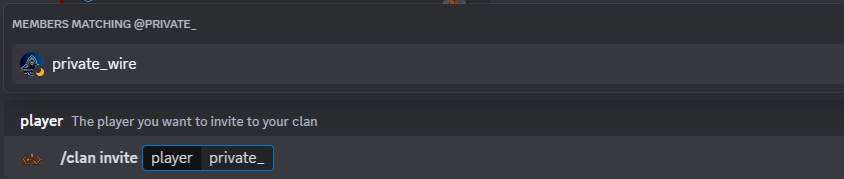
Once you select your player and send you will be notified on screen that your invitation has been sent.
If a player is already a member of a clan then you will be notified on screen and an invitation will NOT be sent, also, if the player you are trying to invite already has an active invite to that clan, again, you will be notified. Please see examples below;

Accepting/Rejecting a Clan Invite
Once members have been sent the invitation to join a clan they can use one of the following commands, /clan accept to accept the invite and join the clan, or /clan reject to reject the invitation. This will pre-fill wish all your available active invites.

Revoking a Clan Invite
If you have sent an invite to a player you no longer want to join your team, or you are higher up on the food chain that another clan member and want to revoke their invitation, you can do so by using the command /clan revoke, This will then give you a pre-filled menu selection of all active invites for you to choose which invitation you want to revoke. Please see below for the example;

Promotions/Demotions
Within your clan there are 4 levels of authority, these are;
Founders: These are the clan creators and are the only member of the clan with all permissions to edit and disband the clan, founders can also promote and demote to all levels up to grubbers, they can also revoke all invites from every member holding the Grubber and Freshie permissions.
Grubbers: Grubbers are the highest rank you can be promoted to within a clan that you do not own, Grubbers can send invites, revoke their own invites and all invites sent by Freshies, they also hold the power to promote and demote between the levels of Noob and Freshie. Finally Grubbers hold the power to kick Freshies and Noobs from the clan.
Freshie: Freshies are approved members of the clan, they have the ability to send and revoke only their own invites to the clan.
Noobs: Noobs are the entry level to clans, although they hold a position within the clan, it comes with no authority in the sense that they cannot perform any actions within the clan.
Using the command /clan promote and selecting the member they wish to promote the relative members can perform promotions within their powers as mentioned above, should they not hold the relevant permissions then they will be notified via a response from the bot. Please see below for the example;

Kicking from the Clan
Using the above hierarchy, members can kick other from the clan using the command /clan kick, by selecting your player you will be able to kick them from the clan, but remember, you must have high enough permissions to do so, failing to have these permissions will lead to an error message, please see the 2 examples below;
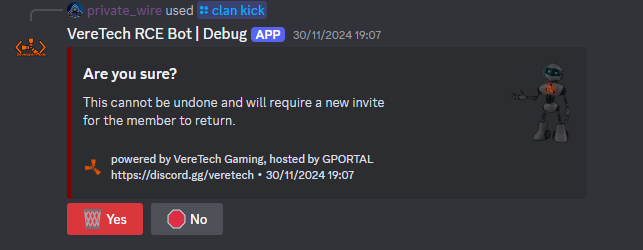
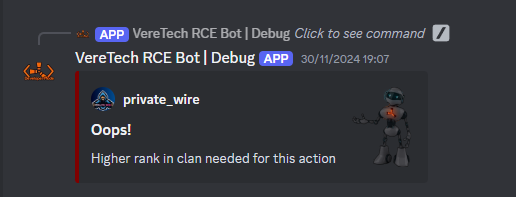
Leaving your Clan
Had enough of your clan and decided its time to leave? Or received a better invite to another clan? It is important to remember that you can only be involved with 1 clan per Discord Guild at any one time, to leave your current clan you will need to perform the command /clan leave, doing so will ask you "Are you sure?" as this action cannot be undone, upon clicking yes, you will be notified that you have successfully left the clan, please see below for the examples;
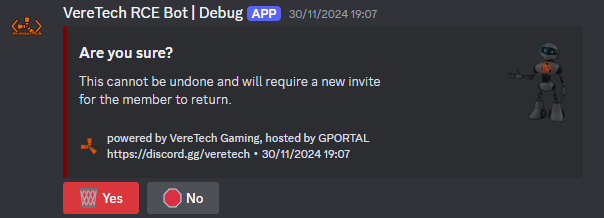
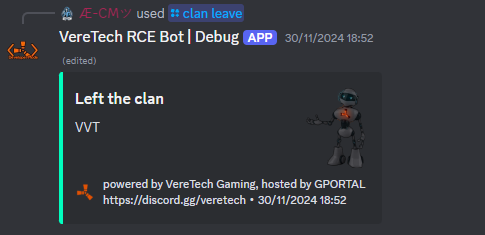
Disbanding your Clan
You can completely disband your clan and remove it from existence if you are the founder, this means all traces of you clan will be removed from the Discord, using the command /clan disband, you will be asked "Are you sure?", this action is undo-able and requires you to select yes or no to confirm, selecting yes will confirm your deletion, selecting no will return back. Please see below for examples;
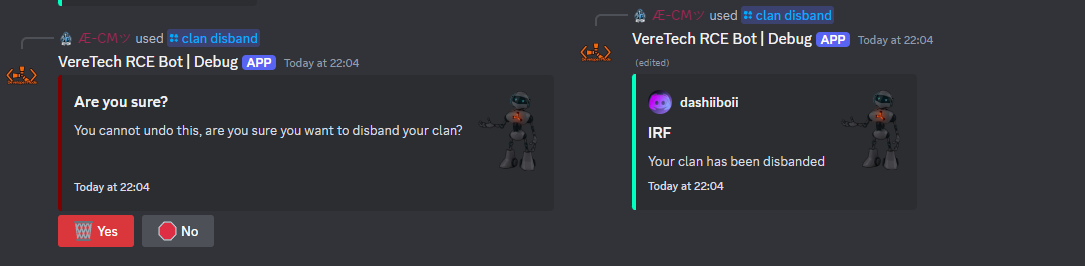
Display Clan information
Operating an "open book" policy, you can obtain the information of other clans using the command /clan info, selecting the clan you wish to view the information on, you will be greeted with a response detailing the clans information including;
Clan Members Count
Founders Name,
Grubber(s) Name(s),
Freshie(s) Name(s),
Noob(s) Name(s),
Please see below for the example;
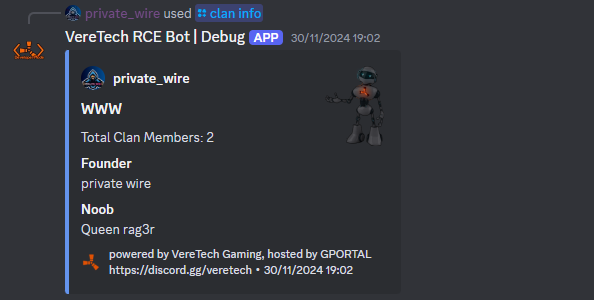
Fortify - Raid Protection System
Time to look at how Clans can make the most of the Fortify features including; Creating a Fort, editing a Fort and deleting Forts.
Prerequisites;
Create a Clan
Please note: All Forts must adhere to the settings configured by the Admin of the gameserver - Please contact them for more information. ALSO for the Fortify system you MUST be part of/Owner of a Clan within Discord with the correct Clan permissions!
Please click the blue text should you need to learn more on Clans.
Creating a Fort
To create a fort, as mentioned, players will need to be part of a clan and bare either the "Founder" role or the "Grubber" role, Freshies and Noobs cannot use the Fortify settings!
Once you have met this criteria head in game and find the center of your base - As we have below;
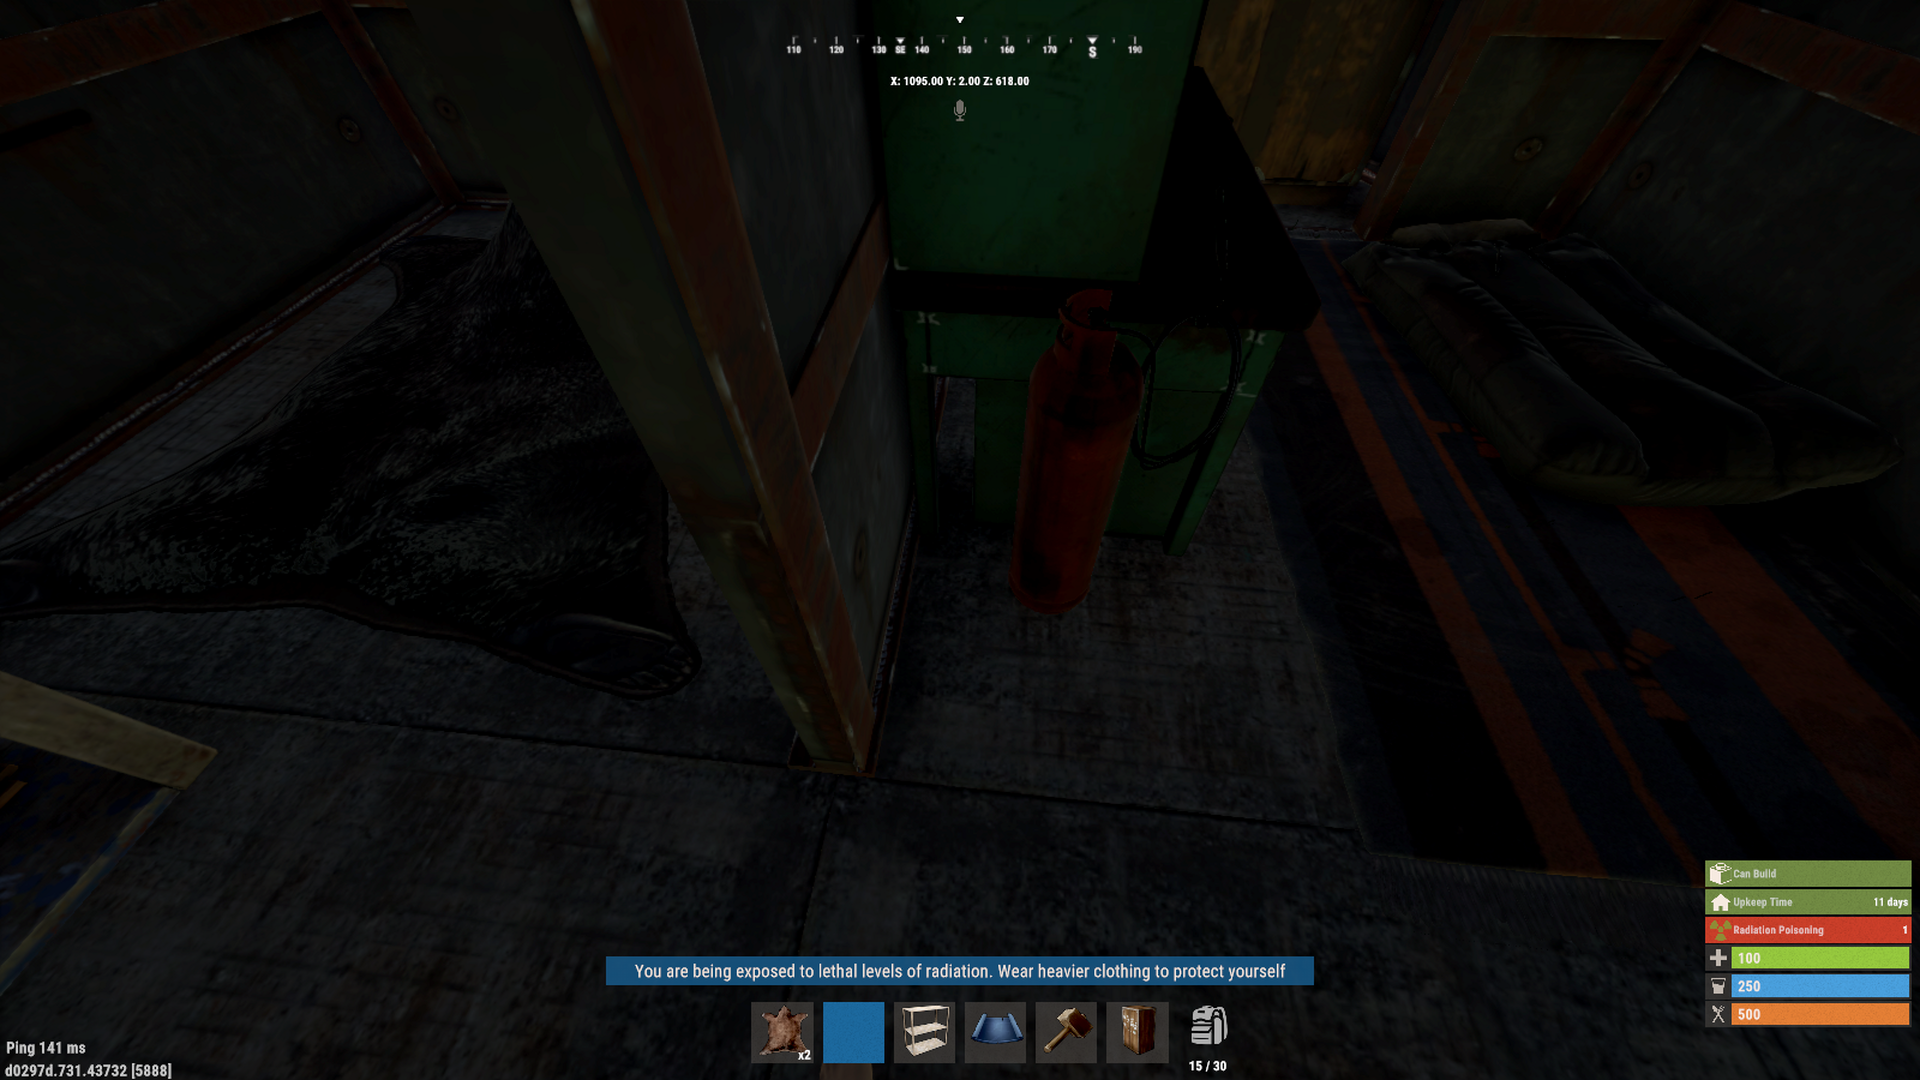
Once in the center, head back to Discord and use the command /fort upon using the command you will be required to select your gamserver from the list and hit enter.
Once processed you will see a list of all of your current forts - Ours currently has none so we can select "Add";
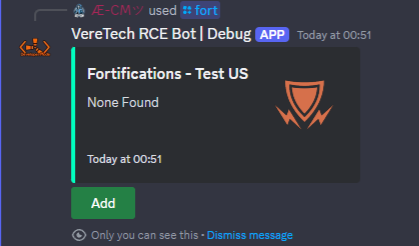
You will then be asked if you want to make a new Fort for your clan and if you are standing in the middle of your base before continuing - Once these 2 statements are true, select "Yes";
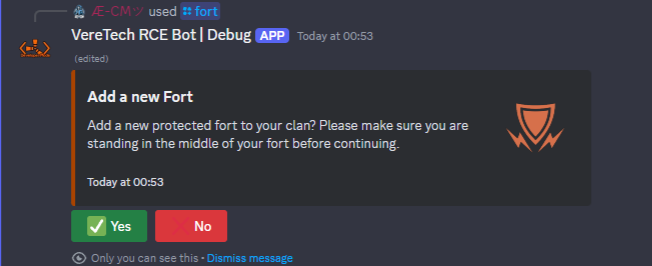
You will then be greeted with a text box asking you to name your Fort - Please note: This is limited to 3 characters (ABC123);
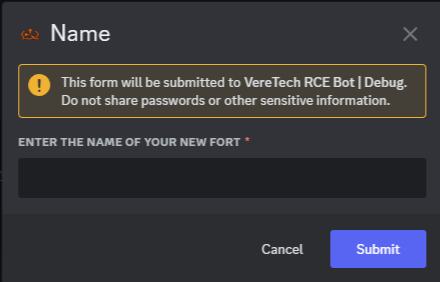
Once you are happy with everything select "Submit" and allow up to 60seconds for your Fort to be applied! Side Note: If the server is currently in any mode other than NO RAID or ScheduleRaid you will not see your Fort as it will not be active until your entire Clan logs off.
Deleting a Fort
For users to delete a fort they will again have to use the command /fort and you will be greeted with all of your Forts, simply use the drop-down menu to select a fort from the list to delete;
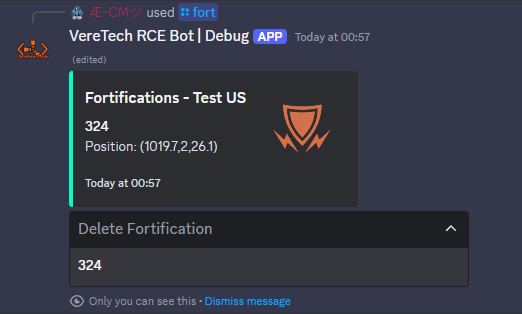
Once you select your fort to delete, you will see that the message will update and that fort will no longer exist;
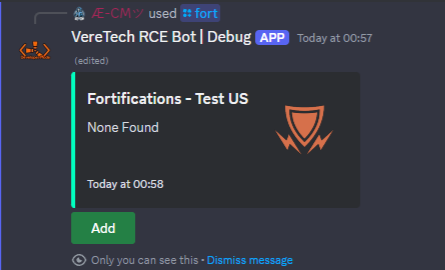
96.9 KDFM - RF Broadcaster Alerts
96.9 KDFM is where you can subscribe to in-game broadcaster frequencies and receive alerts into your Direct Messages (DM's).
Global Notifications
The first step to get started is to ensure you have Global Notifications turned on, you can configure this by using `/notify` in the DM of the VereTech RCE Bot.
When you first run the `/notify` command, you will see this:

Once you toggle the status to "Enabled", you will then see:
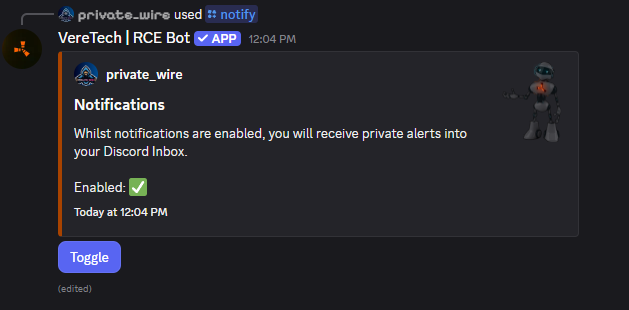
Whilst Enabled, the VereTech RCE Bot has permission to DM you. If you want to stop receiving DM's from our bot, you can once again use `/notify` and disable. We will now never DM you for anything.
Tune
Now that you have Global Notifications turned on, you can now head back to the Discord Server of the Gameserver your playing on and begin to tune your Discord Radio into the games frequencies.
Start by using `/tune` and select the gameserver you want to receive alerts for:

If you have "Global Notifications" turned off, you will see a friendly reminder to enable it to receive alerts:
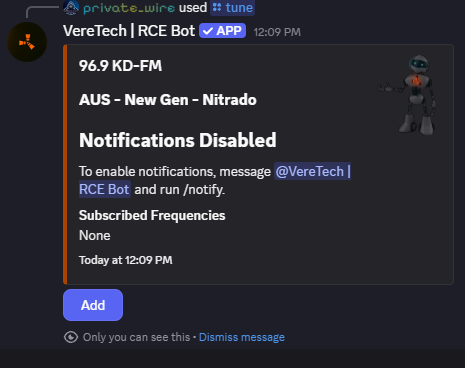
Otherwise you will see:

The response of `/tune` is hidden and other players cannot see what frequencies you have tuned your Discord Radio into.
To tune your radio into a frequency, select "Add":

You have two fields you need to fill in:
- Frequency
- The in-game frequency you want to receive alerts for.
- Name
- A nickname, this might be "front door turret targeted" or "boat base getting raided". What you choose here will be how you will be alerted when the frequency is triggered.
Once you have filled out the above info and pressed "Submit", you have now tuned your Discord Radio into that frequency:

You will now have the choice of adding another frequency or deleting an existing one by selecting it from the dropdown menu.
Once your frequency is triggered, you will receive a message from the VereTech RCE Bot with the Name, frequency and Gameserver name where the broadcast is occuring.
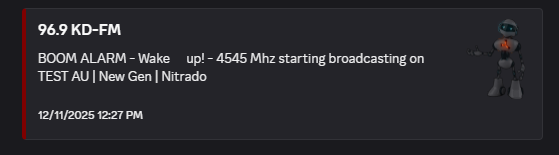
When a Gameserver wipes, all your subscribed frequencies are also wiped!
Clans & Teams
Everything you will need to know regarding clans within Discord and teams within game.
Clans & Teams Introduction
Clans
You can now create a "clan" within Discord which will allow you to keep track of all members within your clan, create clans, promote and demote as required and disband when your finished - Clans open up a much wider gateway in what is possible with the VereTech bot within Discord!
Not only is clans available for ease of control, it also stops the ability of members being able to farm each other for economy points, allowing you to keep a balanced economy and introducing another way to keep those pesky abusers at bay!
Teams
Using the in-game standard feature of teams, you can keep track of players within your team within Discord, this shares many of the same features as the clans with regards to the economy system but allows for no control from within Discord meaning that anything on display within Discord regarding "Teams" is for information purposes only.
Admin Controls - Clans
Welcome to the feature "Clans", this system allows players to create their clan within Discord which will assign the clan with their own role, it also changes any in-game and Discord killfeed with their clan tag to be introduced in front of their name.
The clan feature has opened another avenue for us to dive down to bring you many more features in the near future with VereTech.
Configuring Clan Settings
There are a few different options with the clan settings that we can adjust. To do this, use the command /settings clan - When triggering this command there are 6 options which are configurable by interaction, please see the example below;
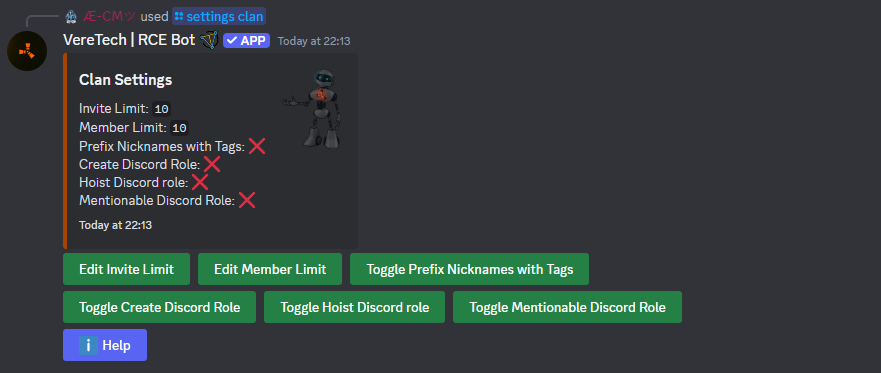
Invite Limit - Admins can set the limit to how many active invites are allowed to each clan, by clicking this button you will be greeted with a text box asking you to set your limit, simply enter your choice and submit once complete. You will see once you have submitted that the clan settings text box has been updated with your choice.
Edit Member Limit - Admins can set a limit on the maximum number of member that can be in a clan at any one time, by selecting this button, you will again be greeted with a text box requesting your choice and once you submit this choice, the clan settings will update itself with the new information.
Prefix Nicknames with Tags - Turning this setting on will create a nickname for the members of the clan by placing their clan tag in front of their Discord username when in your Discord server. By clicking the button in the options, this will toggle the setting on/off.
Toggle Create Discord Role - Admins can choose if the clan creation creates a discord role with the clan tag as the roles name and the clan colour as the roles colour. Note: Discord has a limit of 250 Roles per Guild. By clicking the button in the options, this will toggle the setting on/off.
Hoist Discord Role - Admins can choose if the Discord roles are hoisted in the user menu, this will cause the menu to display the clan role members separately from online members. By clicking the button in the options, this will toggle the setting on/off.
Mention-able Discord Role - Admins can choose weather the Clans roles are mention-able by everyone in the Discord using the @ mentioning tool. By clicking the button in the options, this will toggle the setting on/off.
Help - Clicking help will bring up a full comprehensive in Discord guide to the settings mentioned above.
Please note: This interactive settings tool will expire 60s after its last interaction, if you still need to configure more then you will need to trigger the command again.
Disband a Users Clan (Admin)
Server admins also have the power to disband a clan, this will carry the same effect as the "Disband your Clan" section above, using the command /pl disband-clan, you will be giver a pre-filled menu with all the available clans on the Discord, selecting your chosen clan to Disband you with the same "Are you sure?" warning as above, please see below for the example;

Fortify Raid Protection (Premium)
Learn all about our "Fortify" raid protection systems.
Introduction into Fortify
The most requested system is finally here, and it’s a game-changer for your Rust Console server: Fortify, the personal offline raid protection system your community’s been waiting for!
With Fortify, you can give your players the ability to customize their own offline protection, helping keep base wipes to a minimum while they’re offline—and keeping your server population healthier for longer.
🎯 But here’s where it gets powerful:
As an admin, you’re in full control. You can globally disable all offline raid protection for scheduled raid events, PvP weekends, or chaos hours—whatever your server’s vibe is. Once the raid window closes, offline protection automatically reactivates, per player, without you lifting a finger.
✨ Key Highlights:
-
✅ Personal offline protection (user-controlled)
-
🔥 Admin override for all protections
-
🕒 Timed raid windows with auto-restore
-
🧠 Flexible setup: guided user config or admin-only control
Keep your server balanced. Keep players invested. And keep things fair—even when they log out.
Fortify is live. Time to take your server to the next level. 🚀
Admin Configurations
Beginning the guide with the admin settings - Admins can set up a host of items with the ability to turn Fortify on or off, editing zone sizes, distances between forts, amount of forts clans can own and much much more - We can also include schedulers for those all important events eg - Raid weekends, Raid evenings or even end of wipe raids!
Please Note: If your gameserver undergoes a Map/Full wipe then all current Forts will be wiped from the gameserver at the same time. This is a mechanism designed to avoid old Forts being placed on a new map.
In addition any Fortify settings that are changed will only take full effect once the zone has gone through a cycle, eg: Been Enabled or Been Disabled. This can be forced immediately by toggling the setting mode to: OFF, allow 60 seconds for all Forts to switch off and then toggle back to your original setting.
Fortify Settings
To enter the fortify settings menu we need to use the command /settings fort. Then by selecting your gameserver and hitting send, you will be greeted with the following menu;
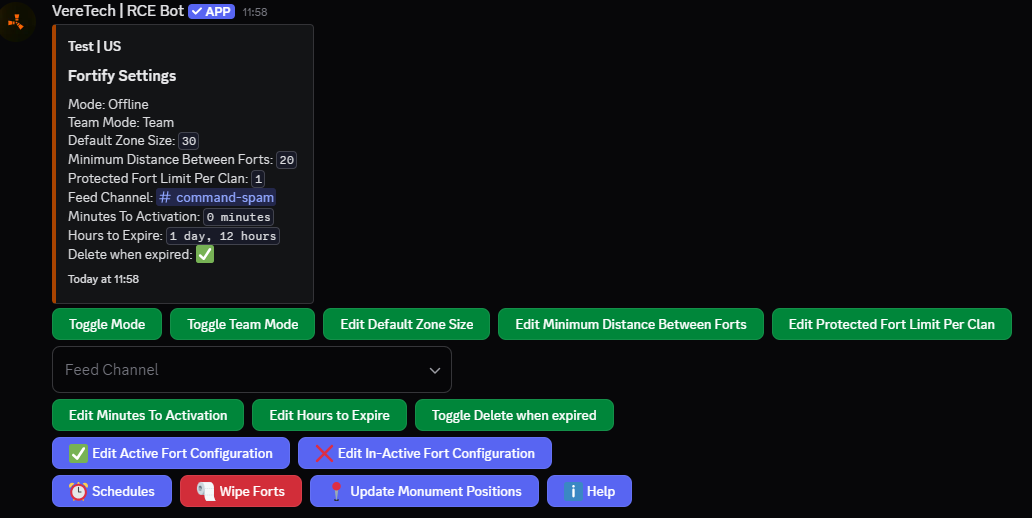
This message is fully interactive and has a time-out of 60s, meaning that from your last interaction with this message, you will have 60s to then interact again or the message will then time out.
Toggle Mode
Toggle mode is a button interaction where we have 4 options to choose from, upon clicking the interactive button you will see the message update to your new mode, lets break down the modes individually
Off - Raid protection is completely disabled for the entire server, if your users attempt to set a Fort then they will receive an error message stating that Forts are disabled on this gameserver. If your already have users who have offline raid protection set up and you decide to switch off Fortify for a period of time then all current configured Forts will be stored until they are switched on again, meaning no data will be lost.
Offline - The offline mode is for Fortify to be switched on, allowing users to setup their own Forts within game to avoid that nasty offline raid. Players can then have full use of the Fort commands. This will mean that the full rules of Fortify will apply.
No Raid - No Raid is a permanent protection method - Allowing all Forts to be enabled 24/7 regardless of players online/offline status.
ScheduledRaid - Forts will then be bound to the rule of scheduling, meaning the standard Fortify protection will be enabled up to the point where you introduce a schedule which will override all Fort settings disabling/enabling them at your own will, this could be useful for events such as "Raid Weekends"
Toggle Team Mode
Toggle team mode is a button interaction that has two options to choose from, when clicking the button it will change from clans to team.
- Clans Mode (Default)
In Clans Mode, Fortify integrates directly with your server’s Discord-based clan system.
-
✅ Forts are linked to registered clans created through your Discord.
-
✅ All clan members share raid protection.
-
🔐 Only players who are actively in a registered clan will benefit from Fortify.
Use Case: Best for servers that want strong community engagement and centralized control via Discord.
- Teams Mode
In Teams Mode, Fortify protection is based on in-game Rust teams.
-
🎮 Players must be part of an in-game team.
-
👑 Only the team leader can create a fort using an emote while in game.
-
🛡️ All team members will share offline protection as long as they remain in the same in-game team.
Use Case: Ideal for servers that prefer lightweight, in-game-only functionality without requiring Discord clan setup.
Feed Channel
To set the fortify feed channel click on the button and a list of channels will show up. Select the channel you wish to display the feed in from here the bot will work the magic.
You will then receive feeds in the channel like this one below for anything from
- Forts being removed due to player online
- Fort expiry
- Fort becoming active because team are offline
- Fort being deleted due to member leaving team
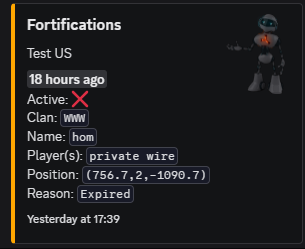
Default Zone Size
Default zone size is measured in meters and by default VereTech sets these at 10 (Radius), 10 meters in radius is approximately enough space for a single layer of honey comb on a 2x2 base inclusive of a large furnace on each end. By clicking this button you will be triggering a pop-up text box, for assistance in measurements, please also see below the diagram example
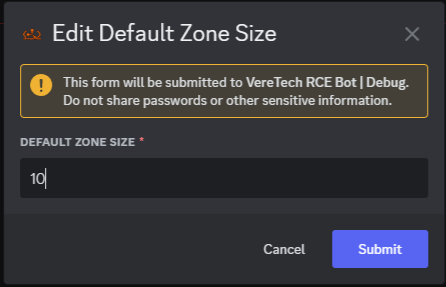
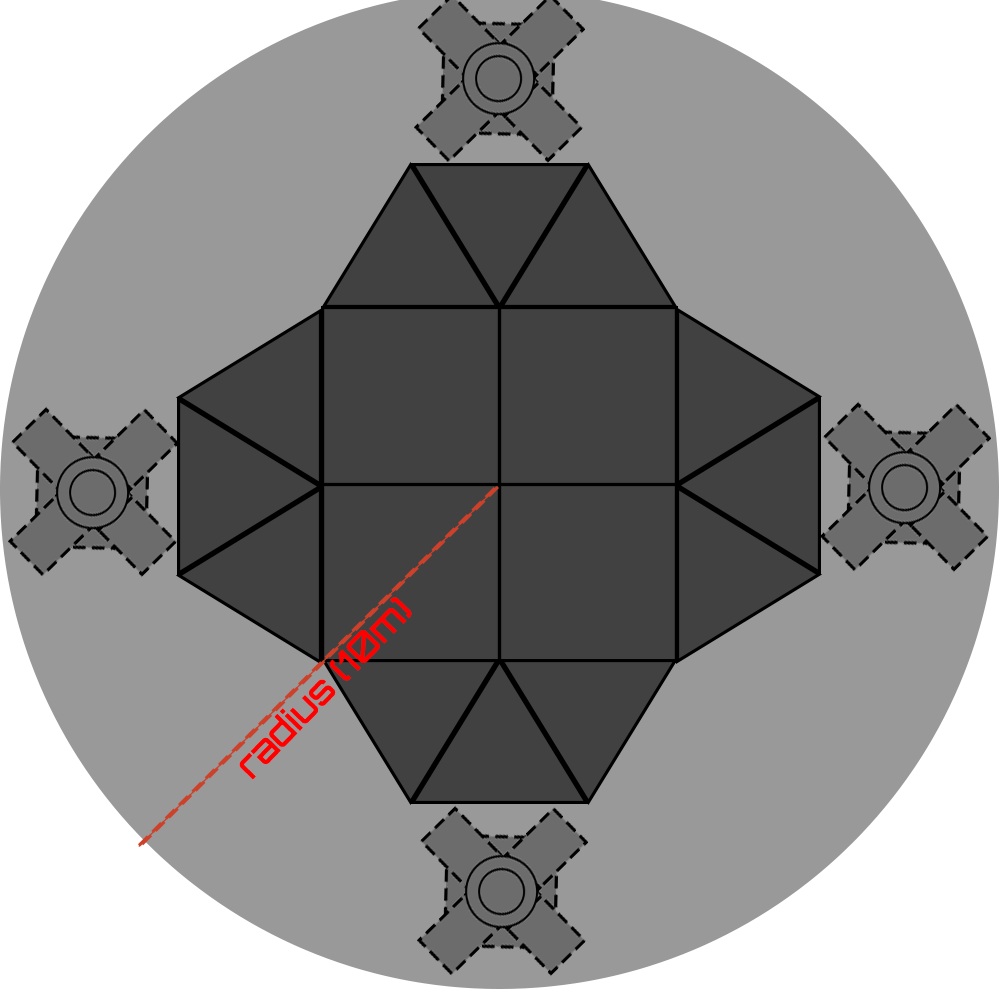
To change this, simply enter your wanted measurement (in whole numbers) and click "Submit" to confirm your choice.
Minimum Distance Between Forts
To change the minimum Distance between Forts you will need to select the "Edit Minimum Distance Between Forts" button and again you will trigger a text box to pop up on screen, again, by default, 10 meters is set,
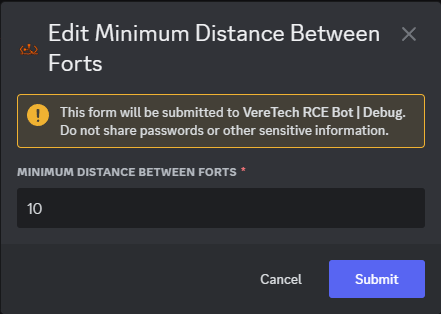
Protected Fort Limit Per Clan
We also have the ability to allow Clans to have more than one Fort, this enables clans, should you wish to allow it, to have protection on as many bases as you choose, this could be for boat bases, farm bases and much more! Simply click "Edit Protected Limit Per Clan" this time by default we set this at 1, but you have the choice to set this limit and again confirm using the "Submit" button.
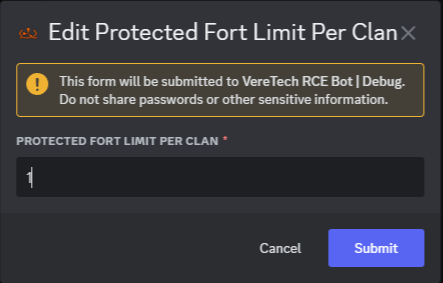
Minutes to Activation
The minutes to activation is for the Offline Mode ONLY and dictates how many minutes will pass from the last player logging offline until the Fort activates, this blocks users from being able to block raids the moment they start by simply logging off - The default for this is 10minutes which can be changed by clicking the "Edit Minuted To Activation" button - Again, you will see a text box pop up asking for your input, this is in minutes.
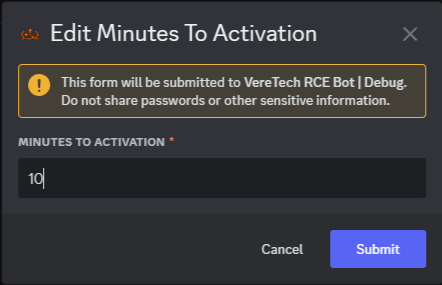
Edit Hours to Expire
This setting again is for the Offline Mode & No Raid Mode ONLY and denotes how many minutes shall pass until the Fort is automatically switched off - Meaning that this number indicated how many minutes will pass after ALL clan members log off until the Fort will go down, essentially stopping unlimited protection. This can be useful to void players using alt accounts whilst their main accounts being offline holds up the Fort continuously. By default this is set to 0 which indicates NEVER, Should you change it to another value and wish to return it to never simply enter 0.
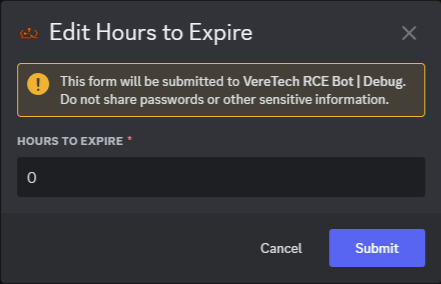
Edit Active Fort Configuration
This setting allows us to configure specifics to the Fort when it is active and the Clan assigned to that Fort are all offline - These settings include the following;
Toggle Delete
Toggle Enabled
Toggle Enable PvP
Toggle Enable NPC vs. Player Damage
Edit Radiation Damage
Toggle "Is Building Allowed"
Toggle "Is Building Damage Allowed"
Toggle Use Clan Colour for Forts
Toggle Show Area Message
Edit Enter Area Message
Edit Leave Area Message
Edit Fort Colour
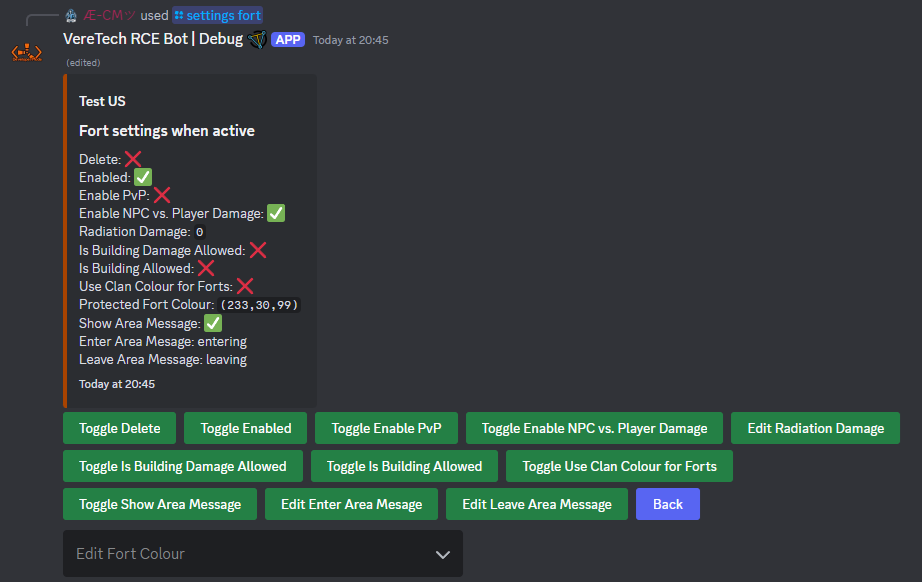
These settings mentioned above will be covered later in the documentation, please click on the relevant setting if you wish to TP to that settings instructions.
Edit In-Active Fort Configuration
This setting allows us to configure specifics to the Fort when it is in-active and the Clan assigned to that Fort are online - These settings include the following;
Toggle Delete
Toggle Enabled
Toggle Enable PvP
Toggle Enable NPC vs. Player Damage
Edit Radiation Damage
Toggle "Is Building Allowed"
Toggle "Is Building Damage Allowed"
Toggle Use Clan Colour for Forts
Toggle Show Area Message
Edit Enter Area Message
Edit Leave Area Message
Edit Fort Colour
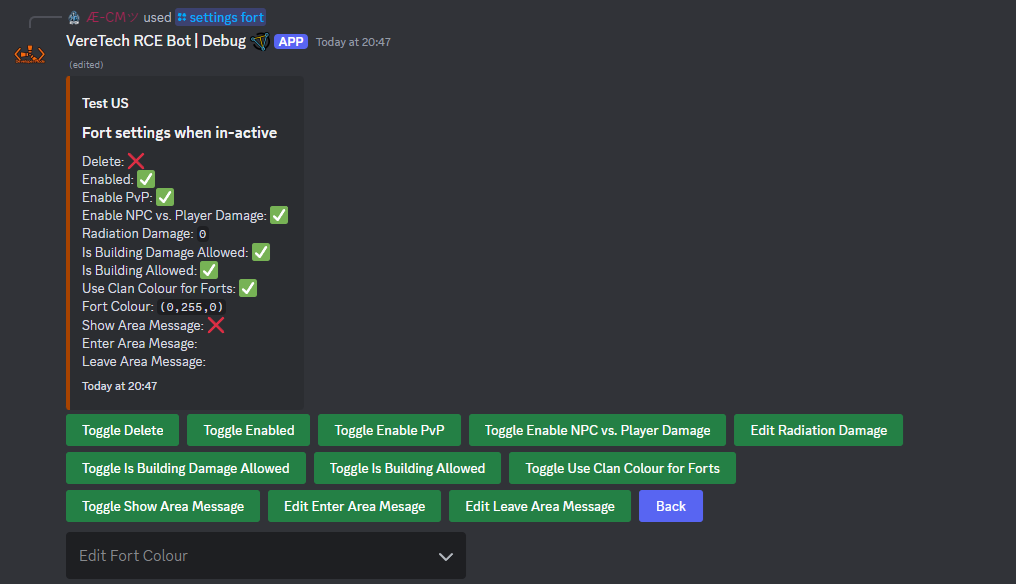
These settings mentioned above will be covered later in the documentation, please click on the relevant setting if you wish to TP to that settings instructions.
Configuring Active & In-Active Fort Settings
Show Area Message
This settings allow us to choose weather we want there to be a message shown upon players entering/leaving the area, this is an On/Off toggle which will be indicated in the message as you click the button;

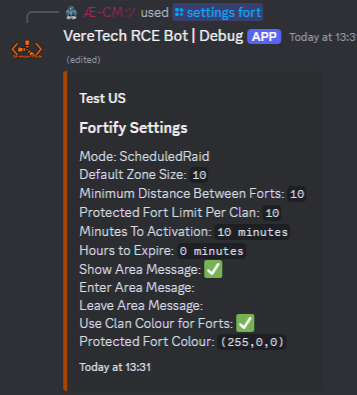
Enter Area Message
When selecting the button "Edit Enter Area Message" we can enter a custom message for when players enter a Fortified area, these are blanket messages which cannot be set for each individual Clan, however, you can use the Clan placeholders to make them personal - Please click here to head to the placeholders specifically available for Fortify - Click submit and your message will be set.
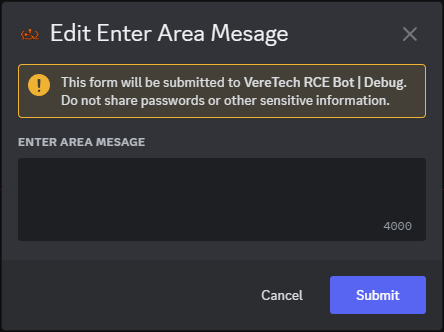
Leave Area Message
As with the entering area we also can choose our own custom leave message, by clicking the button "Edit Leave Area Message" you will again be greeted with a text box which you can use, again these are blanket messages which cannot be set for each individual Clan, however, you can use the Clan placeholders to make them personal - Please click here to head to the placeholders specifically available for Fortify - Click submit and your message will be set.
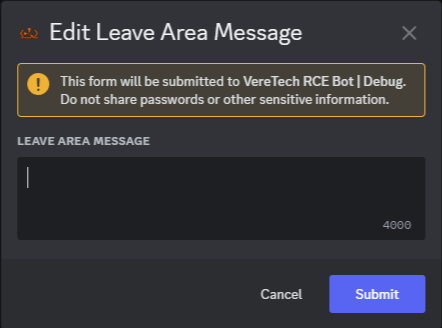
Use Clan Colour for Forts
We can choose if we wish to allow clan colours for the setting of the Forts, meaning the "Fort Bubble" will be that of the colour of the clan, just a simple toggle switch which will update the settings message as seen below.
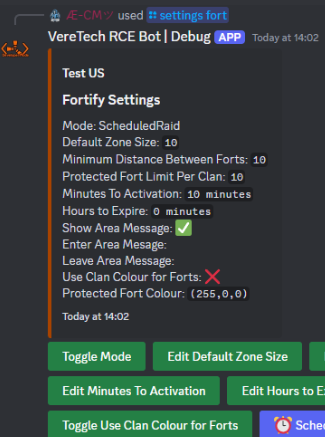
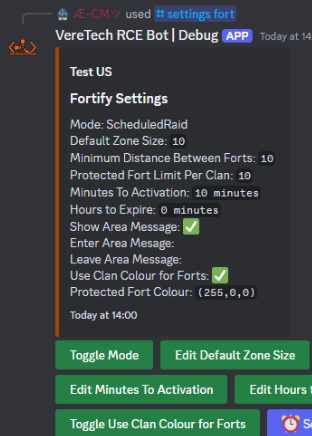
Protected Fort Colour
Because Discord has no option for a selective pallet - You will need to create roles for specific colours you wish to use for Forts - Simply head into discord server settings and create a role and select the colour you wish the Forts to show, once that has been created you will see upon triggering the /settings fort command that at the bottom we have an "Edit Fort Colour" menu which is prefilled with our roles, simply select the role that you just created and the Fort settings will be applied from the colour of that role.
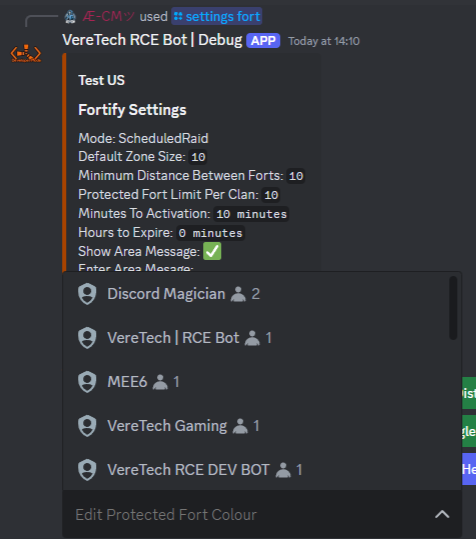
Please Note: You are more than welcome to delete this role following this being applied, we simply needed it to be able to set the colour. Also, if you have Use Clan Colour for Forts switched on then this will be overridden by that setting.
Enable PvP
The enable PvP button is an On/Off toggle, enabling or disabling weather players can deal damage to other players within the Fort, simply click the button "Toggle Enable PvP" and watch the message update;
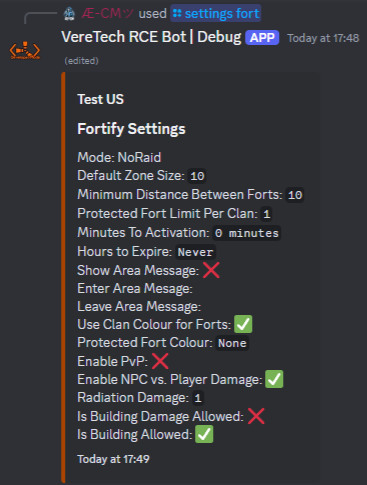
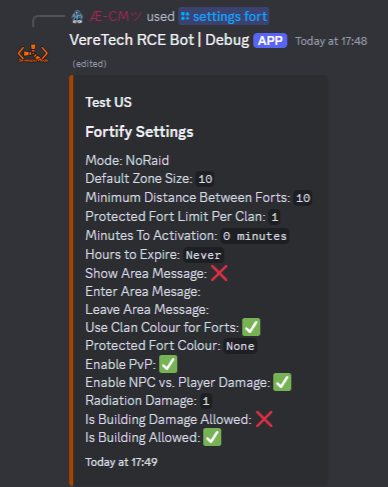
Enable NPC vs Player Damage
The enable NPC button is an On/Off toggle, enabling or disabling weather NPCs can deal damage to other players within the Fort, simply click the button "Toggle Enable NPC vs. Player Damage" and watch the message update;
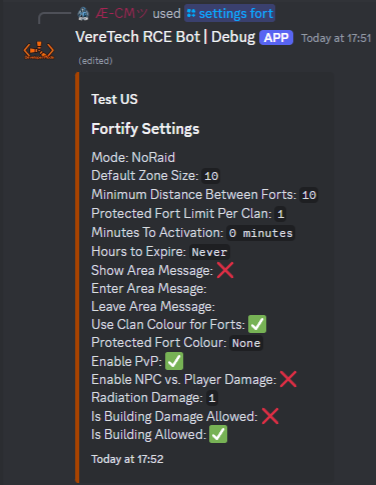
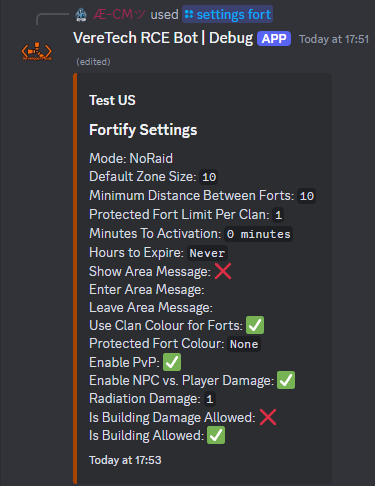
Radiation Damage
You can also adjust the radiation damage, allowing radiation to occur when another player enter the Fort, this is a value based adjustment, by clicking "Edit Radiation Damage", you will be greeted with a text box - Please enter here the value you wish damage to be at between 1 - 300. Default is set at 0;
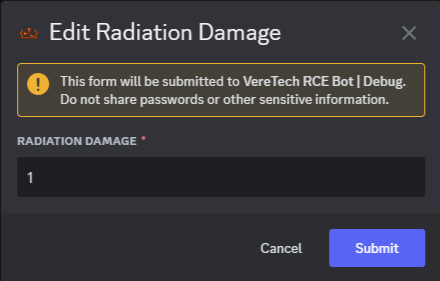
Building Damage
You can toggle On/Off building damage within an active Fort by players, by simply clicking the button "Toggle is Building Damage Allowed" you can toggle On/Off. This will be updated within the message;
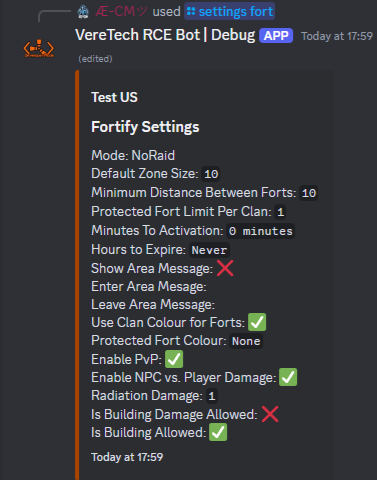
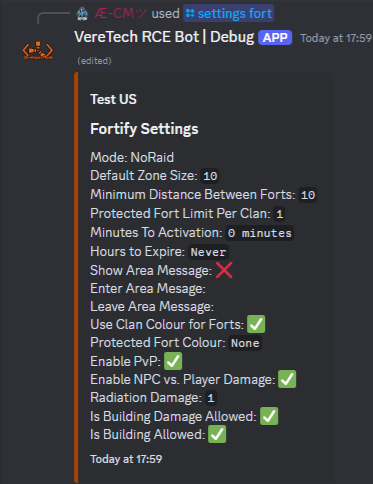
Building Allowance
You can toggle On/Off building structures within an active Fort by players, by simply clicking the button "Toggle is Building Allowed" you can toggle On/Off. This will be updated within the message;
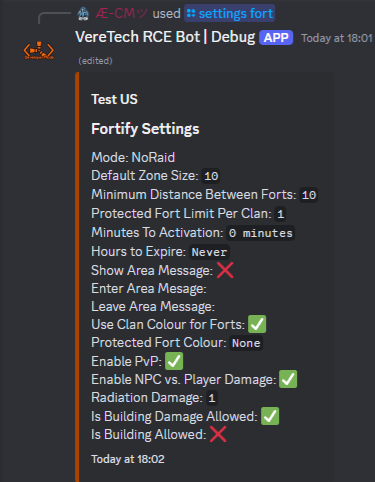
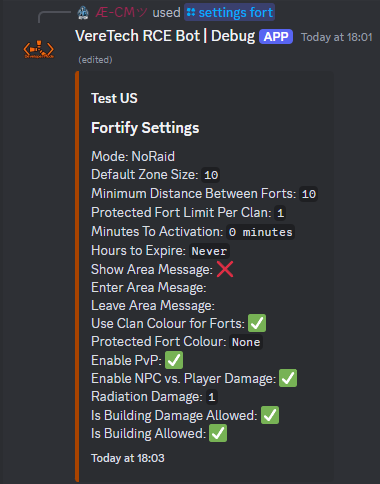
Schedules
We will get onto schedules later within this documentation, however, the schedules button is one to use to recall all schedules you have programmed. This is ONLY for use with the mode: ScheduledRaid and will not work with any other mode;
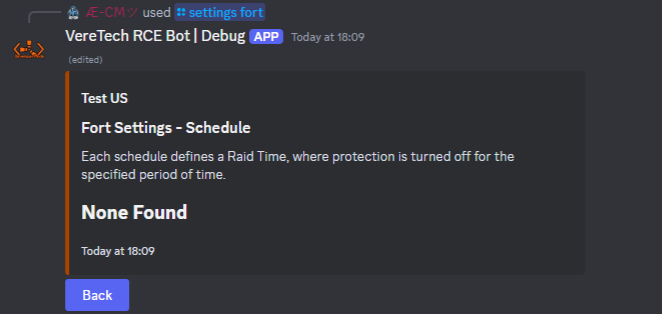
Help
We have also included a handy Help button should you need it, by clicking this it will give you all the information you need should you need reminding of any of the features in Discord;
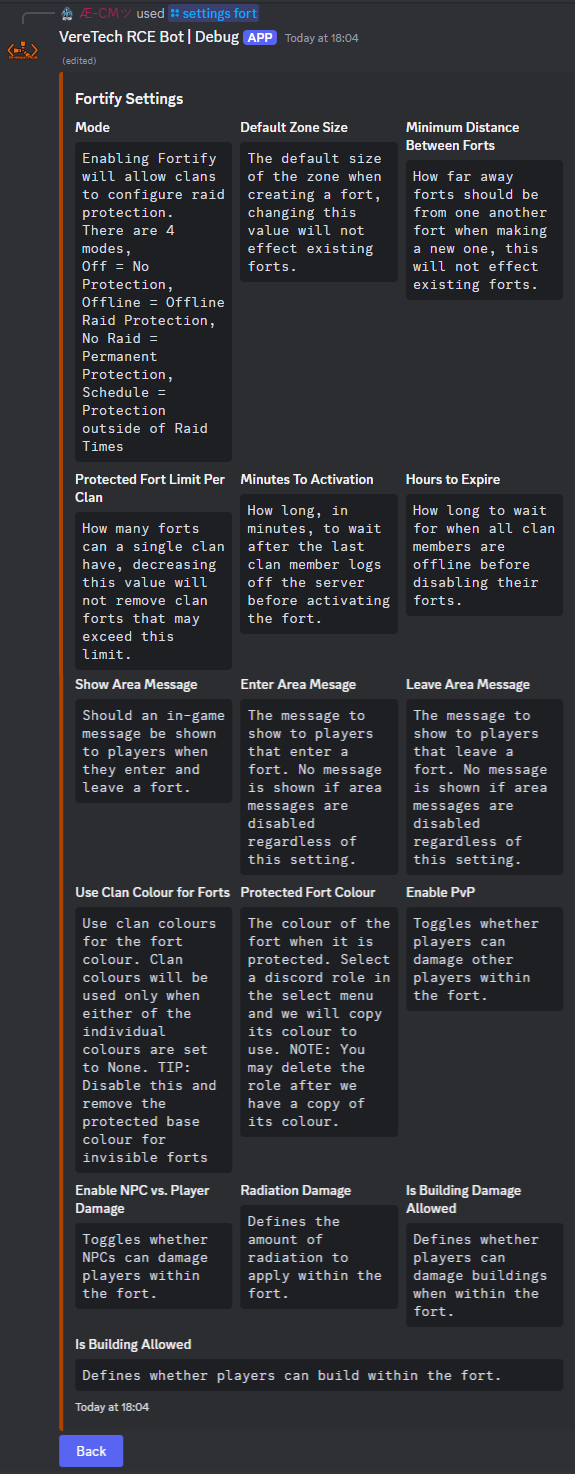
Editing Forts of Individual Clans/Teams
You can also, as Admins, carry out edits to individual Clan/Team forts should they out grow your default Fort size, maybe you want to reduce it following a clan Disband? By using the command /settings fort-edit you can do this, selecting your gameserver and the Clan tag or Team ID from the pre-filled menu, remember, should you have over 25 clans or team with forts, due to Discord limitations on auto-fill menus you will need to start typing the clans name or gamertag for the option to display.
Once you choose your Clan/team, you will be greeted by a text box with the Clan/team's Fort information, including the Fort name(s), the current active Forts for that clan and the size, choosing from the drop-down menu you can select which Fort to edit. Once selected you will be greeted with a text box where you can enter the new Fort size reposition or delete the fort.
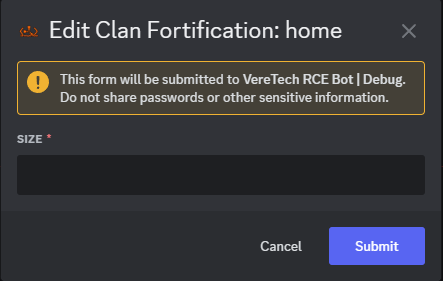
Scheduling Fortify
We have also allowed or scheduling within fortify, should you want to run events such as, Raid Evenings, Raid Weekends, End of Wipe Raids... This is the system for you! Allowing you to turn off ALL Forts at the click of a button!
You must be in the mode: ScheduledRaid for this system to take effect
Adding a Schedule
Using the command /settings fort-add-schedule you can set up custom schedules for your raid times and when you want these to be active for example - If you want raids to only be Friday through to sunday we can do this on one schedule.
By selecting our gameserver we then get the following options;
Timezone: Please select your timezone or the time zone you want the schedule to be on.
Name: Simply name the schedule, eg: Raid Weekend
day-of-week: Please choose the day of the week that you wish the scheduler to be started on
hour-of-day: Please choose the hour of the day that you want this to be started eg: 20:00 = 8pm
duration: Please select the duration of the schedule to then be de-activated - This is in minutes, so to gain sunday we would want 2 days = 2880

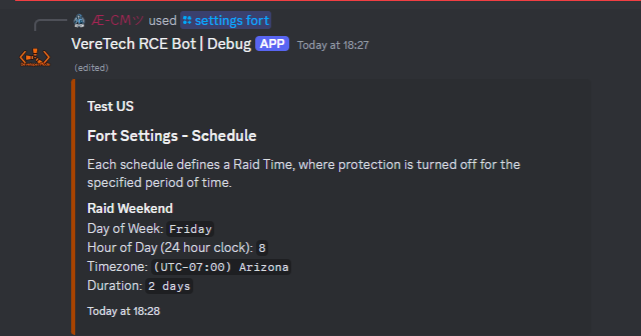
Listing and Deleting Schedules
To show a list of your schedules we will need to go back to using the command /settings fort and notice the button names "Schedules" if we click here we will be show a list of all of our current schedules, notice also there is a drop down menu named "Delete Schedule"
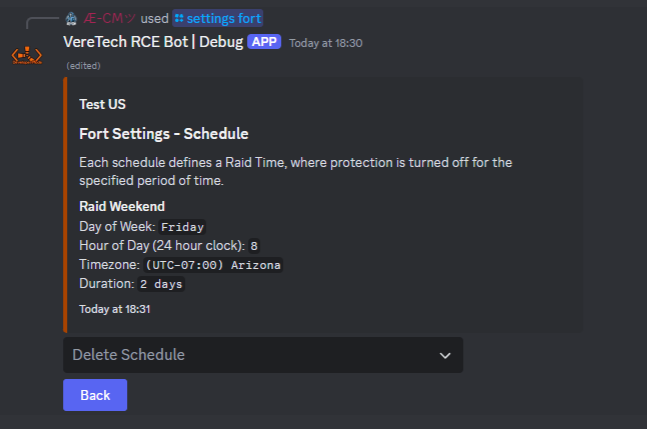
Once you choose a schedule you want to delete, simply use the drop-down menu, select your schedule and you will see that the schedule you have chosen has been removed and the text box has been updated;
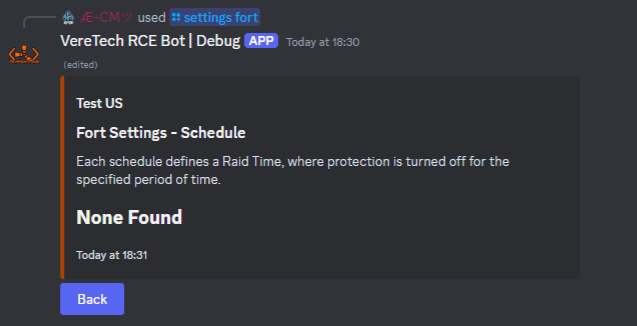
Placeholders Available for Fortify
| Placeholder |
Effect |
Example |
| {FortName} | Shows the registered name of the Fort. |
HME |
| {FortPosition} | Shows the position of the Fort. |
(5,0,-1100) |
| {FortColour} | Shows the colour of the Fort in Hex Code format. |
#123456 |
| {FortId} | The ID of the fort as registered in the database. |
1307e956-32a2-40be-8546-fc11b2a80de7 |
| {FortSize} | Shows the Fort size in meters. |
50 |
| {ClanTag} | Shows the Fort owners Clan Tag |
[VVT] |
| {ClanColour} | Shows the Fort owners Clan colour in Hex Code format. |
#123456 |
| {ClanTagWithColour} | Shows the Fort owners Clan tag in its respective colour. |
[VVT] |
Skip Night (Premium)
Configuring
Welcome to Skip Night, where you let the players decide for themselves if the server should skip night.
Introduction.
At a certain time of the day, voting is started and allows all online players to vote.
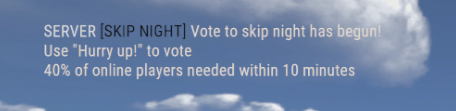
In order for a player to vote, the player must use the "Hurry Up!" emote.
Players do not get an acknowledgment if their vote was counted, to prevent spamming your feed.
Roughly every minute, votes are collated and if there is still time to vote, a message is displayed in game showing how many votes are needed and how much time is remaining.

If there are enough votes, you will see a voting success message and the servers time will be skipped ahead.
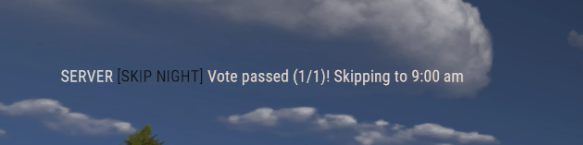
If there were not enough votes by the end of voting, you will see a failed message instead.
Getting Started.
To enable and configure all settings for the Skip Night feature, use `/settings skip-night` and select your gameserver from the list.
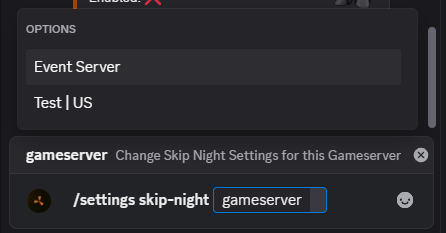
You will be presented with all the options available to be configured, including enabling and disabling the feature.

- Enabled:
- When a green tick is displayed, it means the Skip Night feature is enabled and working.
- Start vote:
- At what in-game time should we start the voting process. This is only a rough guess as we only check in-game time every 1 minute.
- At what in-game time should we start the voting process. This is only a rough guess as we only check in-game time every 1 minute.
- Accept votes Duration:
- How long in IRL (In Real Life) time to wait for the last vote.
- Required Percentage:
- Out of 100, what percentage of online players need to vote in order for the vote to be considered successful.
- Skip To:
- The in-game time to skip the server time to in-case of a successful voting outcome.
96.9 KDFM - RF Broadcaster Alerts (Premium)
Setting Up 96.9 KDFM
Introduction
96.9 KDFM is a premium feature, designed to allow your players to subscribe to in-game frequencies and receive alerts into their Discord DM's when a frequency is triggered.
Getting Started
By using `/settings tune` in your discord and selecting the gameserver to configure, you are presented with the following options:

- Enabled: Turn the feature on or off for your gameserver, by default this is off.
- If this is disabled, players will receive the following message when they try to use:

- If this is disabled, players will receive the following message when they try to use:
- Maximum Subscribed Frequencies per Player: Limit the number of frequencies a player can receive alerts for. By default this is 5.
- When a player tries to subscribe to a new frequency when they have already reached their max, they will see:

- When a player tries to subscribe to a new frequency when they have already reached their max, they will see:
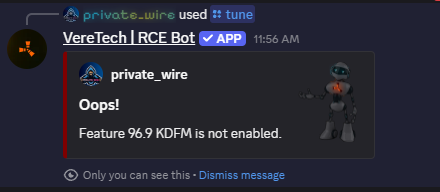
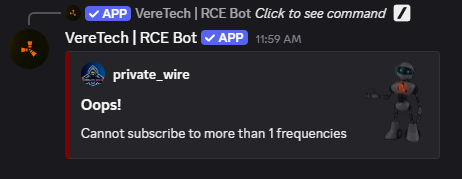
By clicking on "Toggle Enabled", the enabled status will toggle on or off.
By clicking on "Edit Settings", you will see the following screen to configure the max subscribed frequencies per player:
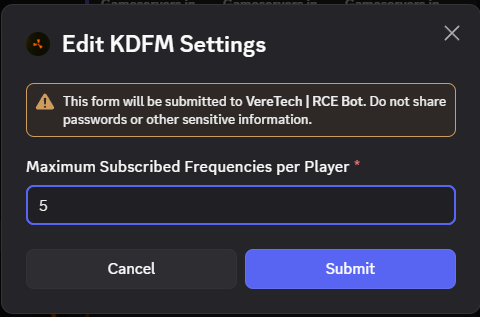
Commands Overview
List of Commands (Admin)
| Full List of Commands & Effects (Server Owners) Please use the blue text as instant links to the documentation on that command. |
|
| /gs add-gp |
Adds your GPortal server |
| /gs list | Shows a list of your Gameservers |
| /gs test |
Tests the connection of your Gameserver |
| /gs update-gp |
Change the details of your Gameserver |
| /gs delete |
Deletes Gameserver |
| /gs enable |
Enables/Disables your Gameserver by selecting Yes/No |
| /gs onlineplayers |
Allows you to set an active Voice Channel to show server pop |
| /gs adminchannel | Allows you to set a channel for admin spawning feeds |
| /gs sync-roles |
Allows you to create a synchronization between game and Discord roles |
| /premium activate |
Sends you a link to activate Premium |
| /premium status |
Shows current status of Premium |
| /premium coupon |
Allows you to add a premium Coupon |
| /premium switch |
Switches premium across gameservers |
| /premium buymeacoffee |
Send link to donate towards the project |
| /premium cancel |
Stops future payments and cancels premium |
| /feeds config pvp |
Configures the PvP channel |
| /feeds config pve |
Configures the PvE channel |
| /feeds config event |
Configures the Event channel |
| /feeds game add |
Configures in game text |
| /feeds game list |
Lists in game messages |
| /feeds game delete |
Deletes in game messages |
| /feeds discord add |
Configures in Discord messages |
| /feeds discord list |
Lists in Discord messages |
| /feeds discord delete |
Deletes in Discord messages |
| /pl info |
Provides info about a player |
| /pl search |
Search for a linked player via GamerTag |
| /pl link |
Allows owners to link players accounts |
| /pl setlinkedrole |
Adds players to role on linking |
| /pl refreshlinkedrole |
Adds discord role to all linked players |
| /pl setplayernickname |
Changes players Discord names to Console name when linking |
| /pl refreshplayernickname |
Changes all linked players names to Console name |
| /pl unlink |
Unlinks a Discord user from their GamerTag |
| /chat setup |
Setup note edit chat |
| /chat mute |
Turns on/off player admin mutes |
| /chat say |
Adds message on screen in game |
| /cmd group-add |
Adds a new command group |
| /cmd group-edit |
Edits an existing command group |
| /cmd group-list |
Lists all command groups |
| /cmd group-delete |
Deletes a command group |
| /cmd add |
Adds a new command to a group |
| /cmd edit |
Edits an existing commands in a CMD Group |
| /cmd delete |
Deletes a command from a group |
| /cmd list |
Lists all commands in a group |
| /cmd run |
Runs a command group |
| /category add |
Adds a category to the Economy |
| /category edit |
Edits a current Category |
| /category list |
Lists all current Categories |
| /category delete |
Deletes a Category |
| /product add-item |
Adds a product to a Category |
| /product edit-item |
Edits a product |
| /product info |
Shows information about a Product |
| /product delete |
Deletes Items, Kits and Teleports from the Economy |
| /product add-kit |
Adds a kit to the Economy |
| /product edit-kit |
Edits a Kit |
| /product add-tp |
Adds a teleport to the Economy |
| /product edit-tp |
Edits a Teleport |
| /eco currency |
Changes the currency of Economy |
| /eco startbal |
Sets starting balance of players |
| /eco setbal |
Allows you to edit everyone's balance |
| /eco give |
Gives funds to a selected player |
| /eco take |
Takes funds from a chosen player |
| /eco reward-pvp |
Sets reward for PvP events |
| /eco reward-pve |
Sets reward for PvE events |
| /eco reward-event |
Sets reward for claiming events in Discord |
| /eco bigwheel |
Configures the Bandit Camp wheel |
| /eco blackjack |
Configures the Blackjack feature |
| /eco logs |
Prints admin logs of the Economy System |
| /tc addupdate |
Allows you to add a timer to existing groups |
| /tc list |
Shows a list of command groups with timers applied |
| /tc trigger |
Allows you to manually trigger a timed command |
| /tc delete |
Deletes a timer from an existing command group |
| /lb pvpkills |
Displays a leaderboard of PvP kills |
| /lb pvpdeaths |
Displays a leaderboard of PvP deaths |
| /lb pvekills |
Displays a leaderboard of PvE kills |
| /lb pvedeaths |
Displays a leaderboard of PvE deaths |
| /lb pvpkd |
Displays a leaderboard of PvP KD |
| /lb pvekd |
Displays a leaderboard of PvE KD |
| /pl wipelb |
Wipes all leaderboards back to zero |
| /bind add | Adds a bind for a CMD to a "Emote Wheel" |
| /bind edit | Edits a bind to a "Emote Wheel" |
| /bind list | Shows all current "Emote Wheel" binds |
| /bind delete |
Deletes a current "Emote Wheel" bind |
| /tip key |
Enables you to enter your Tip4Serv key for linking your gameserver |
| /claim |
The command for claiming items/subscriptions following a purchase |
| /settings clan |
Admin commands for the setting configs for the clan system |
| /pl disband-clan |
Allows admins to disband any clan on the Discord server |
| /settings fort |
Allows Admins to edit the Fortify settings |
| /settings fort-add-schedule |
Allows Admins to set, edit and remove Fortify schedules. |
|
Allows Admins to configure the skip night voting system |
|
| /settings Tune | Allows Admins to configure 96.9 KDFM (RF Broadcaster Alerts) |
|
Allows admins to search up UUID'S |
|
List of Commands (Players)
| Full List of Commands & Effects (Server Players) Please use the blue text as instant links to the documentation on that command. |
|
| /link | Allows you to link your GamerTag/PSN Name within the Discord. |
| /buy | Allows you to buy items from the Discord for in-game delivery. |
| /bal | Shows your balance. |
| /dep | Deposits your funds into your bank. |
| /spin | Launches the Bandit Camp Wheel. |
| /bj | Launches BlackJack. |
| /stats | Shows your stats within the chosen GameServer. |
| /mute | Allows you to un-mute and enable your note edits. |
| /say | Allows you to send a message in-game from discord |
| /claim | Enables you to claim your Tip4Serv purchases |
| /clan create | Allows Users to create their own clan. |
| /clan edit | Allows the Founders of the clan to carry out edits |
| /clan invite | Sends an invite to another user (Must follow permission rules) |
| /clan accept |
Allows users to accept clan invitations |
| /clan reject |
Allows users to reject clan invitations |
| /clan revoke | Revokes an invite to another user (Must follow permission rules) |
| /clan promote | Promotes a clan member up a rank (Must follow permission rules) |
| /clan demote | Demotes a clan member down a rank (Must follow permission rules) |
| /clan leave | Allows clan members to leave the clan |
| /clan kick | Allows clan Founders to kick members of the clan |
| /clan disband |
Allows clan Founders to completely disband the clan |
| /clan info | Displays information of any clan on the Discord server |
| /fort |
Allows Clan Founders to create a clan in game |
Troubleshooting, Tools & Suggestions
Troubleshooting Common Issues
General Troubleshooting
From time to time there may be issues with your bot, as we push updates and the server providers change things, there may be times where you need to force a re-connection. Below are a few examples of how we can do this, it is also worth noting that these are in the order that we recommend you trying them;
Update Connection
We can generally do a "soft" reconnect by performing the update command, this is /gs update-gp, when performing this command please only select your server, nothing else and simply send the command. Allow 5 minutes and then check your feeds.
Disable & Re-Enable
A more direct and deliberate way of forcing a re-connection is by using the command /gs enable and then select "NO" to disconnect the server from the bot, allow 5 minutes for it to be completely disconnected, followed by the command /gs enable and then selecting "YES" to force a reconnect, again, please allow another 5 minutes for the bot to connect.
Check for G-Portal Issues
There have been times where the "Console" within the G-Portal webpage is blank, and remains blank following any direct interaction. To check this, please enter a command of any kind into the text box located below the console and hit send. If nothing responds, then we encourage you to please open a customer support ticket with G-Portal, let them know that your Console has stopped producing feeds and one of their amazing support team will assist! Please see below for how the console may look when in this state;
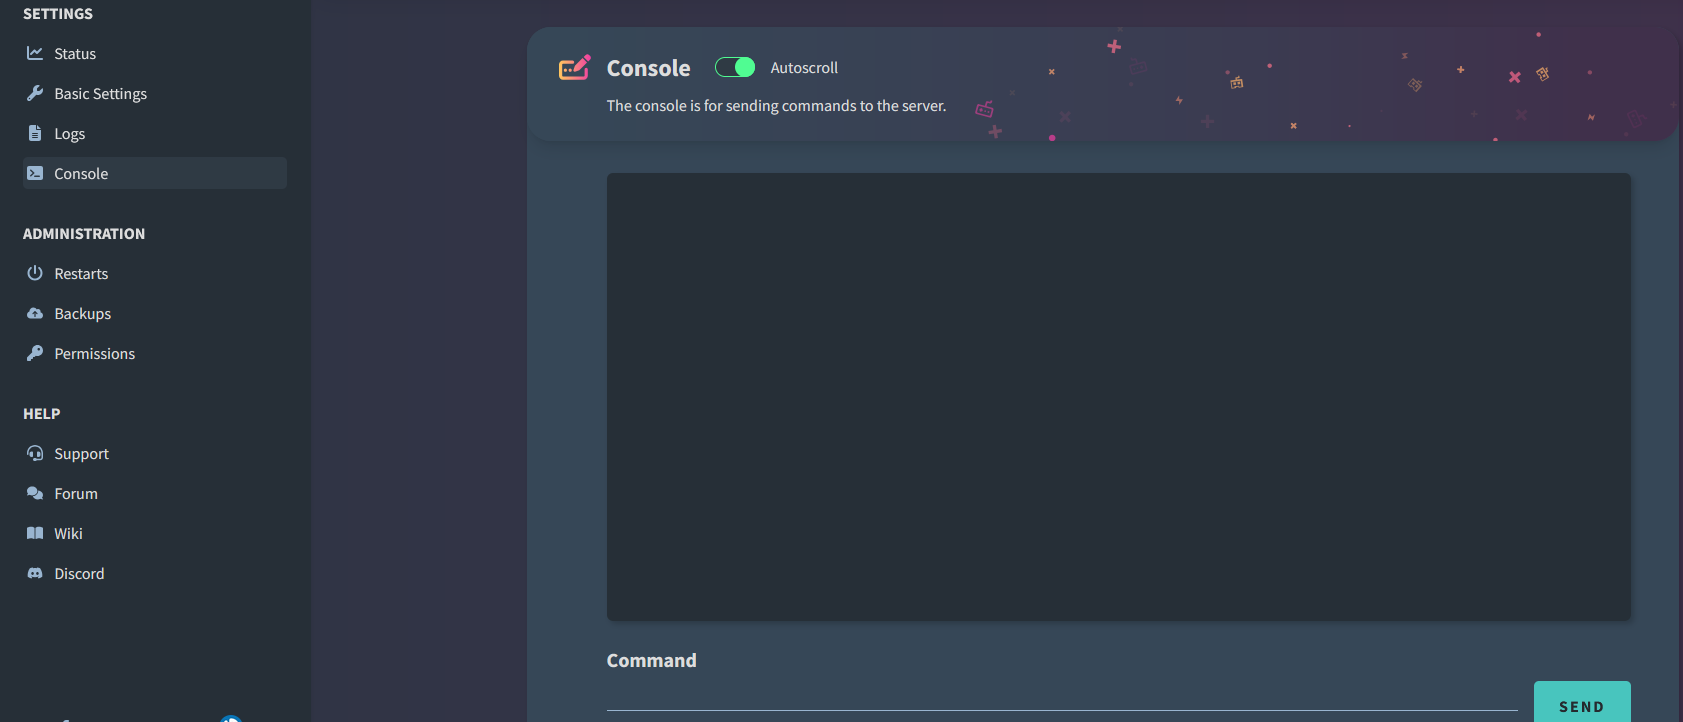
Restart your Gameserver
Sometimes it can be a connection issue that can only be resolved by restarting your gameserver, head over to your server providers webpage, select your gameserver and then click the "Restart" button. Allowing the server to completely restart, this generally can take anywhere upto 15mins, however it is worth noting that at peak times this can be longer. Once the server is back online, we also recommend using the /gs update-gp command again just to ensure all is well.
Re-Add Bot Permissions
A final way to try and force the connection is by re-adding the bot username within the server providers permissions. It is the same way in which you set the bot up. Head over to the server providers webpage, select your server and you should see a tab named "Permissions" by selecting this you will see you will already have the username of the bot, please remove this, save the edit and then re-add it. In case you need it the bot username is:
de91e108-fd4e-423a-acc3-7ab55926b90c
Open a Ticket with VereTech
If you have carried out all of the above and still have no joy then please join us on Discord and open a ticket using the Support Bot page where one of our staff will gladly assist you.
It would be beneficial, if you are able to, carry out the command /gs list and include a screenshot of this in your opening message in the ticket - This will allow us to locate your gameserver much quicker!
Other Troubleshooting
Disconnected Premium
If you find that your premium has prematurely disconnected then this may be for one of the following reasons;
- Your subscription has expired
- G-Portal have assigned you new hardware
- You have purchased a new gameserver to replace your old one and did not follow the transfer procedure
- You have moved Discords
To get this rectified you will need to get in touch with us via a support ticket in the Discord please again have a screenshot of /gs list ready along with the email address you used at time of purchase when subscribing to premium.
Killfeed wont Display after Editing
Because we allow custom killfeed text, there will be times when mistakes are made and more often than not we find that its with the placeholders, such errors can cause the killfeed to not recognize the placeholder and stop it from working completely, please ensure that all of your placeholders are correct.
The other reason we find is that you are using words that are filtered out by a profanity filter, these can be but not limited to:
Swearing
Racial Comments
Sexual Comments
Terrorism Comments
Hate Comments
All of the above when editing feeds can be check first using the global.say command within your server providers command console, followed by your custom text. Generally, if it doesn't show in screen, its been filtered or there is an error and you will need to revisit your wording.
Binds are NOT working
there are multiple reasons that we find emote wheel binds not working, it is very important that you strictly follow the format in which these are laid out in, ensuring the correct placeholders are in your commands and that you haven't "stacked" multiple binds as these will cause an error. Most notable issues are resolved by checking the following;
- Ensure you have used the correct symbols, " is a quotation mark and not a speech mark
- Ensure you have entered valid commands as mentioned in this documentation
- Ensure that you have used valid placeholders
- Ensure that the above troubleshooting has been completed
If after following this guide it still does not work then please do get in touch for support from our team!
GamerTags/PSN Names not showing in Killfeed
There have been some strange things we have seen in our amazing journey with Rust Console Edition Community Servers and some of the words in the profanity filters still amaze us to this day! we have seen an array of strange combinations of words/numbers that make no sense to filter, however, this does sometimes align with what some players have as their GamerTags/PSN names - To check this we recommend using the global.say command followed by the players name, if this doesn't show then it is likely that the name has one of these mysterious letter/number combos which is being filtered out.
Online Player Counter won't Update
Sometimes we find ourselves with our online player counters not updating, please as always, ensure that your console isn't blank and that your gameserver is connected to the bot - If the issue still persists then we need to look into the gameserver name on G-Portal, please see the example below;
```\t <color=#FF00FF> Classified 3x </color> <color=#00FF00>/ autokit / x-mas / quad / kits / fast / 45min heli / 15min brad / Tp / 5crate cargo</color>```
Notice that the name at the beginning includes a back slash "\", this is a character which the bot cannot decrypt due to the nature of coding, whilst forward slash "/" will be fine, it is likely that the back slash is causing an error in the online player counter, please remove it, hit save and restart your gameserver, once you have done this - The online player counter will resume as normal.
Reporting Bugs and making Suggestions
Entity
🔍 /entity Command – What’s That UUID All About?
Ever seen those long strings of letters and numbers in commands, fort data, clan IDs, or logs and thought:
“What even is this thing?”
Well, mystery solved — those are called UUIDs (Universally Unique Identifiers).
They’re how our system keeps track of players, clans, forts, and more behind the scenes.
🎯 What Does /entity Do?
The /entity command is your admin-side magnifying glass 🔍.
Just run /entity followed by a UUID, and we’ll tell you exactly what it belongs to.
🛠️ How to Use It

Example:
You’ll instantly get a breakdown showing whether that UUID is tied to:
-
🏰 A Fort
-
🧑🤝🧑 A Clan
-
👤 A Player
-
🔗 Or any other trackable entity in the system
⚡ Why Use It?
-
✅ Troubleshooting protection issues
-
✅ Investigating logs or tracking admin actions
-
✅ Clarifying ownership of forts or clans
🧠 Pro Tip:
UUIDs may look scary, but they’re your best friend for accurate tracking and control behind the curtain.
Next time you’re deep in server management and stumble across one of these digital fingerprints —
/entity it, and take the guesswork out of the game.
Placeholders
What is a Placeholder?
A place holder is a name, wrapped in curly braces {name}, which you place in commands, feeds and all sorts of places. When things run, like feeds and commands, we replace the placeholders with data that is available.
Some placeholders are only available in certain contexts, like a PvE feed has different placeholders available to Emote Binds.
You can apply some basic mathematics in placeholders, such as:entity.spawn rhib {PlayerPositionX - 10},{PlayerPositionY},{PlayerPositionZ}
This will spawn a rhib 10 meters west of the players current position.
- Subtraction
+ Addition
/ Divide
* Multiplication
The mathematics is available on all placeholders that are a whole or decimal number.
Placeholders List, available everywhere:
| Placeholders | Description | Example |
| {ServerInfoHostname} | Server name, as it appears in GPORTAL | VereTech Gaming | Test US 2x |
| {ServerInfoMaxPlayers} | Max players allowed on your gameserver | 100 |
| {ServerInfoPlayers} | Current number of players on your gameserver | 66 |
| {ServerInfoQueued} | Current number of players queued to join your gameserver | 2 |
| {ServerInfoJoining} | Current number of players loading into your gameserver | 10 |
| {ServerInfoEntityCount} | Number of entities on your gameserver | 120,000 |
| {ServerInfoGameTime} | Current time in-game | 6:00pm |
| {ServerInfoUptime} | How long your gameserverhas been up without a restart/wipe | 18 Hours, 40 minutes |
| {ServerInfoMap} | The type of map your gameserver is currently running | Procedural Map |
| {ServerInfoFramerate} | The last captured FPS of your gameserver | 60 |
| {ServerInfoMemory} | Current RAM usage? | 2 |
| {ServerInfoCollections} | Number of Memory garbage collections since restarted | 1600 |
| {ServerInfoNetworkIn} | N/A | 0 |
| {ServerInfoNetworkOut} | N/A | 0 |
| {ServerInfoRestarting} | N/A | False |
| {ServerInfoSaveCreatedTime} | When the server last map wiped | 6 days, 5 hours |
PvP Placeholders List
The below is a list of placeholders that are available to be used in PvP Feed Types.
|
Placeholders |
Description |
Example |
| {KillerPlayerName} | GamerTag or Discord Name of the killer. | private_wire |
| {KillerClanTag} |
Will Display the killers Clan Tag |
[VT1] |
| {KillerClanColour} |
Will insert the killers clan tag colour into feed text. |
65435 |
| {KillerClanTagWithColour} |
Will display the killers clan tag in its clan colour. |
[VT1] |
| {KillerPvEKills} | How many times the killer has killed a scientist. | 24 |
| {KillerPvEDeaths} | How many times the victim has died to a scientist. | 5 |
| {KillerPvEKD} | Killer's scientist K/D. | 4.8 |
| {KillerPvPKills} | How many times the killer has killed a player. | 24 |
| {KillerPvPDeaths} | How many times the killer has died to a player. | 5 |
| {KillerPvPKD} | Killer's K/D. | 4.8 |
| {KillerGameConsole} | The killer's console type. | Playstation |
| {KillerWallet} | How much is in the killer's wallet. | 100 |
| {KillerBank} | How much is in the killer's bank. | 566 |
| {KillerWalletBank} | How much is in the killers wallet and bank combined. |
666 |
| {VictimPlayerName} | GamerTag or Discord Name of the victim. | private_wire |
| {VictimClanTag} |
Will display the victims clan tag. |
[KHA] |
| {VictimClanColour} |
Will insert the victims clan tag colour into feed text. | 22657 |
| {VictimClanTagWithColour} |
Will display the victims clan tag with colour |
[KHA] |
| {VictimPvEKills} | How many times the victim has killed a scientist. | 5 |
| {VictimPvEDeaths} | How many times the victim has died to a scientist. | 24 |
| {VictimPvEKD} | Victim's scientist K/D. | 4.8 |
| {VictimPvPKills} | How many times the victim has killed a player. | 24 |
| {VictimPvPDeaths} | How many times the victim has died to a player. | 5 |
| {VictimPvPKD} | Victim's K/D. | 4.8 |
| {VictimGameConsole} | The victim's console type. | Xbox |
| {VictimWallet} | How much is in the victim's wallet. | 544 |
| {VictimBank} | How much is in the victim's bank. | 88 |
| {VictimWalletBank} | Will show how much is in the victims wallet and bank combined. |
725 |
| {Currency} | The Unit of Measurement for the currency. | Scrap |
PvE Placeholders List
The below is a list of placeholders that are available to be used in PvE Feed Types.
|
Placeholders |
Description |
Example |
|
{PlayerName} |
Displays Players Name |
private_wire |
|
{ClanTag} |
Displays clan tag |
[VT1] |
|
{ClanColour} |
Inserts the clan colour into text |
65435 |
|
{ClanTagWithColour} |
Displays the clan tag in colour |
[VT1] |
|
{GameConsole} |
PlayStation or Xbox |
Playstation |
|
{PvEKills} |
How many times they have killed a scientist. |
24 |
|
{PvEDeaths} |
How many times they have died to a scientist |
5 |
|
{PvEKD} |
Scientist K/D |
4.8 |
|
{PvPKills} |
How many times they have killed a player. |
24 |
|
{PvPDeaths} |
How many times they have died to a player |
5 |
|
{PvPKD} |
Player K/D |
4.8 |
|
{Reward} |
The reward amount |
200 |
|
{Stolen} |
The amount stolen |
24 |
|
{Wallet} |
How much is in the players Wallet |
0 |
|
{Bank} |
How much is in the players Bank |
1005 |
|
{WalletBank} |
Will display a total count of the players wallet and bank. |
12254 |
|
{Currency} |
The Unit of Measurement for the currency |
Scrap |
Placeholders available in Emote Binds
| Placeholders | Description | Example |
| {PlayerName} | The players name | private_wire |
| {GameConsole} | The Game Console the players is on | Xbox |
| {PlayerPositionX} | The players current position X vector (left to right) | -100 |
| {PlayerPositionY} | The players current position Y vector (top to bottom) | 66 |
| {PlayerPositionZ} | The players current position Z vector (ground to sky) | 200 |
| {"Name of Zone"X} | The Specified monuments centre position X vector | 1023 |
| {"Name of Zone"Y} | The Specified monuments centre position Y vector | 54 |
| {"Name of Zone"Z} | The Specified monuments centre position Z vector | 345 |
| {"Name of Zone"RandomX} | A random X vector for the specified monument. | 125 |
| {"Name of Zone"RandomY} | A random Y vector for the specified monument. | 432 |
| {"Name of Zone"RandomZ} | A random Z vector for the specified monument. | -120 |
| {"Name of Zone"RandomOuterX} | A Random X vector within 15m of the specified monuments outer edge | 123 |
| {"Name of Zone"RandomOuterY} | A Random Y vector within 15m of the specified monuments outer edge | 453 |
| {"Name of Zone"RandomOuterZ} | A Random Z vector within 15m of the specified monuments outer edge | 325 |
| {"Name of Zone"RandomInnerX} | A Random X vector within 15m of the specified monuments centre | 425 |
| {"Name of Zone"RandomInnerY} | A Random Y vector within 15m of the specified monuments centre | 234 |
| {"Name of Zone"RandomInnerZ} | A Random Z vector within 15m of the specified monuments centre | 324 |
Placeholders available in Emote Binds cooldown message
| Placeholders | Description | Example |
| {PlayerName} | The players name | private_wire |
| {GameConsole} | The Game Console the players is on | Xbox |
| {Cooldown} | The time left to wait before player can use bind again | 1 minute, 6 seconds |
Placeholders available in Fortify's Enter & Leave messages, for Teams:
| Placeholders | Description | Example |
| {FortName} | A sequential number, uniquely identifying the fort in a team | 1 |
| {FortPosition} | The position of a fort | (11,4,77) |
| {FortColour} | The html colour of the fort | #000000 |
| {FortId} | A Guid of the fort, it uniquely identifies the fort in the database. | 488219dc-049f-458f-a032-05eccede223f |
| {FortSize} | The current size of the fort | 10 |
| {PlayerName} | The team leader's player name | private_wire |
| {GameConsole} | The team leaders game console | Xbox |
| {TeamMembers} | A comma separated list of all members in the team | private_wire, xPercivil, KDunnHD |
| {Currency} | The discord economy currency | Scrap |
Placeholders available in Fortify's Enter & Leave messages, for Clans:
| Placeholders | Description | Example |
| {FortName} | The name of the fort entered when the clan created the fort | Hom |
| {FortPosition} | The position of a fort | (11,4,77) |
| {FortColour} | The html colour of the fort | #000000 |
| {FortId} | A Guid of the fort, it uniquely identifies the fort in the database. | 488219dc-049f-458f-a032-05eccede223f |
| {FortSize} | The current size of the fort | 10 |
| {PlayerName} | The clan's founder's player name | private_wire |
| {GameConsole} | The clan's founder's game console | Xbox |
| {TeamMembers} | A comma separated list of all members in the team | private_wire, xPercivil, KDunnHD |
| {Currency} | The discord economy currency | Scrap |
| {ClanTag} | The clans tag | VT1 |
| {ClanColour} | The clans designated colour in html | #000000 |
| {ClanTagWithColour} | The clans tag, formatted with their designated colour | <color=#000000>[VT1]</color> |
Placeholders available in Economy Command Group Products
| Placeholders | Description | Example |
| {PlayerPositionX} | The players current position X vector (left to right) | -1100 |
| {PlayerPositionY} | The players current position Y vector (top to bottom) | 60 |
| {PlayerPositionZ} | The players current position Z vector (ground to sky) | 6 |
| {PlayerName} | The players name | private_wire |
| {GameConsole} | The Game Console the players is on | Xbox |
| {Currency} | The discord economy currency | Scrap |
| {Wallet} | How much is in the players wallet | 0 |
| {Bank} | How much is in the players bank | 500 |
| {"Name of Zone"X} | The Specified monuments centre position X vector | 1023 |
| {"Name of Zone"Y} | The Specified monuments centre position Y vector | 54 |
| {"Name of Zone"Z} | The Specified monuments centre position Z vector | 345 |
| {"Name of Zone"RandomX} | A random X vector for the specified monument. | 125 |
| {"Name of Zone"RandomY} | A random Y vector for the specified monument. | 432 |
| {"Name of Zone"RandomZ} | A random Z vector for the specified monument. | -120 |
| {"Name of Zone"RandomOuterX} | A Random X vector within 15m of the specified monuments outer edge | 123 |
| {"Name of Zone"RandomOuterY} | A Random Y vector within 15m of the specified monuments outer edge | 453 |
| {"Name of Zone"RandomOuterZ} | A Random Z vector within 15m of the specified monuments outer edge | 325 |
| {"Name of Zone"RandomInnerX} | A Random X vector within 15m of the specified monuments centre | 425 |
| {"Name of Zone"RandomInnerY} | A Random Y vector within 15m of the specified monuments centre | 234 |
| {"Name of Zone"RandomInnerZ} | A Random Z vector within 15m of the specified monuments centre | 324 |