Emote Wheel Actions
Emote Wheel (Free Version)
Welcome to the free version of the "Emote Wheel" key binds. For the free version we have set it to be powered by the CMDs/CMD Groups - Please make sure that you have an adequate understanding of how to configure your CMDs and CMD Groups before starting your work on your "Emote Wheel". Should you need to review the documentation for them then please Click Here.
Emote Wheel Configuration (Binding)
To get started with your emote wheel binding, please ensure that you have your all the CMD Group names on which you want to bind to the Emote Wheel.
To get started we will need the command /bind add. You will now have a total of "7" options to choose from, "4"of which are mandatory. The options are as follows;
Mandatory -
gameserver: Please select the GameServer which you wish to create this bind for.
command-group: Please select the Command Group which you are going to be binding.
emote: This will be a selection for your emotes, you have 8 to choose from
channel: Because we have "Team", "Local" and "Server" selections in game when using the emotes, each one can be programmed for its own bind, giving you a total of "24" possible keybinds on the free version! If you don't want to select this option then choose the bind that will apply to "All"
Optional -
auth-group: You can select which group can claim the kit, leave blank for all or choose from one of the following; VIP, Moderator, Admin & Owner. (You cannot have more than one auth group per bind)
server-cooldown: How long the whole gameserver will have to wait between uses, as soon as one player redeems it, it is then unavailable to everyone until the cooldown has expired.
player-cooldown: How long each player must wait between each emote - If one player uses it, the cooldown only applies to that player.
cooldown-message: What to say when a player tries to use the emote with a cooldown still active. (Profanity filters will apply)
Require Discord-Role: You now have the option of requiring a user to have a discord role in order to be able to claim a bind. In order for this to work a player will need to be linked to their gamertag using /link and have the role in discord that you have set.

Once a successful bind has been configured you will receive a confirmation message with your binding information, Please see the example below;
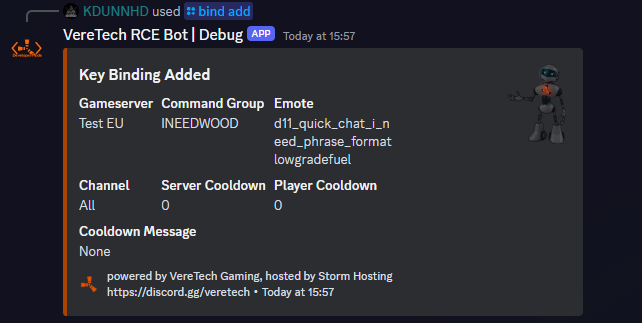
Now all your players will have to do is select the "Emote" from the "Emote Wheel" in-game, for delivery of that set bind. Please ensure that players know which chat channel it is bound to, "Team", "Local" or "Server" as this will effect delivery. As mentioned earlier, if you do not choose "channel" then the bind will apply to "All" so this issue will not apply.
Editing a Bind
Should you wish to edit your current binds, change of kit, change of cooldown, change of message - Whatever it may be... We have enabled an editing command for this. /bind edit will allow you to choose a bind to edit;
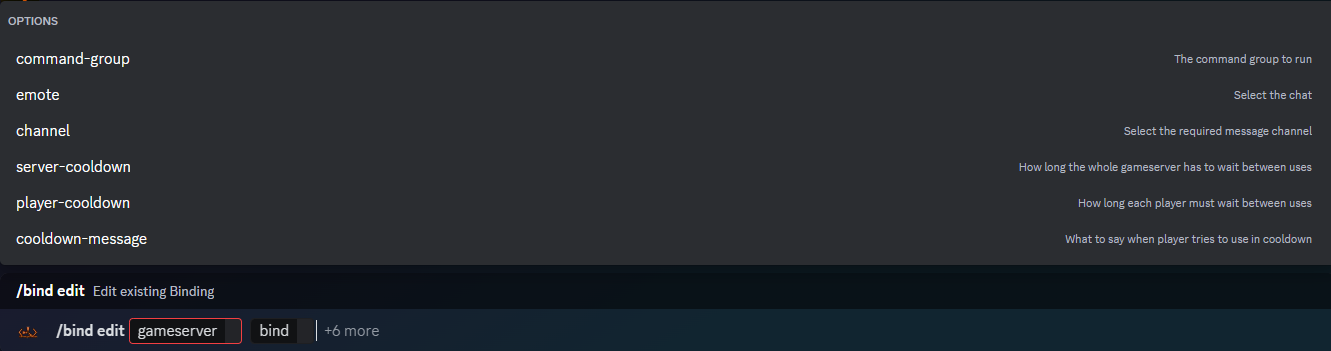
You will have "8" options, of which "2" are mandatory and "6" are optional these are;
Mandatory -
gameserver - Please select the GameServer you wish to change the keybind to.
bind - Please select the bind you wish to edit.
Optional -
command-group - Please select the Command Group you wish to change to
emote - Please select the emote you wish to change to
channel - Please select the chat channel you wish to change to
server-cooldown - Please select this option to change the server cooldown timer.
player-cooldown - Please select this option to change the player cooldown timer.
cooldown-message - Please select this option to change the cooldown message displayed on screen.
(THIS REQUIRE DISCORD ROLE OPTION IS PREMIUM ONLY)
Require Discord-Role: You now have the option of requiring a user to have a discord role in order to be able to claim a bind. In order for this to work a player will need to be linked to their gamertag using /link and have the role in discord that you have set.
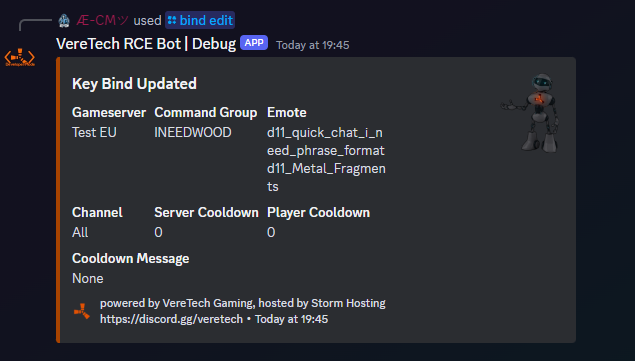
Upon successful edit you will be greeted with the following message;
Listing your Current Binds
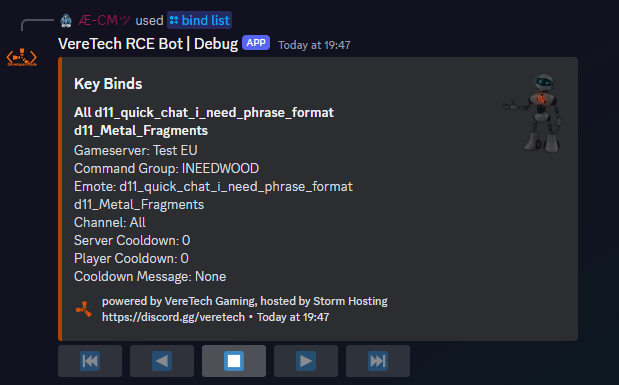
Should you need to see all of your binds as a collective, you can do this on a per embed page bases, simple use the command /bind list and select your game server. Upon sending this command you will be greeted with all of your "Emote Wheel" binds for that server.
Please Note: Because of character limits on embeds, these key binds are shown on pages.
Deleting a Bind
Should you wish to "Delete" your bind then we can do that also! Using the command /bind delete we can delete your chosen bind. Simply select the gameserver you wish to remove a bind from, and then select the bind. Please see the example below;

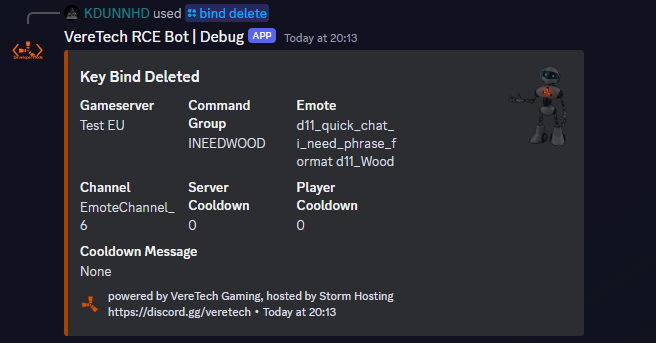
Upon successful deletion you will receive a message of confirmation from the bot for its deletion. Shown below;
Placeholders for Use with Binds ONLY
| To display Players Name |
GamerTag/PSN |
private_wire |
{PlayerName} |
| To display Players Console |
Which Console |
XBOX |
{GameConsole} |
| To display cooldown as (DD:HH:MM:SS) |
Cooldown Timer |
1 Day, 12 Hours, 30 Minutes, 43 Seconds |
{Cooldown} |
Steps to Bind A Kit
- Create a command group using /cmd group-add. Name it anything you want, I normally use INEEDSTONE kitname servername.
- Create the command using /cmd add, for the kit use position 0 Note you will need to replace the word kitname with the kit you have created on gportal. You will then input the command below into the command: box
kit givetoplayer "kitname" "{PlayerName}" - If you want it to announce when a player receives a kit use /cmd add select position one and add the following, note you can customise the text to what you want
4. Use /bind add as explained aboveglobal.say {PlayerName} received a starterkit
Steps to Bind A Teleport
- Create a command group using /cmd group-add.
- Create the command using /cmd add, for the teleport use position 0 Note you will need to replace the word (x,y,z) with your xyz you want them to teleport to. You will then input the command below into the command: box
global.teleportpos (x,y,z) "{PlayerName}" - If you want it to announce when a player receives a kit use /cmd add select position one and add the following, note you can customise the text to what you want
4. Use /bind add as explained aboveglobal.say {PlayerName} teleported to outpost
Steps to Teleport and give a kit
- Follow the steps above but place the cmds in the same command group. Use position 0 for the kit followed by position 1 for the teleport. If you want to announce it use position 3 and add the full message once.
Emote Entity & Vehicle Spawning
Emote Wheel Binds let players trigger commands, spawns, or actions directly from their emote wheel in Rust Console Edition.
This feature can be used to spawn entities/vehicles on a player.
🔑 Key Concepts
-
Command Groups → A collection of commands. Every command in a group fires when the bind is used.
-
Emotes → The in-game Rust console emotes. E.G (I need wood)
-
Channels → The in-game chat mode: Team, Local, Server. Each emote can be bound separately per channel.
-
Placeholders → Variables that insert a live information into a command.
-
Cooldowns → Timers to prevent spam use (per-player or global) in seconds.
-
Auth & Discord Roles → Restrict access to specific groups or linked Discord roles.
1️⃣ Step 1: Create a Command Group
Before you can create a bind, you need a command group with at least one command.
A command group is a group of commands that will be ran in the order specified by you 1 second apart. When a command group is triggered every command in that command group will run.
2️⃣ Step 2: Add Your command to the command group
/cmd add has 4 mandatory fields:
-
Name – your friendly handle for the command
-
Command Group – the group you just created
-
Position – the order this command appears within the group (1, 2, 3, …)
-
Command – the actual server command to run
For player-targeted spawns we’ll use position placeholders:
-
{PlayerPositionX} -
{PlayerPositionY} -
{PlayerPositionZ}
These placeholders are maths-aware, so you can offset spawns (e.g., X+10).
Command layout
Example: Spawn a HORSE command
Example: Spawn a locked crate command
Example: Spawn a Scrap Heli (away from the player) command (10m North)
Example: Spawn a RHIB command (10m South)
3️⃣ Link the command group to a bind
To get started we will need the command /bind add.
Mandatory -
gameserver: Please select the GameServer which you wish to create this bind for.
command-group: Please select the Command Group which you are going to be binding.
emote: This will be a selection for your emotes, you have 8 to choose from
channel: Because we have "Team", "Local" and "Server" selections in game when using the emotes, each one can be programmed for its own bind, giving you a total of "24" possible keybinds on the free version! If you don't want to select this option then choose the bind that will apply to "All"
Optional -
auth-group: You can select which group can claim the kit, leave blank for all or choose from one of the following; VIP, Moderator, Admin & Owner. (You cannot have more than one auth group per bind)
server-cooldown: How long the whole gameserver will have to wait between uses, as soon as one player redeems it, it is then unavailable to everyone until the cooldown has expired.
player-cooldown: How long each player must wait between each emote - If one player uses it, the cooldown only applies to that player.
cooldown-message: What to say when a player tries to use the emote with a cooldown still active. (Profanity filters will apply)
Require Discord-Role: You now have the option of requiring a user to have a discord role in order to be able to claim a bind. In order for this to work a player will need to be linked to their gamertag using /link and have the role in discord that you have set. (THIS FEATURE IS PREMIUM ONLY)
Emote Monument Teleports
Emote Wheel Binds let players trigger teleports to monuments in Rust Console Edition—no manual coordinate updates after wipes.
This feature uses Monument Position Placeholders so your TP spots stay current automatically.
---
🔑 Key Concepts
- Monument Placeholders → Drop players at a monument’s center or a random point (inner/outer rings).
- Emotes → In-game Rust console emotes (e.g., “I need wood”) that can trigger your TP.
- Channels → Team / Local / Server emote channels; bind per channel for up to 24 binds (free tier).
- Placeholders → Variables that insert **live**, auto-updated monument coordinates.
- Cooldowns → Per-player or global timers (in seconds) to prevent spam.
- Auth & Discord Roles → Restrict TP to specific in-game groups or **linked** Discord roles.
---
1️⃣ Step 1: Update Monument Positions
Before using monument placeholders, fetch/update them from your server:
1. Run `/settings fort`
2. Click Update Monument Positions
3. Wait (this can take a while ⏳)
4. You’ll be presented with a list of **monument names** (e.g., `Outpost`, `Airfield`, `Launchsite`)
Use the names exactly as shown when building your commands.
---
2️⃣ Step 2: Create a Command Group
Create a group to hold your commands (they run in order, 1 second apart):
/cmd group-add name:"Monument TP"
A Command Group is a collection of commands that all execute when the bind is used.
3️⃣ Step 3: Add Your Teleport Command to the Group
/cmd add has 4 mandatory fields:
Name – friendly label for the command
Command Group – the group you just created
Position – execution order within the group (1, 2, 3, …)
Command – the actual server command to run
Monument Placeholder Formats (example monument: Outpost)
Center (fixed spot):
{OutpostX}, {OutpostY}, {OutpostZ}Random (anywhere inside):
{OutpostRandomX}, {OutpostRandomY}, {OutpostRandomZ}Random Outer Ring (~15m from edge):
{OutpostRandomOuterX}, {OutpostRandomOuterY}, {OutpostRandomOuterZ}Random Inner Ring (~15m around center):
{OutpostRandomInnerX}, {OutpostRandomInnerY}, {OutpostRandomInnerZ}Replace Outpost with any monument name from your updated list.
Command Layout
global.teleportposrot ({<MonumentVariantX>},{<MonumentVariantY>},{<MonumentVariantZ>}) "{PlayerName}" "1"The trailing "1" snaps the player on top of terrain/structures, not inside them.
Examples (Command Group: Monument TP)
Example 1 – Teleport to Outpost Center (same spot every time)
/cmd add
Name: TP Outpost Center
Command group: Monument TP
Position: 1
Command: global.teleportposrot ({OutpostX},{OutpostY},{OutpostZ}) "{PlayerName}" "1"
Example 2 – Teleport to Random Position anywhere in Outpost
/cmd add
Name: TP Outpost Random
Command group: Monument TP
Position: 2
Command: global.teleportposrot ({OutpostRandomX},{OutpostRandomY},{OutpostRandomZ}) "{PlayerName}" "1"
Example 3 – Teleport to Random Outer Ring (~15m) of Outpost
/cmd add
Name: TP Outpost Outer
Command group: Monument TP
Position: 3
Command: global.teleportposrot ({OutpostRandomOuterX},{OutpostRandomOuterY},{OutpostRandomOuterZ}) "{PlayerName}" "1"
Example 4 – Teleport to Random Inner Ring (~15m) of Outpost
/cmd add
Name: TP Outpost Inner
Command group: Monument TP
Position: 4
Command: global.teleportposrot ({OutpostRandomInnerX},{OutpostRandomInnerY},{OutpostRandomInnerZ}) "{PlayerName}" "1"
4️⃣ Step 4: Link the Command Group to an Emote Bind
Use /bind add to make the teleport accessible via the emote wheel.
Mandatory
gameserver → Pick the GameServer this bind belongs to.
command-group → Select your group (e.g., Monument TP).
emote → Choose from the 8 emotes.
channel → Target Team, Local, Server, or All (binds are per channel; up to 24 total on free tier).
Optional
auth-group → Restrict who can use it; choose VIP, Moderator, Admin, or Owner (only one).
server-cooldown → Global cooldown for everyone after any use.
player-cooldown → Per-player cooldown only for the user who triggered it.
cooldown-message → Custom message when a cooldown blocks use (profanity filters apply).
Require Discord-Role → Gate usage behind a Discord role on a linked account (/link). (Premium only)
Example:
/bind add
gameserver:"MyServer01"
command-group:"Monument TP"
emote:"I need wood"
channel:"Team"
player-cooldown:"120"
cooldown-message:{PlayerName} Chill! Try again in {Cooldown}.
🔄 Auto-Update Behavior
Monument positions auto-refresh each wipe.
If they didn’t update re-run /settings fort → Update Monument Positions.
✅ Tips
- Use separate command groups (e.g., Monument TP – Outpost, Monument TP – Airfield) to keep your binds organized.
- Combine with auth/roles and cooldowns for fair access during busy events.
- For public TPs, prefer Random / Inner variants to reduce player stacking.